-
Another April 1st… Best and Worst
The small company I work for, posted an April 1st joke with several orders of magnitude more convincing than than companies with hundreds to tens of thousands more employees. April 1st seems to bring out worst in corporate jokes: Chrome reaction Selfies, Unleashed “Dog On A Stick” selfies, Honda’s Safety Selfie Cam, ThinkGeek’s Do It YourSelfie 360 Motorola Selfie Stick…
Worst
Achieving worst April 1st joke takes more effort than the best, since most are orders of terrible. With all the competition, this years goes to NTNews for APRIL FOOLS JOKE: Four-wheel-drives will be banned from all Territory roads from next year.

Yes, the title is in all caps proceeding the article shows so much absolute disdain for the buttfuckery that constitutes April 1st, that one wonders why bother? Unlike other no-votes-of-confidence, this gets special merit for its absolutely zero-commitment. No matter what was written, the punchline was spoiled before the user makes beyond the first three words. APRIL 1ST HA HA! GET IT?
Best
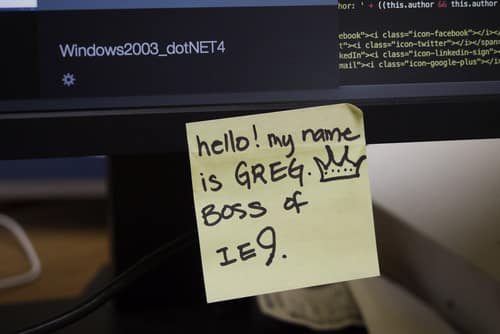
The best easily goes to A random tweet, by someone named Joe Heenan.

-
Yosemite OS X 10.10.2 Wireless Woes
Prior to writing this, my experience with Yosemite has been mostly positive other than the egregious usage of Helvetica, which was easily remedied.
However, on my work MacBook Pro Retina early 2013 (15 incher/i7) has been borked since my update recently to 10.10.2. My wifi speeds dropped abysmally, with transfers topping out at 21k a second, usually much lower.
After trying a boat load of voodoo tricks, such as deleting plists and saw a reddit post recommending killing discoveryd (not the best idea), and I still may yet try reinstalling mDNSResponder. That said, here’s the fix.
The quick fix
However so far there is a fix, and anyone who remembers OS 7 through OS 9 will remember the magic of Zapping the PRAM and its miracle working to make bad SCSI chain start magically working.
- Shutdown or reboot your Mac
- Hold Option, Command (⌘), P, and R and power up the Mac (or hold while rebooting), this has to be done before the white screen appears.
- Hold until you hear the boot chime for a second time.
Notably, the problem may creep back and you’ll have to do this again. I managed to last a week before I had to rezap the PRAM. This hopefully will get you by until Apple manages to fix its networking woes.
A little history…
So what is the PRAM? Back in the “classic days” of OS 7, OS 8 and OS 9, Mac OS stashed important OS settings in the first meg or so of memory, referred to as the Parameter RAM. In early Macs, these settings were stored by battery by battery so they were not lost when powered down.
Later Macs switched to NVRAM (non-volatile RAM), which is the same concept as PRAM, settings that are stored by battery (Screen resolution, network ports available, Speaker volume, startup disk selection, Recent kernel panic information, if any) outside of the computer’s disk storage. The term PRAM carries over as legacy as well as the key commands. The term PRAM is still used interchangeably even if not technically correct.
/Edit: 5/30/14:
OS X 10.10.4 reverted back to mDNSresponder. Goodbye discoveryd, upgrading to 10.10.4 should solve any major networking issues with Bonjour and OS X.
-
-
Chrome just keeps crashing… (and a bandaid fix)
I’m not sure if it’s OS X Yosemite 10.10.2 but I’m getting a little sick of this:

I noticed Chrome Canary seems to be a little less crash happy and it supports HTTP/2. Still Chrome as a whole has been much crashier FireFox and Safari as of late.
So if you’re being punished with “Aw, Snap!
Something went wrong while displaying this webpage. To continue, reload or go to another page.” Try out Chrome Canary, I’m seeing a drastic reduction, which leads me to believe Google has a fix in the pipeline.
-
-
A Front Ender’s Guide to Getting Started on Mobile Web Development Using Simulators/Emulators
It’s a bit of a misnomer even to differentiate mobile web development from web development in 2015. It’s old news, everyone has a smartphone, and people increasingly use it as their primary way of using the web. Since the bulk of development is done on desktops and will be so for the foreseeable future, as developers, we’re left to pick up the task of testing our websites many configurations. Fortunately, with simulators/emulators, these can be tested with very close precision for the major platforms without investing in the hardware. Once properly configured, these virtual devices are always just a few clicks away.
Both Android and iOS can be simulated on OS X relatively hassle-free. Windows Phone on has more stringent requirements that make it more difficult and cannot be run on older hardware, even when Windows is the native operating system.
I’ve assembled several blog posts I’ve written into a singular guide that’ll get anyone up and running for simulators the three major platforms.
iOS
Tools Needed: OS X, Xcode (Virtual Machine Software for Windows, Linux)
How To Get Started: Using the iOS Simulator in Xcode 6 for web development
Android:
Tools Needed: GenyMotion
How To Get Started: A better Android Simulator for Web Development: GenyMotion
Note: You can use GenyMotion with Google Play to download other popular browsers
Windows Phone:
Tools Needed: Windows 8.1, Visual Studio Express, (Virtual Machine Software for OS X, Linux)
How To Get Started: Setting up Windows Mobile 8.1 for Front End Development
-
Amazingly Bad Developer Job Posting


Earlier today, a blog post entitled, “How not to advertise in London…” began making the rounds on Hacker News. I have a feeling that eventually the linked job posting will be pulled from Google Drive so I’ve taken the liberty of screen capturing it for your viewing pleasure. The tweets have already been deleted so its unlikely the job posting will stay.
All credit goes to http://programmingisterrible.com/ for this find.
Where to even begin?
There’s too many questionable requests: Age, implied sex (Dude can be used for women but its unlikely in this circumstance), 20+ years of programming for someone in their 30s, implying hours well beyond the UK and US’s regular work week, requiring ALL past portfolios, access applicant’s social media, required “hackathons”, impossible career goals (Change the world?) and the simply bizarre like wearing headphones.
This job post reads more like satire as it encompasses everything wrong in the tech industry: Ageism, implicit sexism, long work weeks, unabated and unwarranted self importance.
The best programmers I know are 40+, though reading this posting, I imagine though in Career Harbour, anyone above 30 would be a babysitter.
-
Resolving Adobe After Effects “Quicktime is not installed on this system, some components will not work correctly”

Its been a long time since I’ve used After Effects so imagine the fun when I started to dig in that it wasn’t functioning properly. After a bit of sleuthing on the Adobe forums, a user discover that the problem can be traced to the preferences which isn’t entirely necessary but set me on the right track.
The short of it, really old versions of After Effects may have left some residue that’s mucking up your new install.

First, go to Users/yourusername/Library/Preferences/Adobe (note you may need to enable your Library folder)
Remove any folders by the name of “Adobe QT32 Server”, “Color”, “dynamiclinkmanger” and “dynamiclinkmediaserver”.
Relaunch After Effects.
If you’re experiencing “Cannot create XXXXX.xml”, you may need to right click your Adobe folder in preferences in /yourusername/Library/Preferences/ and change the user permissions (Apply all to closing) to allow Read/Write to the Administrators group and your user name.
-
Amazingly Bad Developer Job Posting
Earlier today, a blog post entitled, “How not to advertise in London…” began making the rounds on Hacker News. I have a feeling that eventually the linked job posting will be pulled from Google Drive so I’ve taken the liberty of screen capturing it for your viewing pleasure. The tweets have already been deleted so its unlikely the job posting will stay.
All credit goes to http://programmingisterrible.com/ for this find.
Where to even begin?
There’s too many questionable requests: Age, implied sex (Dude can be used for women but its unlikely in this circumstance), 20+ years of programming for someone in their 30s, implying hours well beyond the UK and US’s regular work week, requiring ALL past portfolios, access applicant’s social media, required “hackathons”, impossible career goals (Change the world?) and the simply bizarre like wearing headphones.
This job post reads more like satire as it encompasses everything wrong in the tech industry: Ageism, implicit sexism, long work weeks, unabated and unwarranted self importance.
The best programmers I know are 40+, though reading this posting, I imagine though in Career Harbour, anyone above 30 would be a babysitter.
-
Neven Mrgan on Why Skeuomorphism Is Like a Classic Car
Design guru, Neven Mrgan, of Panic Studios and several apps (Blackbar, The Incident, Space Age, Glyphboard, Salt & Fat) with an introspective look at Skeuomorphism.
-
A Front-End Developer’s Guide To Reading Job Postings
Spring has come early in the Northwest, and so has a flood of annoying recruiters. Recruiters aren’t the best for anyone looking for a career, so I’ve taken the liberty of breaking down the phrases I’ve found in some of the job postings. Without further ado, I present a front end developer’s guide to reading job postings!
“Work hard, play hard"
Translation: Workaholic culture is the norm, we’re chained to our desks and when/if set free, we drink ourselves silly to forget the fact we’re over-worked and underpaid.
"Work life integration"
Translation: We have no respect for work/life separation. Expect to work 65 hours a week and a divorce/break up or to remain single. You’re better off serving Lattes for a living.
"Rockstar”
Translation: We have unreasonable expectations in your abilities.
“True Startup”
Translation: Expect mismanagement.
“Excellent benefits”
Translation: Average benefits.
“Highly competitive benefits package”
Translation: Has 401k.
“highly skilled” / “problem solver”
Translation: Personal capable of working unsupervised.
“strong experience”
Translation: Actually did this at your last job.
“motivated”
Translation: Shows up on time to work/meetings.
“Full Stack”
Translation: Unrealistic qualifications at not enough salary.
“kick-ass team”
Translation: Our team, but we think it sounds cooler.
“reinventing”
Translation: Incrementally improving.
“Lean”
Translation: Understaffed.
“gig”
Translation: Job, but we think it sounds cooler.
“fast-paced”
Translation: Dead line oriented.
“world-class”
Translation: Unlikely.
“Quickly build prototypes”
Translation: Use CSS frameworks.
“Work directly”
Translation: Open office floor plan.
“mobile optimization”
Translation: Probably isn’t using resolution independent images yet but would like to.
“UX design principles”
Translation: Not really a UX job.
“highly interactive”
Translation: We miss Flash.
“client-facing”
Translation: Expect phone support with our clients
“responsive design”
Translation: Web design, post 2010.
“Java”
Translation: Not really a front end job.
“disruptive”
Translation: Business as usual.
“end-of-year holiday party”
Translation: Mandatory.
“social web”
Translation: The part where people spam each other things.
“key stakeholders”
Translation: The people who have the money.
“native JavaScript”
Translation: Without JQuery.
“ES6”
Translation: See native javascript.
“learning by doing"
Translation: Shiny new libraries are preferred.
"Scala”
Translation: More than a front end job.
“Ember, Angular, Require"
Translation: 1 in 3 chance of your preferred library.
"Sass, Less, Stylus”
Translation: 1 in 3 chance of your preferred precompiled language.
“location-based”
Translation: Probably PhoneGap.
“HTML5 and CSS3”
Translation: You have “CanIuse” bookmarked.
“Demonstrated Ability…”
Translation: Will be in your job interview.
“wide range of support”
Translation: Usual attention to edge cases
“Semantic HTML” / “DHTML”
Translation: Sounds better than HTML.
“Strong understanding ”
Translation: You have “StackOverflow” bookmarked.
“revolutionizing” / “revolutionary”
Translation: Less than 5 years old.
“insanely driven”
Translation: Reads e-mail before meetings.
“stock options”
Translation: Non-redeemable compensation.
“best practices”
Translation: The design pattern/methodology that the supervising Project Manager read about.
“hackathon”
Translation: A 14-18 hour work day.
“Ping pong table”
Translation: Something you probably won’t use.
“unlimited vacation”
Translation: No Vacation.
"mandatory vacation”
Translation: Good idea.
“profitable"
Translation: We have a business plan.
"stealth mode”
Translation: We do not have a shipping product.
“SEO”
Translation: 2008 Mindset.
“design-minded”
Translation: Photoshop and Illustrator proficient.
“cross-browser”
Translation: Expect to support Internet Explorer 8.
“cross-platform”
Translation: Expect to support Windows Mobile 8.
“Internet of Things”
Translation: Job description was written by HR
-
Opera Blog vs Typography on the Web
Note to self: Start reading Opera’s Blog regularly. Two blog posts later, and I’ve attained enlightenment.
Check the excerpts.
Not all browsers hide text while downloading web fonts. For example Internet Explorer always renders text in a fallback font while it is downloading fonts. This has been dubbed the Flash Of Unstyled Text (FOUT). This misnomer. FOUT is a feature and a condition everyone should anticipate and design for. Selecting and testing fallback fonts is an important task while designing and building a site. - The State of Web Type, Dev.Opera
What happens when you slap a fancy new
@font-facecustom web font into your CSS? As it turns out—not much. Just including a@font-faceblock doesn’t actually initiate a download of the remote font file from the server in almost all browsers (except IE8). - Better @font-face with Font Load Events, Dev.OperaThe second article gets crazy quick, using JS to management fallback fonts for newer browsers. Some seriously awesome stuff….
-
Setting up Windows Mobile 8.1 for Front End Development
Running Windows 8.1 emulator on a Mac is a huge pain in the ass.

Requirements:
A core i-series Mac. Windows Mobile Emulator requires VT-X/EPT, which isn’t found on the Core 2 series or Xeons of that era. If you’re running this on a Hackintosh, you may need to enable VT-x/EPT in the Bios. EPT allows for nested VMs, a VM within a VM.
Windows 8.1 64 bit. Notably the VMs found on Modern.ie are 32 Bit and will not work.
VMware or preferably Parallels. VMware has a tendency to lock up on my MacBook Pro Retina when trying to run the Windows Phone Emulator.
Note: It is possible to enable VT-X-EPT on Virtualbox, VirtualBox users will want to check out the following for details.
Step 1: Setup and install
You’ll need to install Windows from your source: thumb-drive / DVD / ISO. Be sure to give your VM enough ram and be sure to enable “Nested Emulation” in Parallels or VT-x/EBt under Advanced in VMware Fusion.

Pictured: VMware Fusion

Pictured: Parallels
Step 2: Installing Visual Studio Express
There’s multiple version of Visual Studio, Express is free, provides all the support you’ll need. You can get VS Express here.
VS Studio Express is a minimum of roughly 10GB download so it’ll take some time. Be sure to Install the Windows 8 Phone SDK. If you do not, or already have VS Express installed, you can get it here.

Pictured: Be prepared to wait after running the VB Express installer.
Step 3: Running Windows 8.1 Mobile
Go to Tools -> Windows Phone 8.1 -> Developer Power Tools.

And then select a Device and click connect. If you do not see any devices, you may need to install the Windows 8.1 phone emulators.
You should see the Windows 8.1 Phone pop up, it can take a few minutes to load so be patient.

Troubleshooting:
While it seems simple in retrospect, I had a bunch of problems getting the Windows Mobile SDK to work which was amplified by the fact restarting meant downloading a new VM or copying an existing VMing and reinstalling Visual Studio Express.
I discovered that the modern.ie installs will not run the Windows Mobile Simulator. VMware failed to report that VS Express needed 64 bit, and gave me a very unhelpful error:

“The virtual machine management service failed to start the virtual machine ‘Emulator 8.1 U1 WVGA 512.ieuser’ because one of the Hyper-V components is not running (Virtual Machine ID: 00B303EC-5432-9116-D4E75CCC4546).”
Parallels gave me the much more helpful error with the same configuration.

The only remedy is to reinstall Windows 8.1 with a 64 bit install, which required “sourcing” a 64 Bit VM. It’s frustrating as MS throws web developers a bone to support Internet Exploder by bundling up VMs for Parallels, Virtualbox and VMware Fusion for free at Modern.ie but makes it impossible to use them for Windows Mobile.
If any MS employees are reading this, thanks to the Modern.ie team, but there’s still legwork to be done for Windows Mobile.
-
The wrong yardstick… (mobile IE11 still needs help)
The break meant bringing up a new Web rendering engine, free from 20 years of Internet Explorer legacy, which has real-world interoperability with other modern browsers as its primary focus – and thus our rallying cry for Windows 10 became “the Web just works.” This pragmatic viewpoint, which was initially proven out by our work in Windows Phone 8.1 Update, meant that Web standards would continue to be important but should function in the background to drive real-world interoperability between browsers. - A break from the past: the birth of Microsoft’s new web rendering engine, blogs.msdn.com
I’m always rooting for IE to get better as Internet Exploder edge cases define my job. That said, using Windows Phone 8.1 as your yardstick?
- Windows Phone 8 and 8.1 both have some strange behavior regarding hover states. MS tries to spin this as building websites correctly, when Android and iOS browsers have no issues. Correct or not, MS doesn’t have the marketshare to define “correct” anymore.
- Windows Mobile 8.1 has some fixed positioning issues that Windows Mobile 8 did not.
- Windows Mobile doesn’t have Inspect Element. We’re in 2015. iOS has had it for years, Mobile chrome has had it two or three years. IE requires javascript injection for 3rd-party, less functional, inspect element tools.
- Windows Mobile 8.1 requires EBT to simulate. iOS, Android, Windows (desktop) do not. This means the few Core 2/Core Quad windows boxes in the office cannot simulate it, and must be run inside one of our MacBook Pros as a Simulator within a VM, meaning double overhead.
- Getting the simulator requires downloading the entire 15 GB VS Express library. Xcode requires roughly 4GB all said and done to run the iOS simulator. Android with GenyMotion is roughly 2-3GB. Both allow for inspect element.
- Native devices can be connected for development: Plug in your iPhone or Android phone into your Mac and you’re ready to do front end development in real time. Windows Mobile? You can plug away, but VS Express won’t assist you for front end web development.
These are just my complaints I have at the tip of my tongue. IE11 for the desktop certainly a welcomed change and the IE team seems dedicated to forward motion. Modern.ie is a great start but If MS wants the Web to just work, they need to throw the bone to the front end developers / ux developers to make it possible for them to develop a web that just works.
- Windows Phone 8 and 8.1 both have some strange behavior regarding hover states. MS tries to spin this as building websites correctly, when Android and iOS browsers have no issues. Correct or not, MS doesn’t have the marketshare to define “correct” anymore.
-
Installing PhantomCSS from scratch on OS X, an adventure in CSS Visual Regression Testing
I wrote not long about the virtues of CSS visual regression testing. There’s a small problem: getting it set up.
PhantomCSS is incredibly powerful, but an incredible pain the ass. I had the chance to install PhantomCSS on my desktop from scratch, and thus this time I documented my adventure. It took me several hours to get this up and working on my development computer. The only assumptions I’ll make is that you have Xcode installed and are using OS X. *Nix users will be able to follow along and my apologies to Windows users. Users may be at all walks of skill so I’ll try to keep this as humanly sane as possible despite jamming in a bunch of terminal commands. PhantomCSS requires pieces of software to work (and several more to install these):
- PhantomJS (a headless webkit web browser)
- CasperJS (a navigation scripting & testing utility that interacts with headless web browsers)
- ImageMajack (a CLI batch image processor that makes Visual Regression Testing possible)
Let’s begin, shall we?
Terminal Commands
- Check to see if node is installed:
node -v
If you do not have Node installed, you can grab it Here.
Node is an open source cross-platform runtime enviroment for fullstack js development, but contains built-in libraries to act as a web server without software like Apache or IIS, and used commonly to distribute packages. - Check to see if you have bower installed
bower --version
If you do not have Bower installed,npm install -g bower
Bower is a package manager for popular web libraries, allowing for quick distribution of code. - Install Xcode developer utilities:
xcode-select --install
This is required to install Ruby, and even if you have installed Xcode, will still need to be run. Skip if you have already installed it. - Install Homebrew, a package manager for OS X, skip if you have already installed it:
ruby -e "$(curl -fsSL https://raw.githubusercontent.com/Homebrew/install/master/install)" - Make sure Brew is up-to-date:
brew update - Make sure Brew packages are upgraded
brew upgrade - Install ImageMagick
brew install imagemagick - Install CasperJS
sudo npm install -g casperjs - Install PhantomCSS
sudo npm install phantomcss - Casper bundles the wrong version of PhantomJS, uninstall it.
brew uninstall phantomjs - Install a compatible version of PhantomJS
brew install homebrew/versions/phantomjs192
Note: this will install version 1.9.2, you can manually install 1.9.8 by visiting PhantomJS’s downloads section, downloading 1.9.8, unzipping it and moving the phantomjs to /usr/local/Cellar/ - Install Resemble.JS
sudo npm install resemblejs
Testing to make sure it is installed correct
In your terminal, go to your desired directory and run
bower install phantomcssNext test to make sure it works by running the default test from this same directory.
run casperjs test bower_components/phantomcss/demo/testsuite.js
You should see three or so failed tests as the testfile isn’t entirely configured correctly but followed by “Must be your first time?” Success!Troubleshooting
Problem: npm ERR! Error: EACCES, open ‘somefile path’
Fix: You didn’t run a npm install as sudo, re-run the npm install as sudo npm install
Problem: Fatal: [Errno 2] No such file or directory; did you install phantomjs?
Fix: brew install homebrew/versions/phantomjs192
Problem: CasperJS needs PhantomJS v1.x
Fix:Casper, the library that talks to PhantomJS only works with PhantomJS 1.x, you have currently installed PhantomJS 2.0. Run brew uninstall phantomjs and brew install homebrew/versions/phantomjs192
Problem: FAIL [PhantomCSS] Resemble.js not found: ./node_modules/resemblejs/resemble.js
Fix:You need to install resemblejs, sudo npm install resemblejs