Installing Provenance (OpenEmu) on iOS 11 without a jailbreak

Following up yesterday's post on how to install PPSSPP, I decided to add the instructions for how to install Provenance on iOS 11 without jailbreaking. I wrote in 2015 a guide on how to install emulators via Cydia and sideloading services which is worth checking out for more information on emulation on iOS. Provenance is THE go to emulator for retro iOS gaming, as its based on the wildly popular OpenEmu and boasts MFi gamepad support. Best of all, it is incredibly easy install compared to RetroArch or PPSSPP. Only RetroArch provides a wider range of support. Provenance boasts support for:
- Sega
- SG-1000
- Master System
- Genesis / Mega Drive
- MegaCD
- Game Gear
- 32X
- Nintendo
- NES (Nintendo Entertainment System)
- Famicom Disk System
- SNES (Super Nintendo)
- Gameboy / Gameboy Color
- Gameboy Advance
- Atari
- 2600
- 7800
Requirements
Building iOS applications requires installing Xcode, so if you haven't installed Xcode or updated to Xcode 9.0, download it. Once installed, launch Xcode and then launch a terminal session. Run the following to install the CLI utilities for Xcode.
xcode-select --installStep 1: Download Provenance
Either download the zip from https://github.com/jasarien/Provenance or via the terminal.
git clone https://github.com/jasarien/ProvenanceStep 2: Provenance.xcworkspace
Open the xcworkspace file (Not Provenance.xcodeproj)!

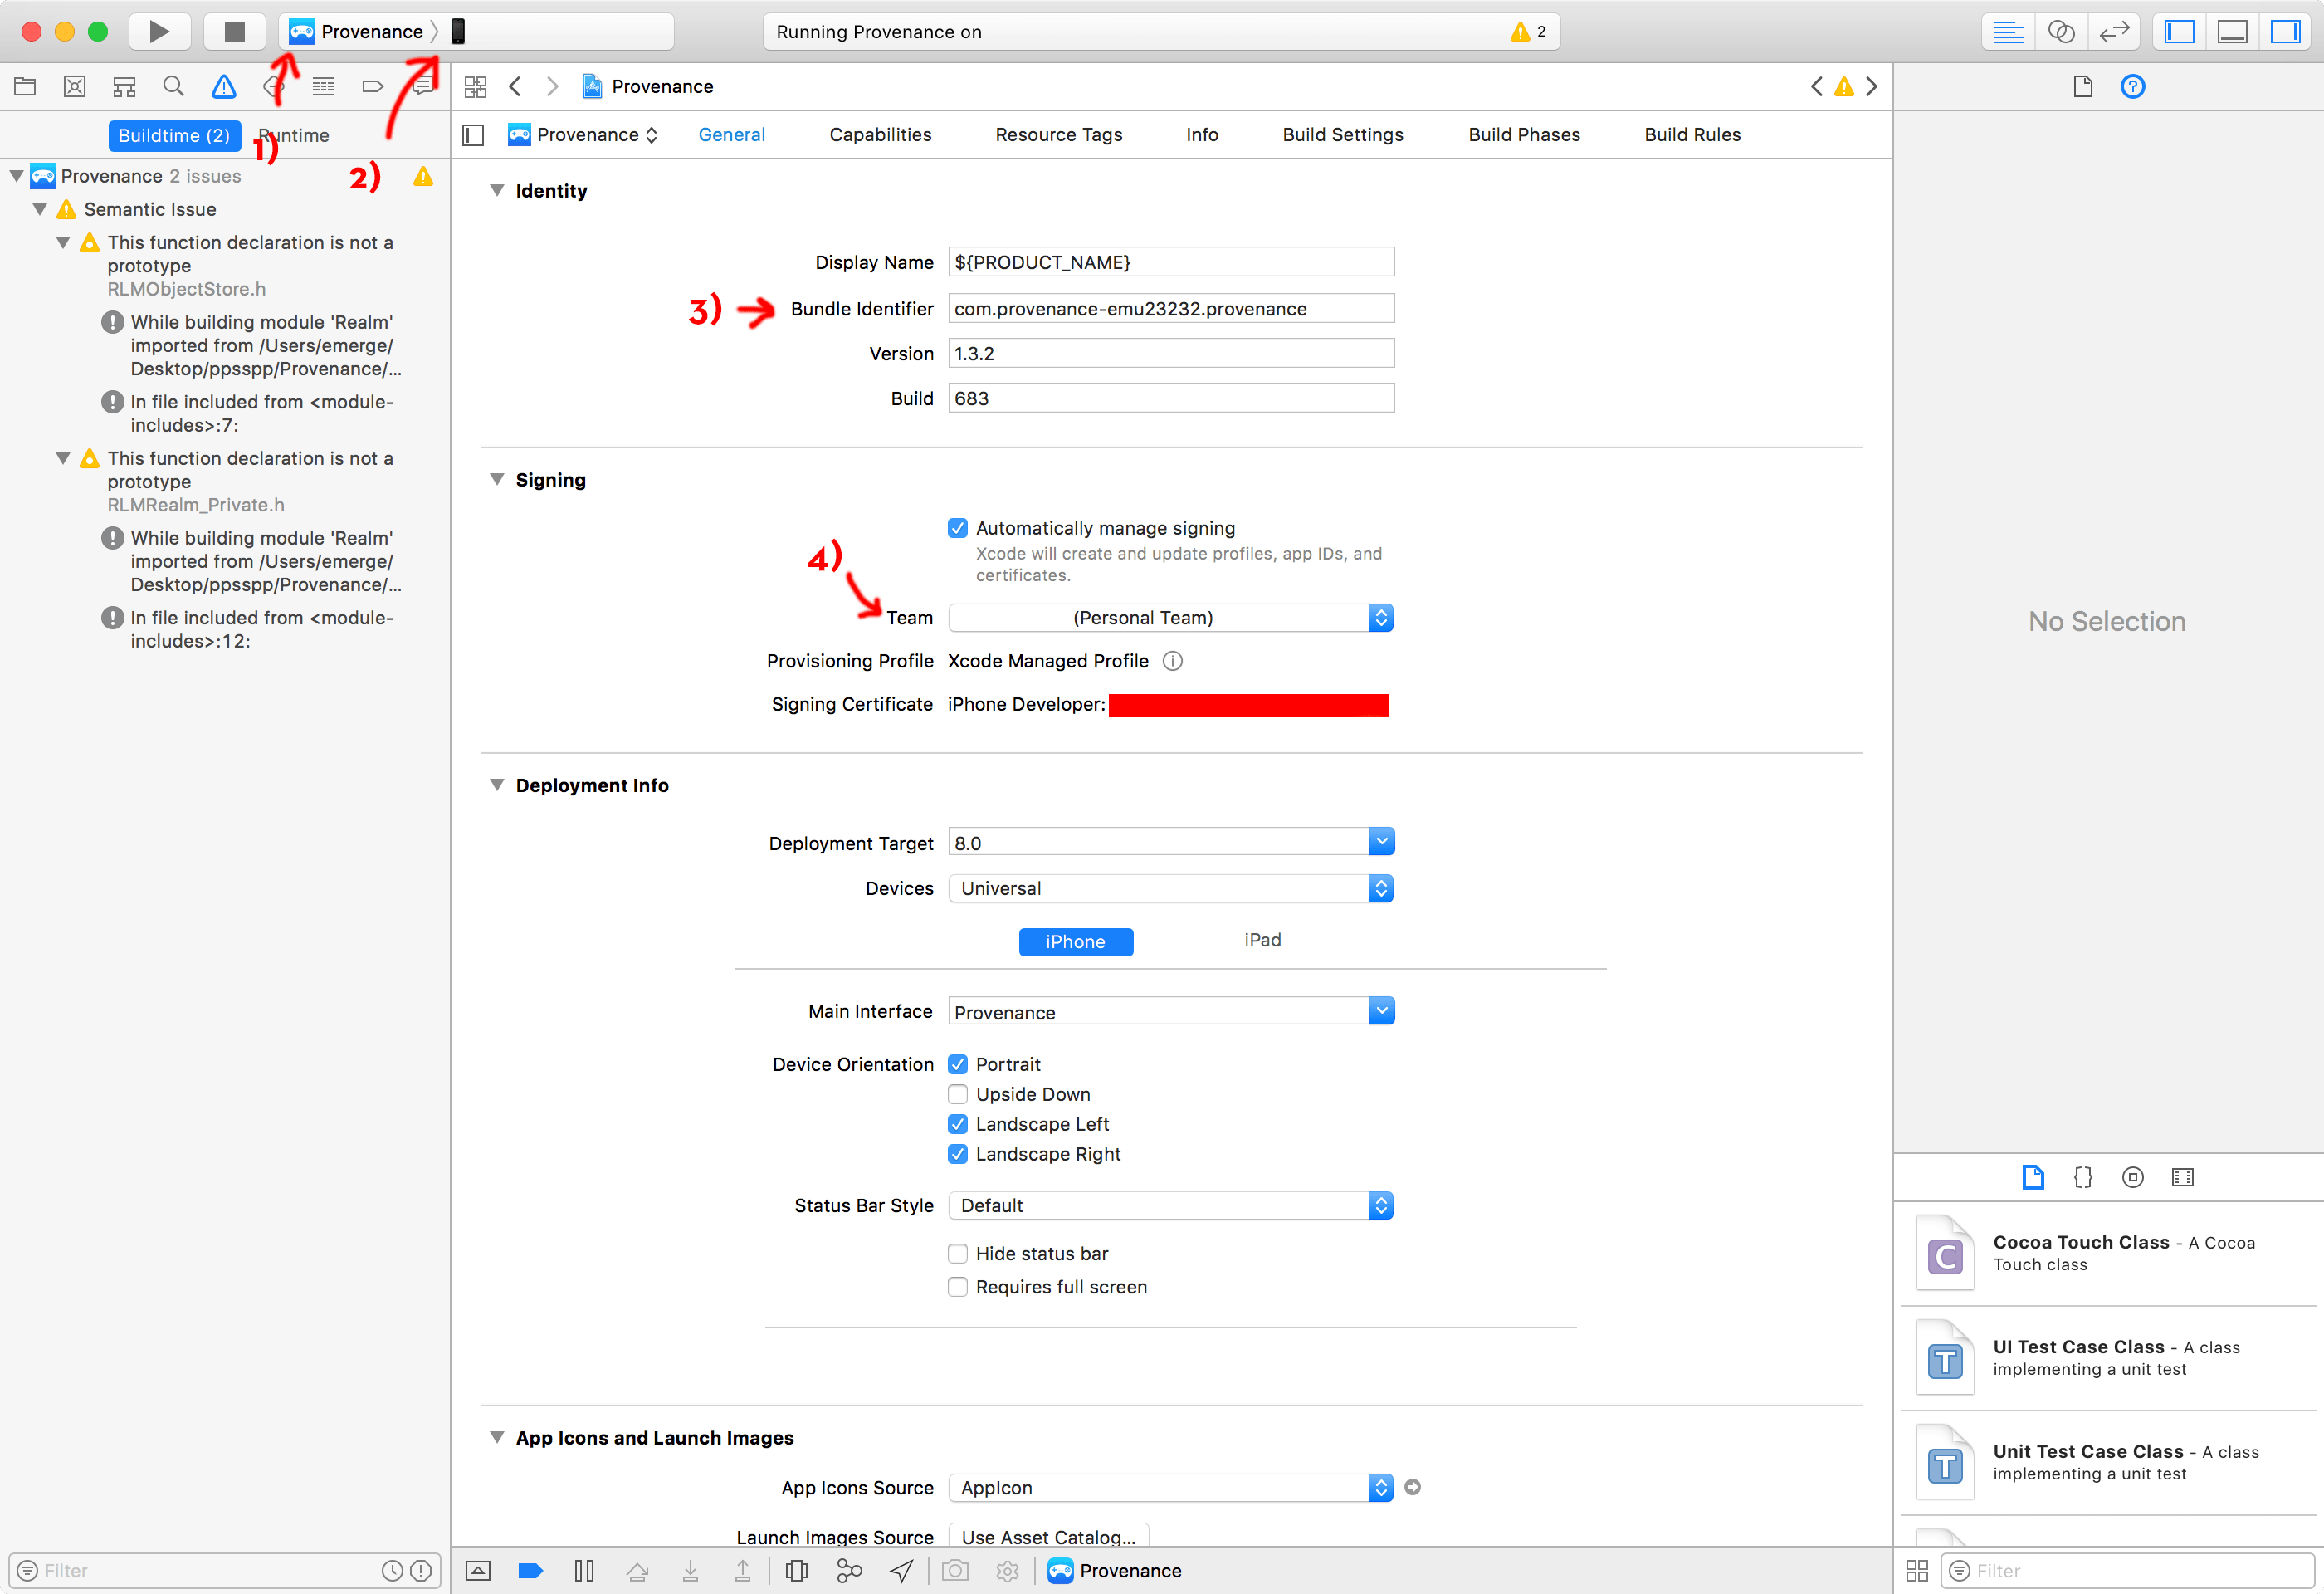
Step 3: Set up the xcworkspace
- Set up the project to the Provenance app
- Set the target to your iOS device (be sure you have it connected)
- Change the bundle identifier to something unique
- Set up your developer profile
Step 4: Build!
Hit build, you're good to go. Provenance is incredibly easy to set up. Go to the official wiki for full details on how to use of the emulator.
If you encounter the error, Untrusted Developer: "your device management setting do not allow using apps from developer... on this iPhone. You can allow using these apps in Settings."
Go to Settings -> General -> Profiles & Device Managment and under developer App, tap your profile to allow apps.
Congrats, you're now ready to use Provenance.
Step 5: Adding games to Provenance

Make sure you iOS device and computer are connected to the same access point. Tap on the Provenance icon on your iOS device. Click the + icon to start the webserver. Go to your computer and navigate to the URL in the message on the screen of your iOS device.
Leave your rom files in .zip file to save space. You can queue up as many games as you want using shift click from the file menu. Sub Folders do not appear to be work within the Roms folder.
Provenance is one of the better iOS apps. You'll probably want to pick up a MFI enabled controller to get the most out of it.