There’s a small point to be made here, insofar as it suggests the FBI is being disingenuous. They’re saying that it’s not about precedent, it’s just about this one phone, this one investigation. But the real reason they’re making a big deal out of it is that it’s politically useful. The phone itself likely isn’t important but the situation surrounding the phone — “terrorism” and the tragedy of 14 innocent people being killed — lends sympathy to their desire for access to encrypted devices all the time. - John Gruber, daringfireball.com
The iPhone debate reminds me of a hot button issue like abortion or climate debate where the two sides are speaking different languages. Strangely the one semantic argument that the other side understands has yet to be made: economics. Forget what you know about encryption and the absurdity of security back door. These are purely intellectual abstractions to the other side.
Want a sure-fire way to sink potentially hundreds of thousands of American jobs slowly? Set up the precedence that the US Government has backdoor access. What foreign government or foreign firm or even foreign citizen wants to use systems that the US Government can trove at will? We've shown a complete and utter disregard for intelligence gathering onourallies, even our closest, why assume anything else even when wrapped in the best of intentions?
On my website, greggant.com I have a small section of my homepage where it always displays the title of my most current blog post. Prior to using Jekyll back when my blog was hosted on Tumblr, I used the API to grab the latest post via a URL. On Jekyll, the solution is even easier: Create a dummy template that only includes the page title and use PHP to write the blog post title.
Step 1: Create a blank template in _layouts
I created a template I named blank.html, the entire contents are one line:
{{ content }}
Step 2: Create a url
Since the script I'll be using is all for public access, I kept it simple and decided to make a new page in the root of my blog. I named it currentpost.html.
  ---

  layout: blank

  title: Inaudible Discussion

    ---

  {% for post in site.posts limit:1 %}

  {{post.title }}

  {% endfor %}
It'd be possible to create a URL directly to the page, but for this solution, I opted in for absolutely the most minimum amount of work seeing I'd rather link from my portfolio to my blog's homepage instead of the the actual post..
I wrote this in late 2015 and early 2016, but most the information still applies for iOS 11. I've recently written a guide on how to install PPSSPP and Provenance (multi-console emulator)without a jailbreak. Jailbreaking even in 2015 started to fall out of favor and in late 2017, the popularity has waned. Technical users now can download most applications that do not fall under the app store guidelines and install via Xcode. If you want to use emulation on iOS, Xcode is your best bet. The two guides above will allow you to install (in my mind), the best two overall emulators for iOS. The rest of this guide covers is still relevant and covers quite a bit of ground.
Before we get started, I’ll be using quite a bit of vernacular related to emulation. Many people familiar with emulation can skim the Mini Glossary.
Originally posted: 2015-12-09
Emulation isn’t exactly legal. Emulators themselves remain legal, jailbreaking remains legal, but downloading ROMs is legally a grey area at best and piracy at worst. However, this isn’t about morality but an exploration of feasibility. With the prevalence of sites like emuparadise, emulation is as alive and kicking as it was during the olden age of emulators, the late 90s and 2000s when the explosion of projects like NESticle, ZSNES, SNES9x, UltraHLE, Connectix VGS were all still being actively developed.
Lastly, emulation is a bit tricky to get up and running. I’ll do my best to distill this into a comprehensive, one-stop guide for iOS emulation. This post encapsulates quite a few burnt hours, starting with two cross-country flights where my sole entertainment on the flights was my iPhone with a Moga Rebel, and my MacBook Pro. While downloading and compiling emulators, I realized that the information on iOS emulation is scattered and often unclear. Immediately I started kicking around the idea of writing a guide. What follows is the longest blog post I’ve ever written regarding hours spent + words. In the end, I downloaded 20+ emulators, took countless screenshots/notes, created original art, dropped over $100 and I accrued over 5000 words, the most I’ve written on since college on a single document (excluding coding).
Android has a huge advantage compared to iOS when it comes to emulation, as its apps can be downloaded through the Google Play store. Make no mistake, if emulation is very important to you, iOS is not the go-to platform as there’s plenty more work and headache that goes into getting emulators up and running. That isn’t to say iOS is bad at emulation, but getting emulation working on iOS is labor intensive. iOS has a bit of catch up to do on the game controller support even when compared to tvOS. If you’re looking for the ultimate portable retro gaming console, an Android phone with a microSD card is likely the better option. Hopefully, this post will be useful to someone, somewhere…
Mini Glossary of Terms
Emulator - A Program that simulates/emulates specific hardware configurations. These programs range vastly in techniques and scope (and aren’t limited to games). For old games to run properly, programmers recreate the functionality of the chipsets found in the past game hardware to allow games to be played on non-native hardware. Due to the complexity of simulating hardware, emulators always require more powerful hardware than those found on the original chipset. Emulators became prevalent in the late 1990s due to the rapidly increasing power of personal computers and the internet, which enabled developers to collaborate and distribute their code. Even a lowly 1998 iMac (Rev B) with PPC G3 233 MHz and 6 MBs of VRAM was orders of magnitude more powerful than all of the SNES’s hardware and thus was able to play SNES games. During the early 2000s, emulators were able to add features not found in the original hardware. Famously the two defunct commercial attempts were made for game emulation Bleem emulator allowed the Sega Dreamcast to play a few select PSX games, and Connectix Virtual Game Station allowed anyone with a Macintosh to play any PSX game, and take advantage of the superior load times both occurring in 1999-2001. After lawsuits, commercial emulators were deemed legal risk and seemed on the cusp of legality. UltraHLE, the first N64 emulator, was hit with legal threats from Nintendo and thus emulation today now mostly lives on in open-source (see source code). For further reading, emulators vary between high level emulation and low level emulation. T Today, the average smartphone is orders of magnitude more powerful than retro game consoles.
ROM - Read-Only Memory. Cartridge-based game consoles like the NES, SNES, and Genesis used Read-Only Memory to store games. Games that could save games used specialized battery packs and additional memory for saving purposes. Later game consoles like the PlayStation and Xbox used less expensive optical media formats that were ROM hence the term CD-Rom and DVD-Rom and opted for memory cards or internal memory to save games. The term ROM is usually used interchangeably for any game file.
ISO - ISO is shorthand for the common ISO 9660 filesystem used on CD-Rom. ISO files are byte-for-byte self-contained data dumps of entire CD-Roms and DVD-Roms. These files can be transferred and later burned onto optical media. Some early game consoles such as the Sega CD and Neo Geo did not have any copy protection, so games could be pirated easily by downloading and burning onto CDs. Later consoles employed various methods to ensure copy protection such as the surprisingly simple but effective bad bye header that the Sony Playstation employed. ISO file format today can contain other variants outside of the 9660 standard.
Source Code - A program instructions are written in the original language before compiled and translated into machine language. In the context of iOS emulators, iOS emulator source code can be downloaded freely and compiled into native iOS apps using Apple’s Xcode. This program can then be transferred to an iOS device. Open Source means the Source Code is open to viewing. Thus anyone can view and modify the code, and submit bug fixes, features, optimizations, and changes to curators of a project to be reviewed. Open Source code projects can be found a variety of places like GitHub. Due to the licensing constraints of Apple’s App Store, pre-compiled apps cannot be installed on iOS outside of the App store, but developers need a way to test their code on iOS devices, thus projects compiled through Xcode can be loaded on onto an iOS device.
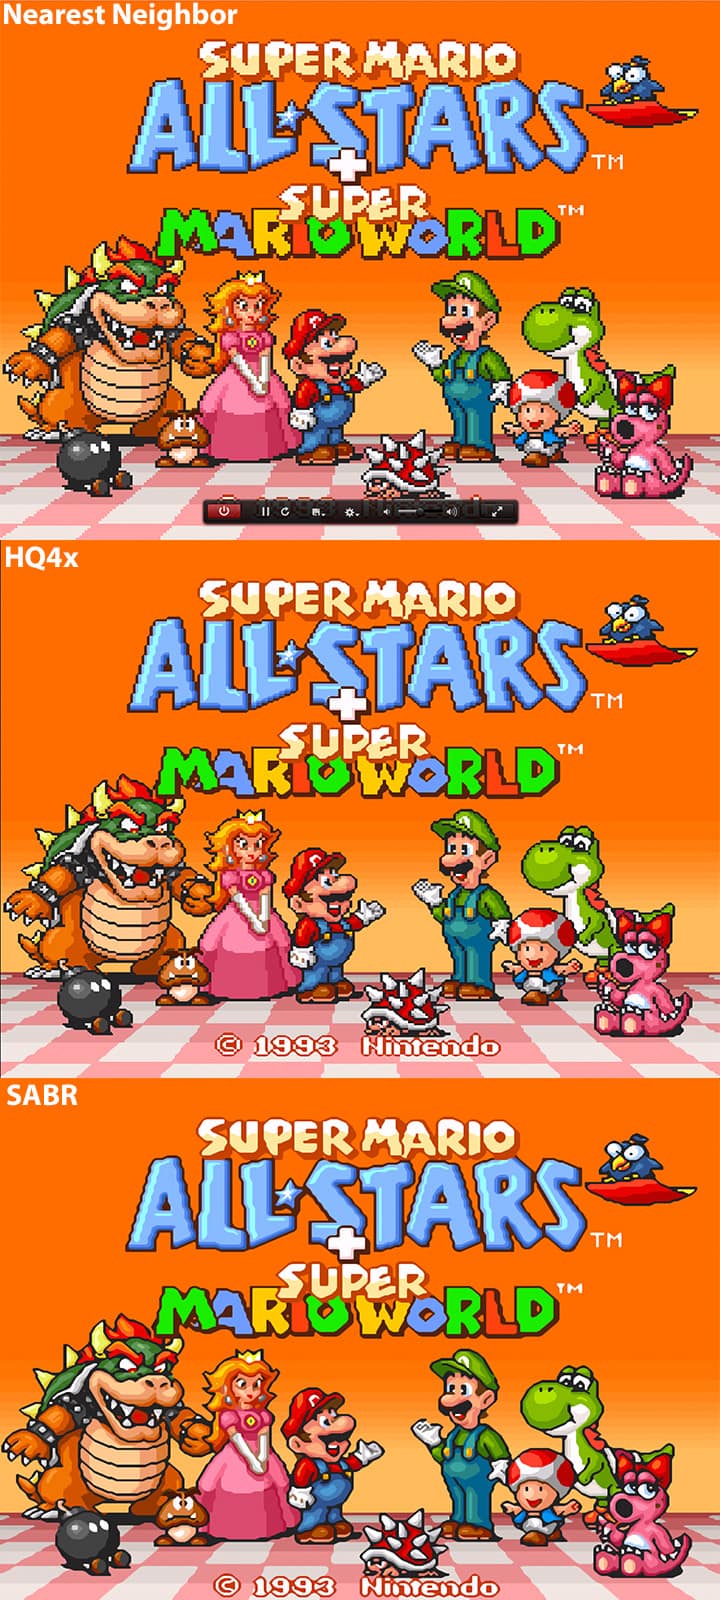
Blitter - Blitter originally is a term for a coprocessor, but in the world of emulation, refers to graphics rendering techniques. Game consoles like the Genesis and SNES had max resolution of 320px x 240px, paltry when compared to modern consoles supporting 1920px x 1080px (1080p), making for 27 times as many pixels. Computers support a range of resolutions, all many times greater than retro game consoles, and the iPad Air and Mini both sport a native resolution of 2048px x 1536px, even greater than 1080p TVs. Due to the resolution differences, the retro consoles appear pixelated when blown up to modern display resolutions. Programmers have figured out various techniques on how to upscale graphics and make them appear smoother for 2D game consoles, called Blitter libraries back in the early 2000s and have steadily improved over the years. 3D game consoles like the Nintendo Gamecube & Wii, Sony PlayStation 1 & 2 & PSP have emulators that render the polygons at modern resolutions and apply effects like Full-screen Anti-Aliasing, and more detailed particles, and even some edge cases, tweaks that change draw distances and textures. Thus emulated consoles can attain much greater image quality than the original consoles could, especially for 3D games.
Below is an example using OpenEmu’s blitter “filters”.
Blitter libraries can drastically improve image quality, although they can be quite CPU intensive for the most advanced like SABR.
Getting Started with iOS emulation
Unlike on Android, emulation isn’t something Apple condones. Occasionally, apps slip through the app stores such as iDOS (A well constructed DOS emulator). Some apps hide functionality in them, such as FloppyBird (a hidden NES emulator). These are unreliable and often pulled instantly from the App store assuming if they somehow make it past Apple’s screening. This likely has less to do with any beef Apple has with game emulation but with emulation in general.
Jailbreaking
Thus this leaves two avenues, the first being the most obvious: Jailbreaking. By now most users are pretty familiar with Jailbreaking. Rather than re-explain jailbreaking, I’ll quote my favorite resource for iOS, iDownloadblog.com
Jailbreaking is the process by which Apple’s mobile operating system, iOS, is modified to run unsigned code to gain access to files that Apple wouldn’t normally let you access.
Jailbreaking adds unofficial application installers to your iOS device, such as Cydia, which let you download many 3rd-party applications, tweaks, and extensions that are unavailable through the App Store. These packages open up endless possibilities to do things on your iOS device that a non-jailbroken iOS device would never be able to do.
Rather than walk through jailbreaking here on this blog, there’s entire websites and forums dedicated to Jailbreaking. While I’ve written a few popular jailbreak centric blog posts and iFile, I am not an expert. You can find all the necessary files and instructions on jailbreaking at iDownloadblog.com.
Jailbreak free - Build your own
The second avenue comes rooted from the Enterprise Distribution certificate exploit to install the app via HTTP. Originally a few clever authors took advantage of a flaw in iOS’s ability to deploy enterprise Apps in iOS 8. The popular emulator, GBA4ios was distributed by this method. The advantage is it didn’t require a jailbreak; the downside is Apple quickly patched this glitch in subsequent iOS updates.
These emulators quickly became open source, anyone with a copy of Xcode and developer license can download and compile the open source projects.
The advantage is it's totally free and unlikely to be closed by Apple. The downside is you need a to jump through several hoops. Notably since previously linked guide, was written a few things have changed. This is by no means a perfect guide but the standard steps to get up and running.
CocoaPods is a dependency manager for Xcode projects. Since many applications have various dependencies, you’ll need this to properly compile many open source projects. Installing Cocaopods process depends on your OS version. OS X 10.10 and below only require one terminal command: sudo gem install cocoapods
One of OS X 10.11 - El Captain's changes is a new security provision for rootless access. In reality, there’s still a root account for the OS but locks off certain directories from access meaning even if a user has root access (full file system) they cannot modify certain portions of the operating system. The default install location for gem installs was in a locked area. Thus the above install command will not work. Rather than disable the “rootless” security provisions, it's safer to install the files elsewhere. You’ll need to follow the instructions, by running the following commands in your terminal:
$ sudo gem install cocoapods
This should execute successful installs
Fetching: nap-1.0.0.gem (100%)
Successfully installed nap-1.0.0
Fetching: thread_safe-0.3.5.gem (100%)
Successfully installed thread_safe-0.3.5
Fetching: minitest-5.8.2.gem (100%)
Successfully installed minitest-5.8.2
etc…
Once done, run:
$ export PATH=$PATH:/Library/Ruby/bin
Test to make sure that Codepods has installed properly
Test to make sure its installed properly
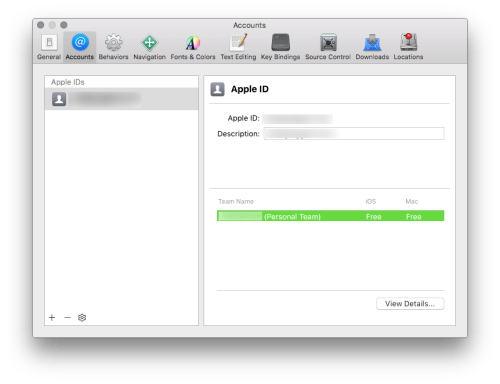
Step 3) Launch Xcode
Go to Xcode -> Preferences and click the Accounts tab and add your Apple ID
Step 4)
Download an open source project, and open the xcodeproj file.
Step 5)
This step is where things start to get tricky, you’ll need to navigate to the General project settings tab and change the Bundle Identifier to a unique name, and the team name to your Apple ID.
Next, change the target device to your connected iOS device. Click fix, and it should make some corrections.
Step 6)
Build!
Getting projects to work can involve many steps, so keep in mind that these steps may take additional corrections. Be prepared to visit Github projects, wikis and forums to guild you. This currently is the only way to get emulators on the newly released Apple TV
Sounds a bit complicated right? It’s because it is. I’m a web developer by trade, and it took me a few hours to navigate the process as I’m not an iOS dev. However, there’s another way to go: Have someone else do the work for you.
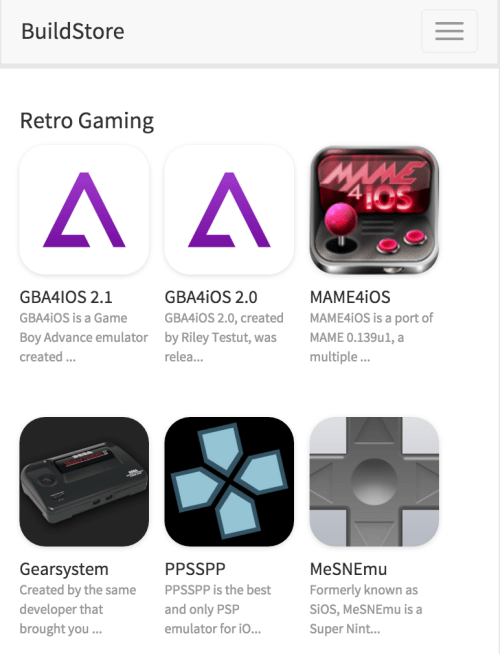
Jailbreak Free - Have someone else make the builds - Builds.io A builds.io mini-review
Since the certificate famed exploit, a few of the emulator authors for iOS combined forces to form Builds.io, a service to distribute HTTP installable enterprise Apps. In order for iOS to be a viable corporate entity, iOS needs the ability to install applications outside of the app store for internal apps that aren’t available on the app store for any number of reasons: not waiting for Apple’s validation, privacy/security, quick distribution and so forth. Builds.io uses Apple’s built-in enterprise functionality. It works by adding your device ID to the Builds.io enterprise network, and authorizes its apps to be installed via HTTP. The catch? It costs $10 a year. Sounds fishy? I was wary but decided to take the plunge.
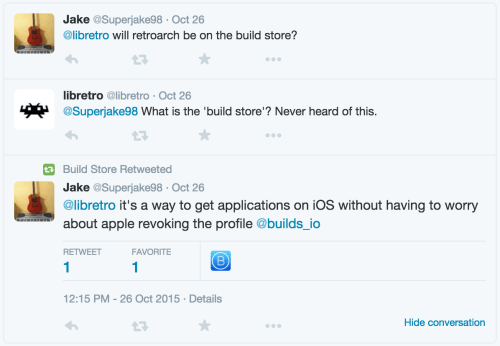
To add to questionability Builds.io doesn’t have full the full condolences of some of the emulation authors either. I found the following exchange on Twitter between a user of Builds.io and the author of LibRetro which makes RetroArch possible, a very popular open source emulator for iOS. Since as of writing this, RetroArch does not appear in Builds.io.
Signing up for builds.io takes almost no time, that is if you don’t run into any PayPal problems. I had deleted my account, and I had to create a new account simply to pay for builds.io. Signing up for the service takes only a few short minutes, to create an ID for your device. Upon payment, your account is then activated (which takes about 2-3 minutes), and then you’re free to install applications.
Installing applications from Builds.io is as simple as the Apple app store. Click the install button, click it again and a message will alert you that you’re about to install an iOS app. Once the install button is clicked, the app will start installing the background. Emulators are pretty small, and even on LTE, it only takes seconds. Once installed, the apps behave like any other iOS application. You’ll find most the of the emulators listed above at Builds.io. It works great, and there were zero hiccups. A $10 license only covers one device, however, so I did not test this on my iPhone 5 or 4.
Would I recommend it the service? In a short answer: Yes.
I recommended this to my technically-inclined-but-not-a-developer brother who spends all day navigation EDLs, codecs, and deliverables as post-production manager, as he’s quite the retro gamer but probably lacking the patience to compile his own emulators. Admittedly, I used Builds.io for many of my emulator installs. However, I’m still unsure as who the money goes to, and while one may argue you’re paying for the service and not the open source software, it still feels like you’re doing precisely that: paying the wrong person for someone else’s hard work.
Picking your path
Ideally, for anyone interested in iOS emulation, you’d have both your iOS device jailbroken and use the open source emulators (by either compiling the applications yourself or paying the $10 for Builds.io or similar service). There are some incredible jailbreak-only features like drivers for Bluetooth PS3 controller drivers and Controllers for all PS4 controller drivers.
Now for the confusing part, there’s no magic bullet to unlock all the iOS emulators.
Some of the emulators are available through Cydia and open source like PPSSPP.
Some are available only through open source repositories and Builds.io like GBA4ios.
Some emulators are available only through Cydia like SNES 9X Ex+ and several helpful tweaks/drivers.
Having a jailbroken device also makes uploading ROMs to your iOS device easier. The ideal iOS emu-gamer would compile her/his own open source emulator AND jailbreak her/his device.
Currently, the momentum is in the compile-your-own side of things as the best iOS emulators are mostly found through open source.
Software Recommendations
If you chose to go the jailbreak route or non-jailbreak route, there are a few recommended utilities to make your life easier iFile (a iOS file management system, available through Cydia) and iMazing (a Windows/Mac utility for device management) or iExplorer.
iFile is routinely one of the most recommended iOS jailbreak utilities. I’m quite a fan and have written a few articles related to it. iDownloadblog wrote the post a few years back “Why Every Jailbreak Power User Needs iFile.” Specifically, pertaining to iOS, iFile allows iOS users to copy, move, open, delete files, create directories and the usual file management tasks. iFile will be routinely mentioned.
iMazing is a wonderful OS X and Windows utility that allows device management outside of iTunes, including full file system access for jailbroken devices. Non-jailbroken users still can use limited file management, still useful for rom management. I picked this up as part of a bundle through macupdate.com, but it can be purchased for $35. Spendy but it's the best overall iOS management utility I’ve used.
iExplorer is geared for one thing and only one thing: Browsing your iPhone from your mac or pc. The advantage over iMazing is the var/mobile/Applications are put front and foremost. Normally viewing through iFile, every application resides in a folder that has a random string of letters and numbers. iExplorer has a viewing option that lists the folders by the name of the application they contain; it makes life easier. Again, ringing in at $35. It also has one other killer app feature, mounts your iPhone in the finder.
Each of these applications is worth buying, but you only need one. iMazing is more bang for your buck, but iExplorer is better strictly for transferring ROMs. I personally while writing this article switched using iExplorer strictly for rom transfer.
A rundown of the Emulators
I downloaded every emulator I could find and tested them, due to sanity’s sake, I’ve kept my reviews short, and for your sanity’s sake, where the ROMs are stored. Note: Locating the ROMs using iFile or iMazing will take some trial and error I’m listing these buy iExplorer’s locations.
Jailbreak Emulators
The following is a list of emulators that can be downloaded via Cydia.
PPSSPP - a very impressive PSP Emulator that allows for upscaling games beyond native resolutions, FSAA, and other graphical tweaks. My iPhone 6 I ran the games at 3x their original resolution only once in awhile with a hiccup. Full gamepad support to boot. Highly recommended.
Default Rom location: /var/mobile/Documents/PSP/
SNES9x EX+ - One of the several SNES9x based SNES emulators, full gamepad support, and support for larger screen iOSdevices. With the plethora of SNES emulation options, this is one of the best.
Default Rom location: /private/var/mobile/media
RetroArch - A powerful multi-console emulator for iOS, includes multi-emulator cores, includes the following support the following emulators: NES (NEStopia, QuickNES), SNES (bSNES, SNES9x, SNES9x Next), Nintendo DS (DeSmuME), NES (FCEUmm), Sega Genesis/MegaDrive/Master System/Game Gear/Sega CD (Genesis Plus GX & Picodrive), Atari Lynx (Handy), Arcade (Mame 2003), Neo Geo Pocket (Mednafen Neopop), PC Engine/TurboGrafx 16 (Mednafen PCE), Sony PlayStation (Madnafen PSX, PCSX ReARMed), VirtualBoy (Mednafen VB), Nintendo 64 (Mupen64plus), GameBoy Advance (VBA Next, VBA-M).
The catch? The Cydia version is massively out of date; you’ll need to use Xcode to install your own. See RetroArch in the open source section
Target your iOS device and hit build.
SNES A.D.+ - Genesis AD+ - A classic iOS genesis emulator, Somewhat out of date, only support Wiimotes and doesn’t include full screen support for wide iOS devices (iPhone 5 and beyond).
Rom location: /private/var/mobile/Media/ROMs/SNES/
Genesis AD+ A classic iOS genesis emulator, Somewhat out of date, only support Wiimotes and doesn’t include full-screen support for widescreen iOS devices (iPhone 5 and beyond).
Rom location: /private/var/root/media/ROMs/GENESIS
GBC AD+ - A Gameboy / Gameboy color emulator. Somewhat out of date, only supports Wiimotes and doesn’t include full-screen support for widescreen iOS devices.
Rom location: /private/var/root/media/ROMs/GameBoy Color
NES AD+ - A classic iOS NES emulator, Somewhat out of date, only supports Wiimotes and doesn’t include full-screen support for widescreen iOS devices.
Rom location: /private/var/root/media/ROMs/NES
Nescaline - A classic iOS NES emulator, Still working even on iOS 8/9 but woefully out of date. No controller support.
Rom location: /var/root/Media/ROMs/NES/
Installable Cydia emulators but incompatible with iOS 8/9 - RockNES, NES4IPhone, SNES4iphone, Gameboy4iphone,
Open Source Emulators
The Open Source emulators currently are where the action is, most were still actively developed. Thus the emulators are of a slightly higher standard.
The rom locations the application directories themselves unless stated otherwise.
NDS4iOS - Nintendo DS emulator, works well, supports gamepads but due to the DS, not the best for landscape gaming.
SNES4iOSSNES4iOS - A SNES emulator based off SNES–HD, another SNES9x core based emulator. Freeze states are partially supported, iPhone can save them but not load them. iPads can load and save freeze states. With almost no updates for 3 years, SNES4ios is probably defunct.
MeSNEmu - A SNES emulator using the SNES9x core, runs well, has minor smoothing, runs without dropping frames on my iPhone 6. Supports a number of controllers. ROMs can be copied directly to it through iTunes or popular utilities.
Provenance - Multi console emulator that supports the Sega family of game console (Master System / Game Gear/ Genesis / 32x) using Genesis Plus GX and SNES through SNES9x, NES and GameBoy Advance. Supports game gamepads, Genesis runs exceptionally well. Includes game box art. How to install Provenance (multi-console emulator)without a jailbreak.
Gameplay Color - Another well-written GameBoy and GameBoy Color Emulation
GBA4iOS - The emulator that caused a stir online. It works nearly flawlessly; it could use some blitter support. ROMs can be added directly through the application using Web browser support.
Rom Location: var/mobile/Applications/ GBA4ios/Documents
N64iOS - a work in progress that crashes shortly after launching. It's sitting on Github and hasn’t seen a commit over two years.
Reicast - An Android Dreamcast emulator with the beginnings of an iOS port. Currently, in the Reicast project, there are iOS and OS X x project files, you can even compile Reicast to a phone and read the debugger files, and upload Dreamcast bios but just don’t expect anything to happen. Seeing as its functioning Dreamcast emu on Android, the iOS port may eventually catch up.
RetroArch - powerful multi-console emulator for iOS, includes multi-emulator cores, includes support the following emulators: NES (NEStopia, QuickNES), SNES (bSNES, SNES9x, SNES9x Next), Nintendo DS (DeSmuME), NES (FCEUmm), Sega Genesis/MegaDrive/Master System/Game Gear/Sega CD (Genesis Plus GX & Picodrive), Atari Lynx (Handy), Arcade (Mame 2003), Neo Geo Pocket (Mednafen Neopop), PC Engine/TurboGrafx 16 (Mednafen PCE), Sony Platstation (Madnafen PSX, PCSX ReARMed), VirtualBoy (Mednafen VB), Nintendo 64 (Mupen64plus), GameBoy Advance (VBA Next, VBA-M).
The guide can be found here but it's a bit overkill.
Setting it all up
A few of the emulators require beyond the normal setup as described above.
RetroArch
RetroArch requires more work than the usual emulator to compile due to its complexity, and the jailbreak version is woefully out of date and doesn’t support gamepads. RetroArch is easily the most powerful emulator on iOS or Android due to its insanely massive support, and currently, the only way to play PSX/N64 games under iOS.
Gamepads are a must for emulation gaming. While all the emulators include variations on-screen touch controls, they’re a far cry from a physical gamepad. There’s a lot of gamepads on the iOS market, all of which use Bluetooth to connect to an iOS device. This inherently makes iOS gamepads more expensive than the cheapest USB options for Android. There have been a few roundups of gamepads for iOS, including Gizmodo and TechRadar but the modern favorites are the well known Mad Catz C.T.R.L.i and the lesser known Moga Rebel, both featuring a simple phone clip.
I opted for the Moga Rebel, partially for availability as I made a spur-of-the-moment decision to buy a gamepad before a cross-country flight at Target. The Moga Rebel isn’t cheap, at $79.99 its nearly as expensive as a Nintendo DS, which makes even current generation game console controllers seem like a good buy at $50-$60. The Moga sports a micro USB port used exclusively for charging its rechargeable battery. While Moga doesn’t boast battery life, it certainly lasts longer than the iPhone and then some.
The other key feature is a simple fold out clamp with rubberized that allows the control pad to grip anything from an iPhone 3g to and iPhone 6s tightly. It works great too, during a very turbulent return flight, even when I heard a few items fall, and I had to pause to grip my controller, my iPhone 6 never came loose.
The gamepad is inspired by the Xbox 360, which to date, is the best feeling console controller, complete with two analog sticks, two analog triggers, two bumper buttons, a d-pad, four buttons, and a single start button. It’s only a select button shy of covering the all the bases.
The pad is both lighter and wider than the Xbox 360 controller, but I didn’t notice either until had the two side by side. The Moga Rebel feels “right,” an almost indefinable characteristic. Everyone who’s used generic gamepad can describe how “off” a controller can feel. Does it feel like an $80 controller? I’m not sure, but it certainly feels like a premium product.
Most games that support gamepads supported the Moga Rebel; I got a kick out of playing Metal Slug and Knights of the Old Republic, both of which played flawlessly and required zero configs. I also realized a few games in my library were finally playable such as Sonic CD. iOS gaming still is the wild west when it comes to gamepad support.
Emulators boasting gamepad support magically worked with the Moga Rebel. I ended up spending most of the gaming in emulation, as one might suspect, particularly with PSP games. At 3x their original resolution, and on an infinitely better screen than the original PSP, the PSP games I played (Little Big Planet, Lumines) played like native apps, and perhaps maybe even better. I even took a break to play the GBA remake of Super Dodgeball and beat the game, and played a game of Tecmo Super Bowl (with a rom with updated rosters) for the Sega Genesis.
Other than the price and a missing select button, there’s nothing to complain about with the Moga Rebel. However, I can’t recommend the gamepad for one simple reason: Support. Moga seems to be dead or mostly dead. Other than a twitter account that seems to fire off a flurry of tweaks every month or two, their website appears to be un-updated, their support non-existent, and no OS X support. Had I known, I’d of opted for the less expensive MadCatz controller.
The Wrapup
iOS emulation takes a bit of work. Builds.io makes easy for the less technically inclined but anyone willing to spend the time with Xcode and Jailbreaks can unlock the full potential of their iPhone. To get up and running, you’re looking at a $50 investment for a Mad Catz Micro C.T.R.L.i. Then if you want to go further $10 for builds.io. subscription and $35 for iExplorer for a grand total of $95.
I’ll try and keep this article up-to-date as I’ve done with some of my other guides and clean it up over time.
You’ll want to have a jailbroken device but it isn’t required.
Support for controllers varies wildly on a per emulator basis. Quality of emulators varies quite a bit too.
You will not enjoy iOS emulation very much without a gamepad.
You will need to either subscribe to a service like Builds.io or learn to operate Xcode to get many of the best emulators.
The more storage on an iPhone you have, the better. PSP games clock in often at a GB plus, and PSX games often around 600 MB. I am thankful for my 128 GB phone
Edits:
12/11/15: Minor restructuring of setup section, corrections.
12/10/15: Added originally art, removed icons of emulators, article formatting. Wrap up.
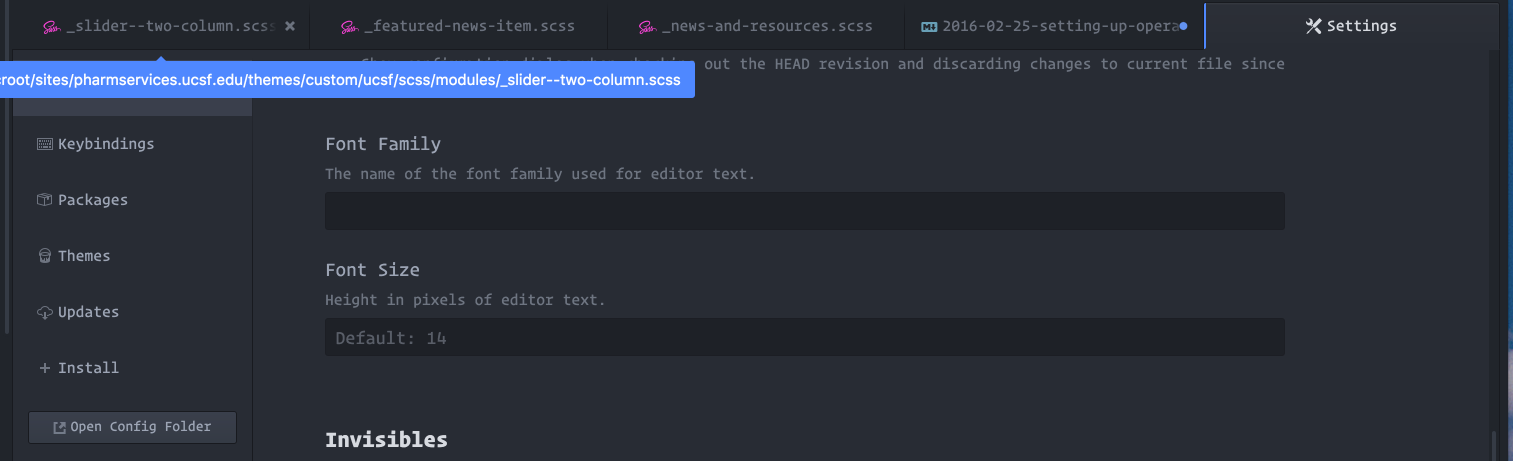
Feel free to play with the line-heights and font-size. If your font isn't installed, you'll see a default font of some variety. Be sure to remove any previous font settings in the preferences.
Moving to Jekyll effectively destroyed my google listings.
Some of my longer posts that used drive hundreds of views a month are now ignored. I can't even get google to find my 9 months with Codekit - A Codekit 2 Review or my Recommended Mac Pro upgrades & hacks. It'll be some work to rebuild from here on out. Still, need to import plenty of posts and set up a better syncing but at least now my blog is under my control and with version control. I originally hacked the default Tumblr theme to suit my wants and needs, but Jekyll is a breath of fresh air. Slowly I'll be de-jekyllfying my blog look and feel modifying it to match greggant.com. I'll be able to add features like lazyload and page indexes in way Tumblr simply never allowed.
More freedom, and more flexibility. Good things are ahead.
Moving photos between HDs is pretty easy, but it's not made clear through the Lightroom interface. Previously, I’d been storing photos on my 750 GB SSD boot drive, and I finally was coming to terms that I needed to move 31,000 photos (a good portion of which are RAW). The process should be the same on any recent versions of Lightroom, and on Windows.
Step 1:
First, create a new folder by clicking “Add Folder”
Step 2
At the file window, select your new photo location on another HDD, and click choose
Step 3
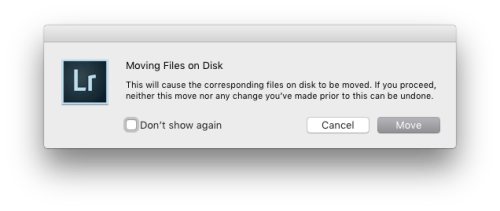
Drag the folder from the left-hand sidebar down to your new location on your new HDD. I’m moving 2015 to Lightroom Library/Photos in this example
Click move, and you’re good to go. Depending on the size of your library, it makes take some time.
Note: I’d highly recommend to anyone, make sure that your new location has a backup as it will delete the original copies of the photos once copied. Since I’m on OS X, I have Time Machine drives configured to backup both “Samsung SuperDrive “ and “SuperDrive”.
If you move your photos to an external drive that isn’t backed up in some manner and it dies, you’ll lose your photos. Check out my making the most out of time machine article and please don’t say I didn’t warn you!
This should be fun; its almost embarrassing I haven’t done this before, considering I’ve held down development positions for most of my professional career. Nothing too big: PhoneGap + free. Should be doable. Already using cheerio to create scrapers.
Some will burn me for saying this but I think shutting down Apple’s pro software line is not such a bad idea. The problem of the OSX platform is not the software.
There’s a reason why my blog posts about Mac Pro drive the majority of traffic to my blog and echoes my reaction to the abysmal Mac Pro 2013. In the nexi-verse of 2016, creative pros are switching to Windows.
If Hackintoshes were more viable, I’d of ditched Apple hardware ages ago. I tried. I really did.
So this happened to me today after I updated Netflix. Logging in and out didn’t help. Netflix’s app redirected to its website, ask me if I’d like to start a free trial and then proceeded to direct me to the app store. Annoying and the 1-star app reviews didn’t help. Having had a similar experience with Audible, it didn’t take much to figure it out.
So here’s how to fix it, using Netflix Reset.
Go to your home screen, double tap your home button and swipe up on Netflix to quit it.
Go to Settings, and scroll down to Netflix and tap it.
Tap the “Reset” Button (see picture below)
Hit home and relaunch Netflix, you should be asked to log back in. Congrats! The Netflix app should be working again!.
Capturing midi and using external controllers isn’t as straight forward as you might think with Maschine and Cubase. This tutorial was created on Cubase 7.5 using Maschine 2.4.x. The version of Cubase shouldn’t matter as the midi I/O configuration hasn’t changed terribly since even Cubase SX 1.0, but I can’t make any guarantees.
The Maschine in its default mode isn’t a standard Midi controller (although it does have a midi mode which isn’t useful for the Maschine software) capturing Midi from the pads requires a few steps for the VST.
The few tutorials I could find are Windows-centric pre-2.4, and video. So to keep from forgetting, I created this guide.
Initial Setup:
Step 1)
Add a Maschine VST, and bring up the window.
Step 2)
Select all pads in the Maschine Group (Command A works on this window or shift-click). Right click the title Group A1 in the sequencer area.
Step 3)
Under the Group panel, select Input, and make sure the Midi is active, and Thru is checked.
Step 4)
Under Sound, Input, make sure that the Thru is checked. You may want to set the channel if you intend to use separate midi channels. This isn’t necessary.
Step 5)
Under the Sound panel, go to Output, Select Midi on the right-hand side and check to make sure its Host or Default.
Step 6)
>
To use the Maschine pads, you’ll need to set the input to Maschine 2 Midi Out and Maschine Midi in.
For external Controllers:
Set midi input to all.
It should default to C1. I’ve found the that the translation between Korg padKontrol and Korg NanoPAD2 both need to be set to C2. Below are examples of default Korg configurations for the NanoPAD and PadKontrol.
Note: Currently I’m unaware of a way to use both internal and external pad capturing at the same time. You can use as many external controllers as you want and capture. For pads, you’ll want to make sure your root note matches your pad configuration. However, playing both the maschine and an external midi pad will trigger sounds which means you can figure out an idea and then capture each part separately.
Korg’s Kontrol editor Korg’s padKontrol editor
Other thoughts:
I’ve found it best to map the Maschine Groups to start the Root note one right after another as opposed to channels so groups can be all part of the same choke group if needed, effectively letting you access more than 16 samples at once.
So the lower right pad of the PadKontrol is mapped to C2 and counts up on Scene 1, and E3 counts on up on scene 2, A4 on scene 3, etc…
I love Packery, but sometimes its rounding causes gaps only at particular screen resolutions when using proportional scaling. Note the small white line in the image below.
This error was frustrating and mind-bogglingly bizarre. I spent hours combing the GitHub page to see similar-but-not-quite fixes. With the ability for this project to have 1-4 items in a row, I couldn’t simply target nth-child. I didn’t want to write crazy jquery just for a simple fix.
In the end, I had a lightbulb moment:
transform: scale(1.01);
CSS Transforms don’t affect the occupied space but causes the images overlay. Knowing this, I could force the images to be a hair larger their parent container without stacking issues. Someone somewhere may be saved a lot of heartache That’s it! Problem solved.
 Running "cssmin:minify" (cssmin) task
 [BS] File changed: ../css/app.prefixed.css
 >> TypeError: Cannot read property '1' of null
 Warning: CSS minification failed Use --force to continue.
If you’re new to grunt and/or Sass, this error can seem mystifying, but we’re actually given enough information to troubleshoot it. First, note that it occurred in the cssmin:minify task. The scss is compiling but minify doesn’t like something. The Sass compiler is more forgiving than the minifier.
Unlike your usual sass errors, minification will not display the sass file in question ( since its only processing the compiled CSS file) nor the line number.
The quickest way to identify the source of the problem is to comment out your individual sass files and compile to see if the error pops up. In my case, I found out it was in my _ HelveticaNeue.scss file. A quick scan revealed I had a @font-face inside another @fontface tag.
If you’re truly stuck, try running your code through CSSlint, there’s even an online csslinter. Pay special attention to the parsing errors. Unexpected Braces will cause minify to fail. Locate and correct the errors and save. You should now be compiling sass error-free.
This is no different that asking building doors (Commercial, Home, or otherwise), safes, file cabinets, vehicles, pad locks and bike locks to be unlock-able with one master key.
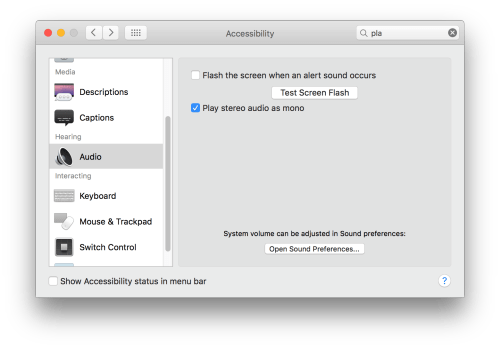
Videos especially on user services like YouTube & Vimeo, sometimes have panned audio that are terrible, sometimes only on one channel or have bizarre mastering such as this video.
Go to Accessibility -> Audio and check “Play Stereo Audio as mono”
That’s it! Don’t forget to uncheck it when you’re done!