Converting .bin .cue to ISO with OS X using free and commercial utilities
Occasionally in your adventures on the internet, you’re bound to encounter cue/bin disk images. For this example, I’m using an old PSX game, Crash Team Racing and converting it for use with pcsxr, OS X/Windows Playstation emulator, however, this isn’t the only reason for converting to ISOs as Parallels / VMWare and VirtualBox all use ISOs.
Method 1) Roxio Toast
In the era of disk burning, Toast was THE utility to own and still is, if you happen to still use optical media. If you happen to have a copy, it’ll convert BIN/CUEs to ISOs without much trouble.
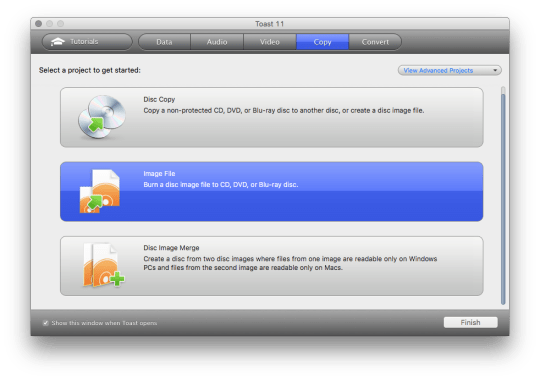
Step 1) Launch toast, select image file

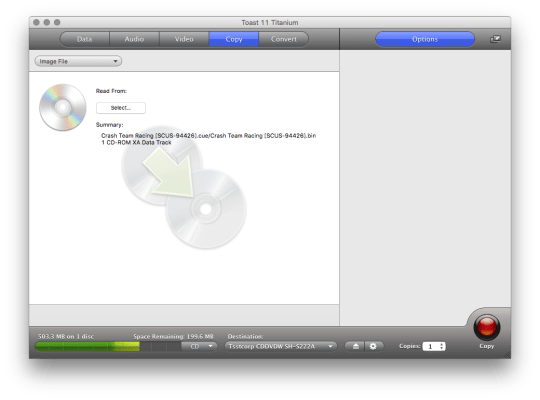
Step 2) Drag the bin file to Toast

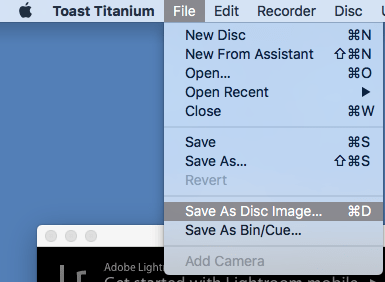
Step 3) Select from the file menu, “Save Disk Image…”

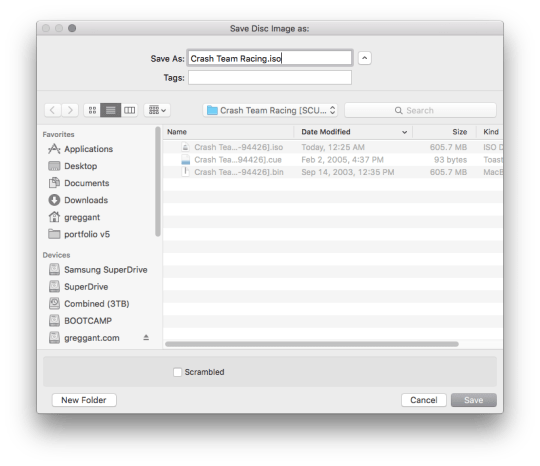
Step 4) Save ISO
You may get an error prompt on naming the disk, type in a name and proceed. At the actual save dialog to be sure to change .toast to .iso and save. Congrats, you’re done!

Method 2) Binchunker
Binchunker is a CLI utility, meaning it’ll take a few terminal commands to operate. Its pretty easy once its set up as you simply need to run a single command to spit out an ISO. Most guides for using Binchunker are pre-10.11 (El Capitan) and suggest installing Binchunker to /usr/bin. OS 10.11 really wants you to avoid using this so we’ll be using the “rootless” method. Users running old versions OS X may be able to use the now defunct GUI wrapper BChunkerFE, but I was unable to, despite my damnest to make it work. To my knowledge, the only freebie utility for OS X that’ll convert ISOs is Binchunker, fortunately, its fast, free and easy to use. Users with even basic terminal familiarity shouldn’t have any problems.
Step 1)
Install MacPorts; the full instructions are here including the download links. MacPorts is package manager and compiler for open source software.
Step 2)
Open a terminal and type:
sudo port install chunk Now you’re able to run binchuncker
Step 3)
Binchunker requires the paths to the bin and cue files and always follows the following pattern:
bchunk -v pathto/disc-image.bin pathto/disc-image.cue YourNewISOname or the less terminal savvy, dragging files to the terminal window will automatically type the path to the file. In the terminal type (with a trailing space) and do not hit return:
bchunk -v Drag the bin file to the terminal window, it should read:
bchunk -v path-to-file/my.bin
Make sure there’s a trailing space after bin and drag the cue file. It should now read:
bchunk -v path-to-file/my.bin path-to-file.cue Now name your file by typing in your desired name. Note: You do not need to type .iso as the file will be given the .iso suffix.
bchunk -v path-to-file/my.bin path-to-file.cue MyISOname Hit return and binchucker will do its magic; the completed .iso will end up in the root of your user/home directory. Congrats, you should now have an ISO file.