-
There is much to be said about the Apple Watch
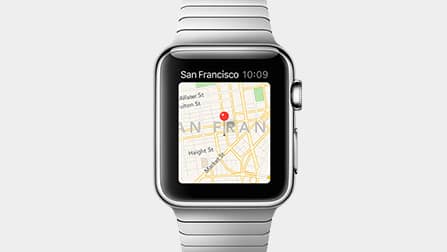
Source: Apple.com
Unsurprisingly, the Apple Watch is perfect for the person who uses their iPad to peck out an e-mail when sitting three feet from his/her laptop. There’ll be a lot to be said about the watch, and inevitably Apple’s entry into the watch territory means that the smart watch has arrived amidst host of caveats (phone dependency, limited battery life, limited functionality), making them more accurately “wrist terminals” than smart.
Wearables aren’t new (Nike+ shoes, Go Pros, Heart Rate/blood sugar monitors and GPS watches), just the modern implementation of the smart watch is. If the smart phone is now the hub if your portable network, the wearable movement has really paled to really adventure is thinking outside the screen (watches and Google Glass). There’s a world of smart things from pet collars, to car keys ready to be interfaced with. Inevitably, smart watches in future generations will become smaller, sport better battery life and perhaps more useful. That said…
Let’s hope we start looking further instead of smaller.
-
Wurfl + Modernizer for HTML5 background video
Modernizr is wonderful and pretty much becoming as prevalent as JQuery. I’m not going to further evangelize Modernizr as there’s so many resources that can summarize Modernizr better than me. We’ll skip the introductions and assume you’re familiar with Modernizr. If you aren’t, google it and you’re in for a treat :)
Modernizr isn’t quite enough for background video
I was working on a proof of concept codepen.io project and needed to do one of the most basic of things: Load a background video but only on desktop device. . Its pretty easy to craft a Modernizr script show/hide content on touch and video takes as such. However, Modernizr doesn’t make a distinction between mobile and non-mobile.
html
<video autoplay loop id="bgvid">
 <source src="video.mp4" type="video/mp4">
 </video>
Javscript
if( Modernizr.touch &|| !Modernizr.video){
var isMobile = true;
$("#html5-video").show();
}else{
var isMobile = false;
$("#html5-video").hide();
}Getting smarter
The problem with the above is the video is still being loaded into the DOM. Its not ideal as Modernzr alone isn’t quite enough to target just mobile devices where users are likely going to be on data plans.
We can leverage JQuery to make this smarter using the .html() attribute.
html
 <script type="text/html" id="video-tpl">
 <video autoplay loop id="bgvid">
 <source src="video.mp4" type="video/mp4">
 </video>
 </script>
<div="target></div>
Javascript
var $target = $("#target"),
videoTpl = $("#video-tpl").html();
if( Modernizr.touch || !Modernizr.video){
var isMobile = true;
$target.html(videoTpl);
}else{
var isMobile = false;
}The beauty of the above example is that the <video> tag will be completely ignored when we do not want it to be used. However, Some windows 8 devices despite running Windows 8 desktop may be eliminated because of our conditional statement, as Modernizr will detect the touch functionality.
WURFL to the rescue
Head.js is a viable option (its a cousin to Modernizr, tossing plenty of body classes onto the HTML) as it’ll put a .mobile class onto your body. However, you’re probably going to get more accurate device definitions from WURFL as it’s been around for several years uses a well established device database.
So with a single conditional change from modernizr for touch to WURFL.is_mobile, we can more accurately detect mobile only devices.
html
<script type="text/html" id="video-tpl">
<video autoplay loop id="bgvid">
<source src="video.mp4" type="video/mp4">
</video>
</script>
<div="target></div>
Javascript
var $target = $("#target"),
videoTpl = $("#video-tpl").html();
if( WURFL.is_mobile || !Modernizr.video){
var isMobile = true;
$target.html(videoTpl);
}else{
var isMobile = false;
}That’s it, now our background video will be ignored if the browser does NOT support <video> or is a mobile device.
-
Using the Korg padKontrol as a sustain pedal (or other functions)
Pictured: Side view of Korg MicroKey 37, USB I/O but no ¼ input for a sustain pedal
Introduction
A lot of smaller Midi keyboards don’t sport sustain pedal inputs such as my much loved Korg MicroKey 37. Sadly, I’ve yet to see a simple USB midi pedal, (although there are standalone midi pedals that require a regular Midi I/O interface). There isn’t an easy fix but if you have a Korg padKontrol or another programmable device, here’s a workaround.
Seasoned vets may want to skip this but with a newer generation of Midi users: the solution might not be so obvious. Digital-Audio-Workstations (DAWs) such as Logic, Cubase, Protools all can accept multiple midi channels or devices at once and even route them to one single virtual instrument/synth. This means for a program, such as an organ like the Native Instruments’s B4 or the Logic’s internal Organ, you can use two keyboards at once to more accurately simulate an organ (as organs often have two sets of keys). However, this ability isn’t just limited to situations such as this. Midi instruments can be set to communicate on the same channel, so a keyboard and a set of midi faders could be linked to Native Instrument’s Massive to control the oscillators and parameters unique to that synth.
Midi is flexible if anything, but also cumbersome as a technology, having barely changed at its heart since its inception in the 80s, still rooted sending in 7-bit integer to various channels. To this day, many DAWs still allow you to view the raw midi data in channels + numerical values. With that said, modern applications make it pretty easy to use many midi devices at once.
Since at its root midi is still simply numbers being sent to various points, many midi controllers allow you to change this functionality to maintain maximum compatibility. A knob can be assigned to a particular Midi Control Channel, (commonly referred to as a Midi CC) to which software (or actual hardware) can determine how this data is used.
Example: a knob could be assigned to MIDI CC 13 which controls phasing on a synth. Twisting the knob, adjusts the phase sync accordingly.
While this all starts to get esoteric, its important to realize that this ability can be used for something simple, like adding Sustain Pedal functionality to a cheap midi keyboard that doesn’t have one.
What you will need:
- A midi device with the ability to send/receive or program its midi function with its proper software installed or which can be programmed via the device itself.
- A sustain pedal (if your midi controller supports a physical pedal. Midi pedals are generic and can be bought at many music shops. Rock band foot pedals work as well, as they are midi pedals).
For this example, I’m using a Korg PadKontrol to control my sustain pedal.

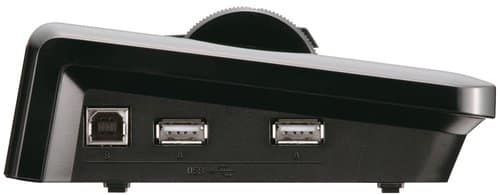
Pictured: back view of Korg padKontrol, the “headphone” like jack is actually a ¼ inch input for a sustain pedal.
Configuring your software can be pain, I can’t specifically include instructions for hardware that I do not own, but generally you will need to make sure in the preferences, the software is able to communicate with your device. Usually this requires setting the midi in and out. Often devices will have a control port when or channel.
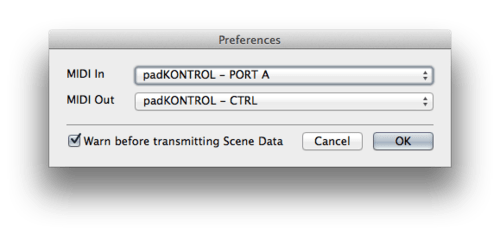
Pictured: A properly configured Korg padKonrol requires going to the preferences and setting the Midi In and the Midi Out to the padKontrol
Step 1: Program software.
Programmable midi devices with send receive usually allow you to program the device remotely. Below is the Korg PadKontrol’s software. Highlighted in red is the setting for the PadKontrol’s sustain pedal

Step 2: Setting the up the pad or pedal
Double clicking the Pad in the Korg Padkontrol allows you to set up and change the Midi CC.
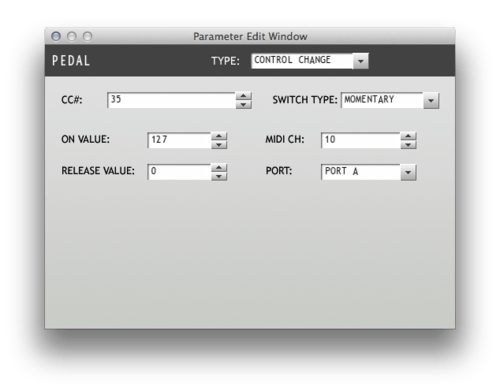
Setting up the Midi CC means setting the Midi CC to channel 64 as this is the general midi specification for sustain pedals. (A full list of common midi settings can be found at various websites such as the following website,
Step 3: Save your configuration to the device.
After the setting for the pedal has been configured, usually it requires transmitting the settings back to the device. The Korg padKontrol has the ability to store multiple “scenes” (separate midi configurations) so I set this to scene #1, which the device boots up to when plugged in.
Step 4: configure your DAW.
Once in your midi application of choice, you may need to configure the instrument input to accept all incoming midi channels from all available devices.
-
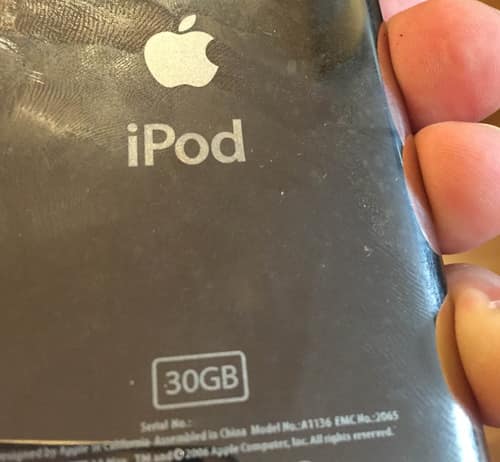
The 30 GB iPod Classic that grew up to 64 GB
Forward
I wrote this back in October, after buying an iPod classic replace my missing 120 GB iPod classic. I finally edited and posted it on December 4th, 2014, and since then there’s been a run on the used iPod market.
The hackable iPod
Ever since the iPod Minis, the iPods have been fairly hackable. After all, the iPod is essentially a portable hard drive that happens to have an ultra light weight operating system and screen attached to it.
What really prohibited most hackers was that the economics didn’t make much sense when CompactFlash card with only a quarter of the storage, cost more than an entire iPod. Most iPod hacking thus was limited to the iPod Mini faction, (where replacing 4 GB Hard drives with equal or greater sized CompactFlash cards was affordable) or loading custom firmware like Rockbox for Flac compatibility (before Apple offered its own lossless alternative).
The end of an era
Quietly, Apple killed the iPod classic after the iPhone 6 announcement and all the remaining inventory was liquidated at an alarming rate. Boxed iPod have shot up in price on Ebay and Amazon.com beyond their MSRP.
Wanting to get an iPod before they’re gone forever, I settled on a 3rd party refurbished iPod 30 GB on Amazon.com, sporting a new faceplate, backplate and battery for $100.
Why not get an iPod touch you ask?
Simple: Storage, Cost, and retro appeal. To this day, there isn’t a media player better at playing music. And iPod can be operated without even looking at the screen (Try skipping tracks or pausing a touch screen blinded folded if you don’t believe me). iTunes Match + Siri certainly works well but with data throttling and a frequency for driving places without 4G, means local storage still wins out.
Shopping list
Hacking an iPod doesn’t require much in the way of specialized tools, there’s a variety of tools out there. Years ago, I replaced a battery in a friend’s iPod, which came with a cheap plastic hook. Since then there’s been a small cottage economy of iPod replacement parts and tools.
The iPods 5G+ all use ZIF (Zero Insertion Force) based HDs, which is a quasi standard for ATA variants.
So in addition to my iPod, my parents list included
- Newer Technology iSesamo - Tool for easily opening iPod
- Micro SATA Cables - CF Card to 1.8 inch ZIF Adapter - An adapter suited for converting ZIF to CompactFlash
- SD-CF II: SD to CF Type II Adapter - A CompactFlash to SD card
- 64 GB SD Card to hold me until 256 GB cards drop in price.
CompactFlash cards for years have had SD card beat on storage and price but in the last two years, SD Cards have come a long ways, with the fastest cards at 250 MB/s write speeds. Impressive but it is still half the speed of a Lexar 3400x card with an incredible 500 MB/s write speed. However, the price differences between CF and SD are quite profound, with CF cards often costing 2x-3x as much as the SD card. Since I’m not recording 4k video, a moderate SD card will suffice.
Popping open the iPod is easily the most difficult part of the entire procedure (although my old 80 GB iPod, bless its little heart could be squeezed open by hand). Prying it open, I marred the case edge in a spot (barely noticeable). You may want to check out more expensive iPod opening tools if you’re concerned.
Once open, removing the HDD took a little more force than I expected from a “Zero Insertion Force” tool, but it only took a minute to connect the CF card.

Yanking out the iPod HDD requires being careful not to wreck the ZIF connector. Once done its a matter of simply plugging in the ZIF adapter with CF Card + SD Card.
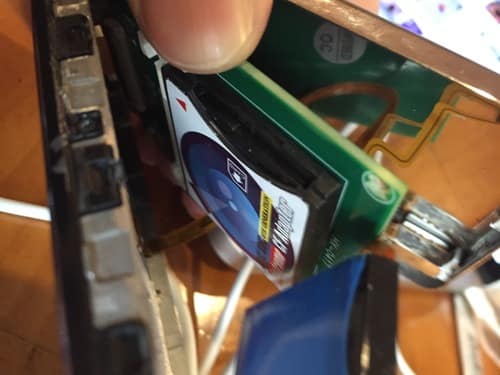
Snapping it back together is a little tricky as the battery free floats in the iPod.
Once all the parts are installed, I plugged my iPod into my computer and booted it up. The iPod went into factory restore mode, to which iTunes automatically reloaded the OS.

Now the waiting game begins. 128 GB cards as of writing this are floating below $50, whereas 256 GB are $100.
Things observed:
The battery life sucks but I didn’t test the iPod before swapping media types. I’m curious if the iPod battery wasn’t new.
There’s no speed increase between skipping songs. There may be a small speed penalty for using the CF to SD adapter negating much gains. Also the iPod uses massive caching to avoid skipping so its quite likely that the speed gains aren’t felt partly due to the OS trying to compensate for its spinning parts.
The iPod seems to run fine otherwise, it doesn’t have the days of charge than I’m used to so I may end up buying another battery.
-
Soon to be the most over used Emoji
As part of the proposed Emoji Unicode 7.0 update, comes “Reversed Hand With Middle Finger Extended”.
Enjoy your emoji…

-
Generate your own Susy grid with simple for loops
Last week I wrote the Newbie Guide to Installing Susy, and I’m a big fans of Susy as it does some of the heavy lifting for maths for Sass by calculating gutters and columns. However, its documentation doesn’t lead by example so I’ve put together the following CodePen (CodePen last week started supporting Susy) to illustrate how to easily create your own susy grid.
Due to the maths, it make take a minute for this to compile over at CodePen
See the Pen Susy: For-Loop Generated Responsive Grids by Greg Gant (@fuzzywalrus) on CodePen.
-
Resolving CodeKit’s “Compass was unable to compile one or more files in the project” error
In your web adventures you may come across the following problem:
Compass was unable to compile one or more files in the project:/Library/Ruby/Gems/2.0.0/gems/compass-1.0.0.rc.0/lib/compass/commands.rb:14:in `<top (required)>': undefined method `discover_extensions!' for Compass:Module (NoMethodError)
from /Library/Ruby/Site/2.0.0/rubygems/core_ext/kernel_require.rb:54:in `require'
from /Library/Ruby/Site/2.0.0/rubygems/core_ext/kernel_require.rb:54:in `require'
from /Library/Ruby/Gems/2.0.0/gems/compass-1.0.0.rc.0/lib/compass/exec.rb:7:in `<top (required)>'
from /Library/Ruby/Site/2.0.0/rubygems/core_ext/kernel_require.rb:54:in `require'
from /Library/Ruby/Site/2.0.0/rubygems/core_ext/kernel_require.rb:54:in `require'
from /Applications/CodeKit 2.app/Contents/Resources/engines/compass/compass/bin/compass:43:in `block in <main>'
from /Applications/CodeKit 2.app/Contents/Resources/engines/compass/compass/bin/compass:30:in `fallback_load_path'
from /Applications/CodeKit 2.app/Contents/Resources/engines/compass/compass/bin/compass:41:in `<main>':Sounds like a mess doesn’t it? Fortunately, you can resolve this rather quickly as its an internal compiler error.- Go to Codekit’s Preferences and select other tools.
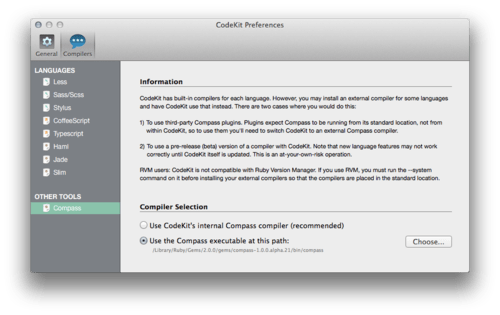
- Select “Use the compass executable at this path” option and click choose.
- Go to Libary/Ruby/Gems/2.0.0/compass-1.x.x/bin/compass and select the execuatable file.*
* Note: you may need to install a newer/different version of compass. I’m currently using the pre-release alpha 21 since I need it for susy grids. You’ll need to fire up your terminal and run the following command (it’ll prompt you for your password)
sudo gem install compass -v 1.0.0.alpha.21 --pre(You will want to check the latest version of Compass before running the above command, you may also need to install Sass first.).
-
MS spoofing Safari’s user Agent in Windows Mobile and it doesn’t matter
One of the most significant issues we saw was related to sites not detecting that IE on Windows Phone is a mobile browser and therefore providing desktop content. This often results in sites displayed with tiny text that you need to zoom in to read and then pan around. It also often means more data is transmitted over the phone’s data connection because the content isn’t mobile optimised. Images are large and many more ads are downloaded and shown.
- IEBlog
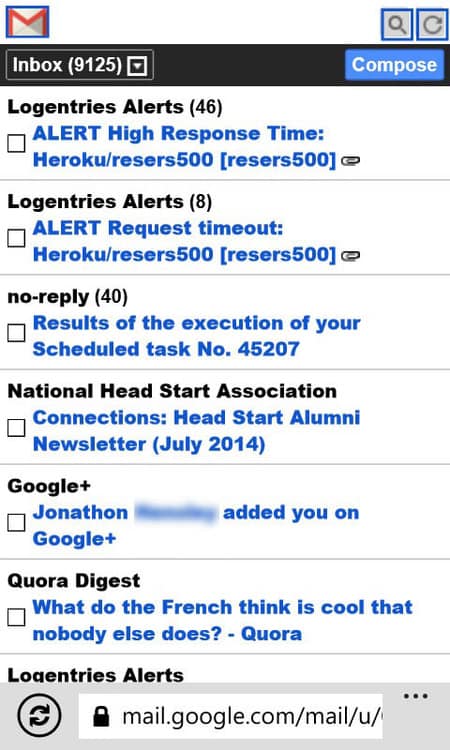
Yesterday I posted this screenshot of Gmail.com running on IE on Windows 8 Mobile. Three things immediately jump out at me:
- This is a band-aid fix. This may serve up more desirable versions of webpages but functionalities that are webkit dependent will not work leading to user frustration and development frustration. (If Windows 8.1 mobile is like Windows 8 Mobile, IE doesn’t support file uploads for instance)
- If you’re still using User Agent strings in the era of Modernizr and Head.js, you’re doing it wrong. Its a simpler and more elegant solution
Quite frankly, no one cares about checking for mobile IE users. If google is willing to serve up the above for Gmail, why should any of us care? I’m not arguing this is the right attitude but it is the reality MS is facing. At my current job, we have one client who actively checks for Windows Mobile glitches, and its only because they run a full-MS tech stack from ASP.NET to Surfaces, to Windows phones and of course desktops.
-
How to get photos off Windows 8 Mobile (windows phone) with no SIM card or MS account
The short answer: Use the internal E-mail Client
This is one of those posts that seems laugh worthy but I spent the better part of the last 40 minutes trying to get screenshots off the lone Windows 8 phone in our office. Its currently running the factory install, we use for testing hence no MS account or SIM card, and it mostly sits in a corner in the office unloved.
None of the default apps on the Nokia phone have any sort of web share, so you’re SOL and require Nokia registration (which appears to require a SIM card) for the Nokia apps.
I should have shot for the lowest tier solution first

Love your iOS or Android device, this is what Gmail.com looks like on Windows 8 mobile
The problems
- Apparently when connected to Wifi only and never have had a SIM card, you cannot sign into Windows Store.
- You cannot use File upload on any webpage. I first tried to sent the screenshots to my iPhone using Good Reader and then a free image sharing service, neither worked
- GMail on windows 8 mobile looks akin cellphone internet on 2007 on a Blackberry. It didn’t even work, no chance for e-mailing.
- The time servers on Windows 8 mobile appear to be messed up and it requires a trip the settings to fix.

Ouch.
-
Having trouble installing Susy Grids? The n00b (newbie) guide to installing Susy Grids on OS X

For some reason, the Susy website doesn’t make it abundantly clear how to install Susy.
I’m going to go ahead assume you have Node / Ruby / Sass installed and Compass. Suzy requires Compass version 1.x.x or later (as it is part of compass).
1. Check your compass versionFrom the Terminal check your compass version:
compass versionIt should return something that looks like this:
Compass 0.12.7 (Alnilam)
 Copyright (c) 2008-2014 Chris Eppstein
Released under the MIT License.Note: Running the compass installer as of writing this will install a 0.x release. You will need to install the prerelease version. If you see Compass 1.0.0.alpha.x or later, skip step 2!.
2) Install Compass prerelease
From the terminal run the following command:
sudo gem install compass --preThis may take a few minutes and you’ll see a lot of install in your terminal
3) Install Susy!
Now we’re finally ready for susy. From the terminal run:
gem install susyCongrats! You should be in business. Note you’ll need to install Node.js, which can be downloaded here, Ruby which which can be downloaded here (OS X comes with it preinstalled), Sass which instructions can be found on how to install here, and you’ll need to set up a compiler like Grunt.js or Gulp.js or an application like CodeKit or Prepros to run compass to compile your SASS.
Happy Coding!
-
Wearables - Solving problems that I don’t have
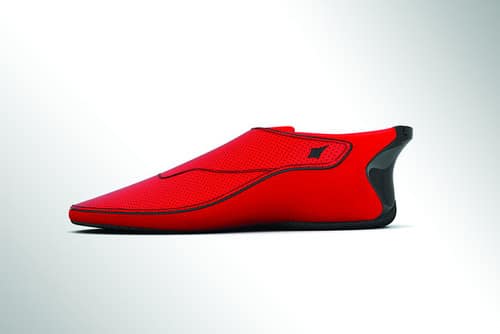
Photo Credit; Wallstreet Journal’s poorly titled “India’s Answer to Google Glass: The Smartshoe”
I’m a bit tired of the wearable revolution. So far the wearable market has been solving the problems I don’t have and the most interesting “wearables” predate the wearable term.
- Garmin Foretrex GPS 101 GPS watch: 2001 >
- Go Pro Video Camerea: 2005
- iPod shuffle: 2005
- Nike+: 2006
- GPS Dog Collar (for hunting): 2008?
What’s interesting is all of these products have been designed for a task, and not a nebulous omnipresent platform, not an always worn such as the much lauded Nike+ Fuelband or Google Glass or even Google Wear watches. While I wouldn’t argue to dissaude to dream big, we’ve had wearable tech for decades in various facets. The only difference today is the mode of thinking as an always on platform. Just as there’s no correct pair of shoes for all situations, its silly to think there’s a wearable correct for all sitations.
-
Favicon overkill…
I asked our luxury automaker client’s agency for a high resolution icon to use as their favicon…
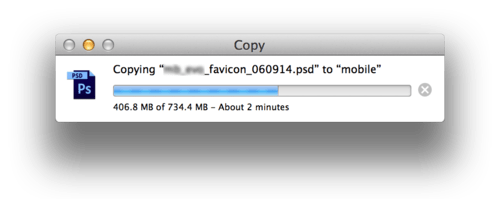
…I can’t tell if they are inept or trolling me, but the 134 x 134 image included vector logo ontop of a smart layer of a 4000 px x 3000 px background complete with multiple images, adjust layers, layer styles, and layer masks.
-
iOS 8 and 10.10 - Symbiotic Harmony
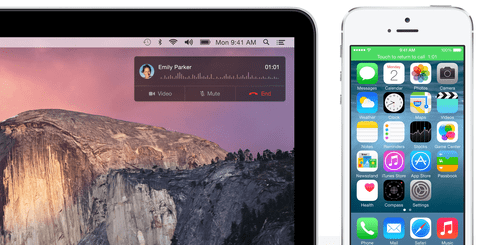
Image credit: Apple.com
For years I have had (and I know many others) the fear of the iOSification of OS X, where OS X slowly regressed from desktop operating system to iOS stand-in. I was unnerved by Lion and Mountain Lion’s feature set of Mac App Store, Push Notifications, Natural Scrolling, Launchpad, full screen apps, GateKeeper and Game Center.
10.9 was either the eye in the storm or the pivot away from borrowing from iOS, which amounts to the best OS X upgrade since 10.3 which drastically improved OS X to the point that it was no longer necessary to boot OS 9. Mavericks may haven’t had much on the exterior, instead of superficial iOS feature looting you had truly desktop features: tabbed finder, tags, time coalescing, app napping, compressed memory which resulted in a magical update that improved performance and increased battery life.
Now we’re getting a unified vision of the path of iOS and OS X, its a unified universe where each operate independently but when paired unlocked a unified experience that no other can offer. Start writing and e-mail and resume on your Mac. Airdrop files easily from iOS to OS X and back. Tether to your iPhone automagically. For the user, the experience becomes even more seamless. It exemplifies the old Steve Jobs maxim: “It just works!”
Developers as are thrown a much needed bone with SpriteKit, Scenekit, Cloudkit, HomeKit and of course Swift. If Mavericks was the retuning of OS X, then Yosemite and iOS 8 is switching the fuel.
Software may not be as exciting to consumers as hardware, but ultimately Apple real strength has always been software. Sure Apple’s hardware offerings are routinely in the highest end camp but they are easily reproduced. The software is not.
-
Things and the internet and complexity
Apple is readying a new software platform that would turn the iPhone into a remote control for lights, security systems and other household appliances, as part of a move into the “internet of things”.
Apple plans to take on rivals Google and Samsung and make a “big play” in the world of smart home technology at its Worldwide Developer Conference on June 2 in San Francisco, according to people familiar with the matter.
This will reinforce the view, held by some in Silicon Valley, that Jetsons-style home automation is the next frontier in technology as growth in smartphone sales begins to slow in developed markets. - The Financial Times
Maybe I’m unimaginative and not visualizing the big picture but I still haven’t thought of practical applications for appliances beyond security, lighting, heating and entertainment which are all systems; not one off devices.
Even as a “user interface” developer *cough* front end *cough* , I see no point to obfuscate my interactions with my refrigerator, oven, dishwasher, washing machine and dryer.
There has to be an obvious gain of functionality/ease-of-use to offset the additional complexity. An iPod despite being more complicated to use than a CD or Tape player has so many advantages that any issues with managing digital music libraries on a computer was easily nullified by the ability to carry massive catalogs of music one’s pocket. Adding wifi/internet/bluetooth support for a car for diagnostics/vehicle health would easily offset the trouble of downloading an app and pairing it with the car. Can we extend this beyond systems and large ticket items?
I look forward to seeing how Apple envisions the future. My guess is they’ll provide the platform (elegant and beautiful in execution) and let the manufactures figure the later out, for better or worse.
-
The life of a Front End Developer
 One of the most dynamic roles in the world of web today is that of the front-end developer. Always keeping up with design and code trends, it is the front-end specialist who keeps a website’s experience on the cutting edge. To understand the role of a web developer, it’s important to…
Entertaining, a little dated (Firefly references, Flash is dead, not much on current JS stacks like Node, Ember, Angular, etc) and I don’t think I know a single Front End Dev that’s a gamer. I’m like the lone dude with a Steam account that I play now and again. Front End Developers as ground don’t quite fit the usual nerd archetype. As a group, they’re more likely to argue fonts faces than Star Wars.
Otherwise, fairly accurate. Coffee is the fuel drives web development.