-
Amazon's "You Will"
Amazon announced Go, a fully automated check out brings us one step closer to the AT&T's strangely accurate "You Will" future. In a twist of irony, AT&T has had almost nothing to do with any of the innovations proposed. For the Amazon addition, see this advertisement. The only technology proposed in all of the six adverts truly out of reach is "Have you ever renewed your driver's license from a cash machine?"
The real question is if this tech becomes licensed, who'd be silly enough take up Amazon on it? It's every bit as nihilistic as Uber's "Drive with us while you still can while we work on automating your job."
-
Hulu's rise
Recently upped my subscription to Hulu from paid to ad-free and haven't regretted it. The real shocker is the slow uptick in quality programming, Causal was good, 11.22.63 was great, and Handmaiden's Tale's timing is phenomenal. I'm finding myself looking at Hulu more than Netflix for the #2 spot behind HBOGO.
Also, I recently finally for the first time used Prime to watch TV for Man in the High Castle and Grand Tour after having Prime since its inception. They were surprisingly good.
-
Trevor Noah is finding his voice
I sat down today and listened to Trevor Noah's interview with TheBlaze pundit Tomi Lahren and held off reading reactions until tonight, The Atlanic.com almost verbatim matched my reaction on Facebook. "He's finding his voice." Trevor doesn't score any KOs but does try to pin down Tomi to explain what sort of protesting she'd find acceptable to only have her evade, and evade more, and manages to get in a few humorous jabs. There's the same visible tension that's reminiscent of Bill O' Reilly and John Stewart whenever they shared a screen.
One of Trevor's quirks, his inability to get worked up or as emotionally invested as John Stewart suddenly becomes part of his appeal. If Stewart's cross to be bear was the from frustration from the stupidity of the Bush Jr era, Noah's looks to be the exasperation from the intolerance of the Trump era.
As a long time Daily Show fan, I've found myself rather taken with Samantha Bee's aggressive punk-rock zero-tolerance for ignorance which has Stewart-like quality. That said, I'm rooting for Trevor as he has the biggest shoes in entertainment to follow. I look forward to seeing where Noah goes from here.
-
Never Let Your Guard Down On Social Media - Standing Rock Edition
I usually keep my professional blog free politics that do not concern web development/digital privacy/security, but under the current climate, I have a feeling that line will be blurred a bit.
I was on FaceBook, and a friend of mine shared a t-shirt with Dwayne "The Rock" Johnson wearing a shirt that took a pro-Standing Rock protest standpoint. Instinctively, I clicked the Like button and decided to check out the shirt more, as I've been one to buy such things to support causes, including a shirt by a local Portland Company where proceeds went to Planned Parenthood.

That's when things got fishy; the page redirected to another website, standwiththestandingrock.com/support redirected to teezily.com, a site that had zero information other than general sizing and color options for the t-shirt. I poked around and didn't see any notes about profits or sales. Next, I went to standwiththestandingrock.com, which again redirected to another site. Clicking back, I noticed the original photo of The Rock looked mighty fishy, so I did a quick reverse image search.

I re-read the copy, nowhere did it say proceeds went to Standing Rock protesters or any native tribes, simply just show "support" in very engrish like writing. Clever. A WhoIS search returned no information on standwiththestandingrock.com other than it was registered on November 7th.
While there wasn't any real "scam" in the traditional sense (I'm sure I'd of received a shirt), it was precisely tailored to make me fill in the gaps if I weren't paying attention.
-
Using Modernizr to detect IE versions
Recently I've been using grunt-modernizr, which is pretty fantastic as it can be set to build a modernizr js file based on the classes that appear in your CSS or JS, as I've been trying to move away from HeadJS. While this post might be a bit antithetical to the point of Modernizr, there are plenty of reasons why to detect IE versions
IE version Test Class IE8 and below csstransforms3d .no-csstransforms3d IE9 and below subpixelfont .subpixelfont IE9 only csstransforms3d subpixelfont .no-csstransforms3d .subpixelfont IE10 and below borderimage .no-borderimage IE10 only flexbox .flexboxtweener IE11 only borderimage .borderimage Note: borderimage, csstransforms3d are a core detect. Please note these detects are not IE exclusive.
-
I hate nouns instead of version numbers for OSes
The conversation goes something like this: "Can you check out the rendering issue on Android?"
Usually, it's followed up with, "What version of Android is this happening in?"
"Franken Berry"
Then its off to google...
It's telling that Apple never applied its naming scheme to iOS yet Google felt it necessary to do as such on Android. Inevitably every time I complain that about this, someone feels compelled to point out "But Greg, it's in alphabetical order!". Google had to go on and fuck up a potentially good idea. There's no sense of versioning. A ≠ v1.0 or v0.1 and N certainly does not equal v14 or v1.4 So much for cleverness. Apple with OS X named only its yearly releases, any point releases of that OS didn't get its own namesake like "Tiger Cub" or "Lion Pride." Android, any candy snack could be a massive upgrade or a minor point release. As a decidedly non-Android user, I'm not about to commit 14 sugary snacks to memory, and I question what happens after 12 more releases of Android?
It's a small burden, but I can't help but be annoyed.
-
Installing Magic Pad on Windows 10 for a non-Mac
The Apple Magic Pad doesn't work out of the box on Windows. It takes a few steps, and some features simply aren't available to windows, even in with a Mac running Windows natively such as three+ finger swipes. You'll need a Windows PC with bluetooth 4.x. I'm going to skip how to connect bluetooth devices to Windows 10 as Microsoft provides basic instructions and there are multiple ways to connect to bluetooth from a Windows PC, including the Control Panels.
Step 1: Download Apple's Bootcamp drivers
Unfortunately, you'll have to download ALL of Bootcamp's drivers, for a 800+ MB payload. The latest version that can be downloaded from Apple's website is Boot Camp Support Software 5.1.5621
Step 2: Unzip but Do run the main installer
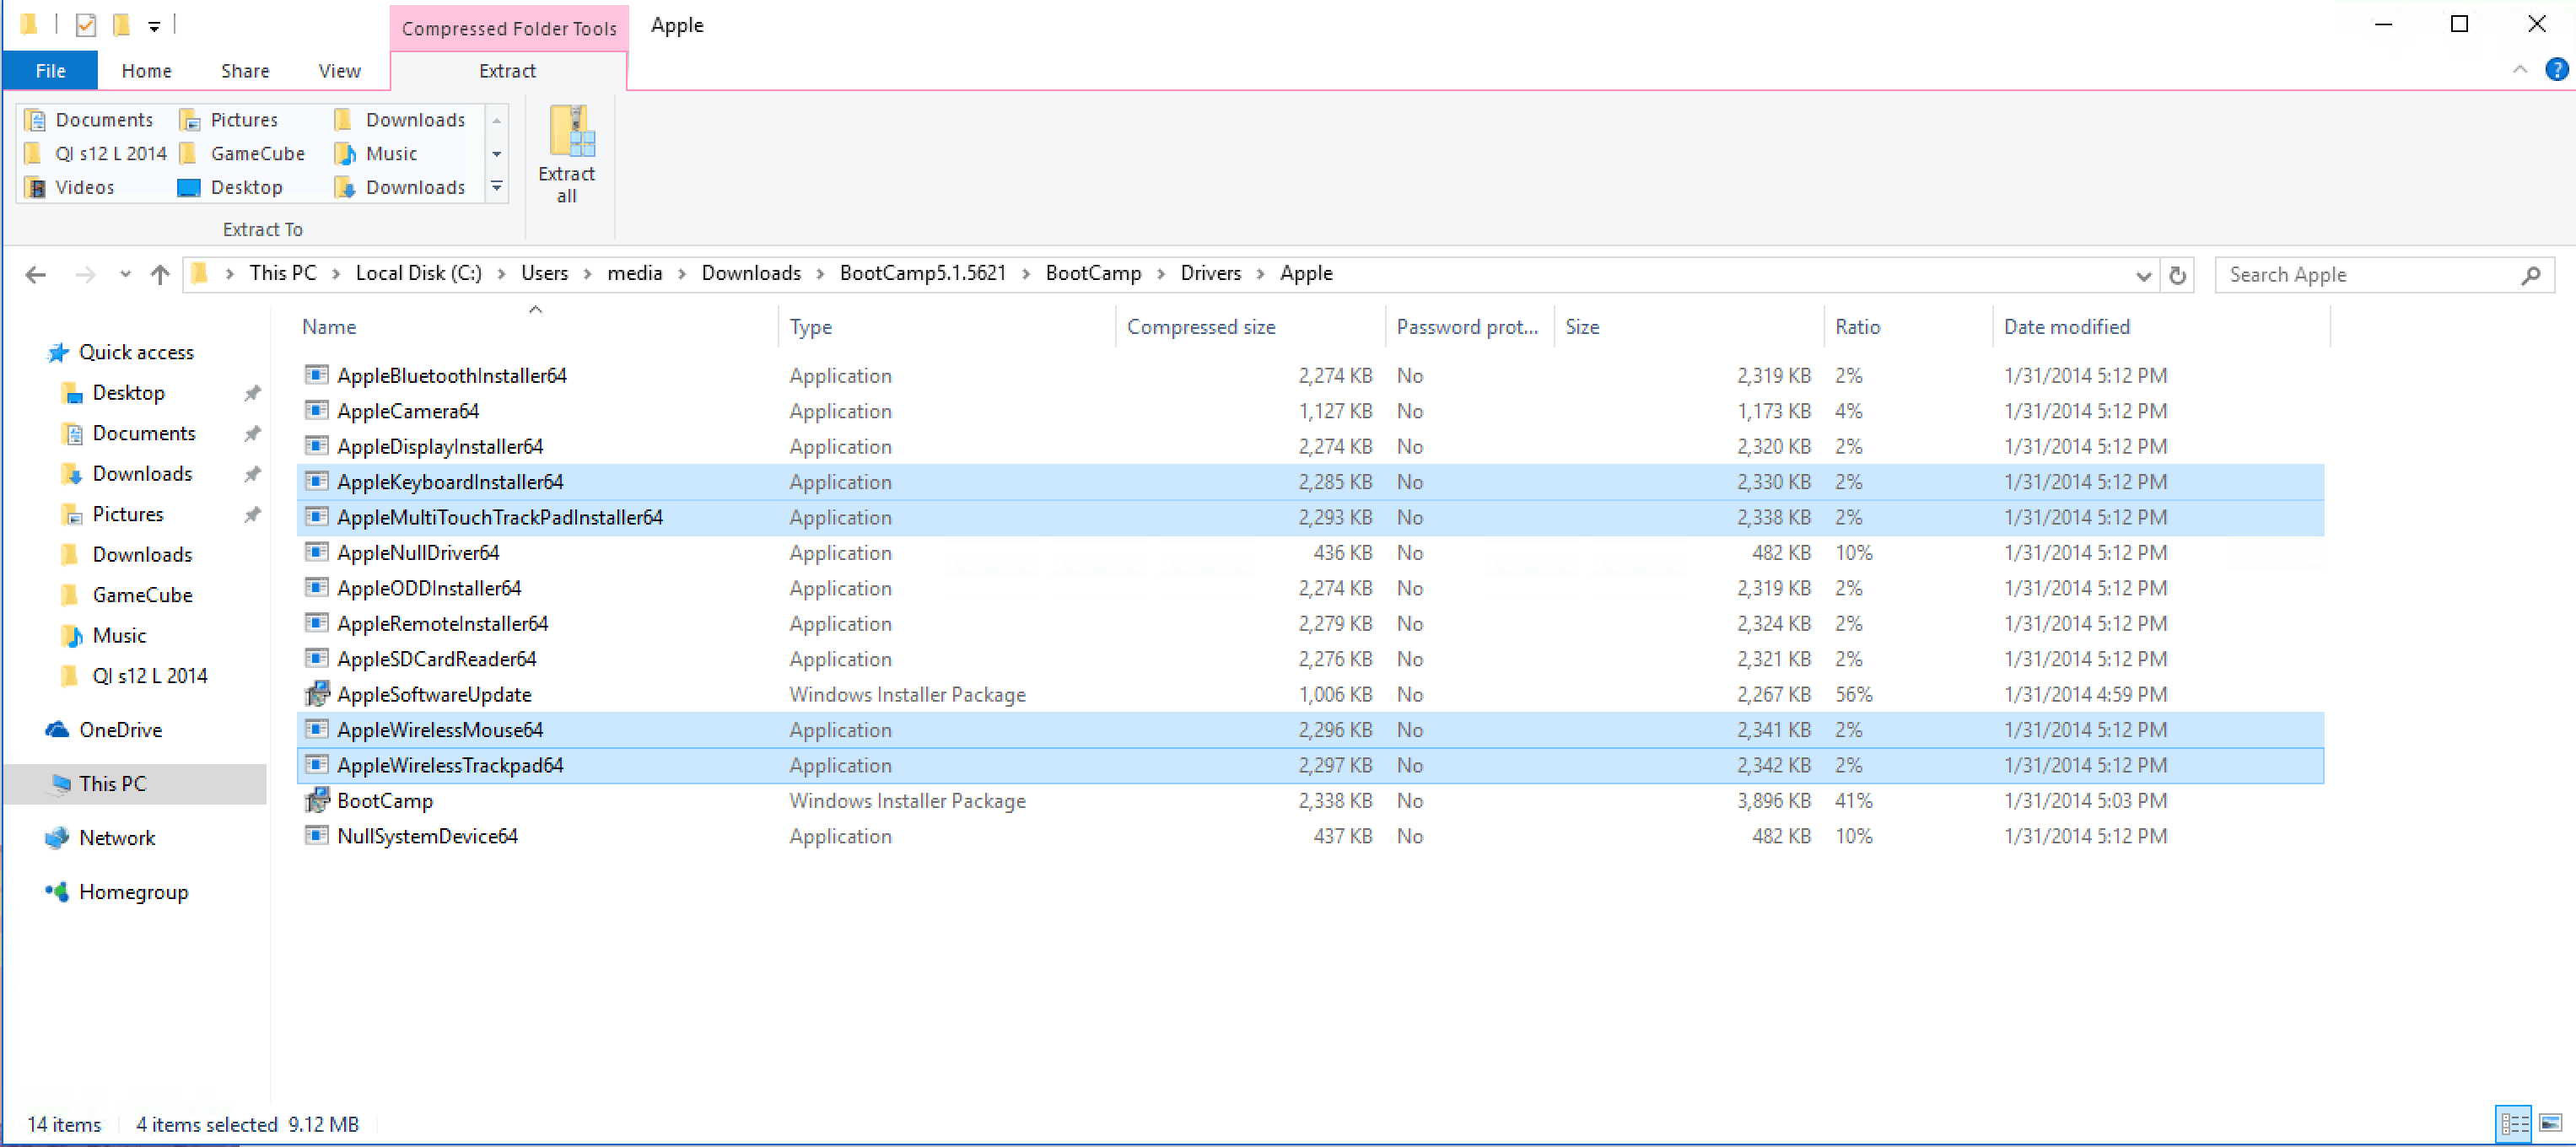
Do not run the main boot camp installer. Within the Bootcamp Folder, locate the drivers folder and open the drivers folder. Install the AppleWirelessMouse64.exe and AppleWirelessTrackpad64.exe and AppleMultitouchTrackpad64.exe.
Step 3: Better support (optional)
At this poin, the Magic Pad is usable-ish, although I did find that tracpadmagic.com's drivers help considerably.

TrackPad Magic's drivers may cost $9.40 but are well worth it to give trackpad users basic control.
-
Add Mac OS Classic sounds to your iPhone (iTunes 12.x / iOS 8, 9, 10) or any text tones
In the past, I've written how to add text-tones/ring tones via iFile, and I've received a few e-mails how to add text-tones other ways. Apparently, there's a lot of really bad posts on how to add text tones, but adding text tones is moderately easy for via iTunes for the iPhone. For this demo I'm going to Mac OS 9 Classic Alert sounds. They're fun; they're retro-ciché and best of all, very short sounds which is important in an alert.
Step 1: Download the sounds
These are easy to get from stevenjaycohen.com MacOS Classic Sound Pack v1.4's, the direct link is macossounds.zip(1.77MB). Thank him for curating them. Download unzip and navigate to the M4R folder.
Step 2: Add to iTunes
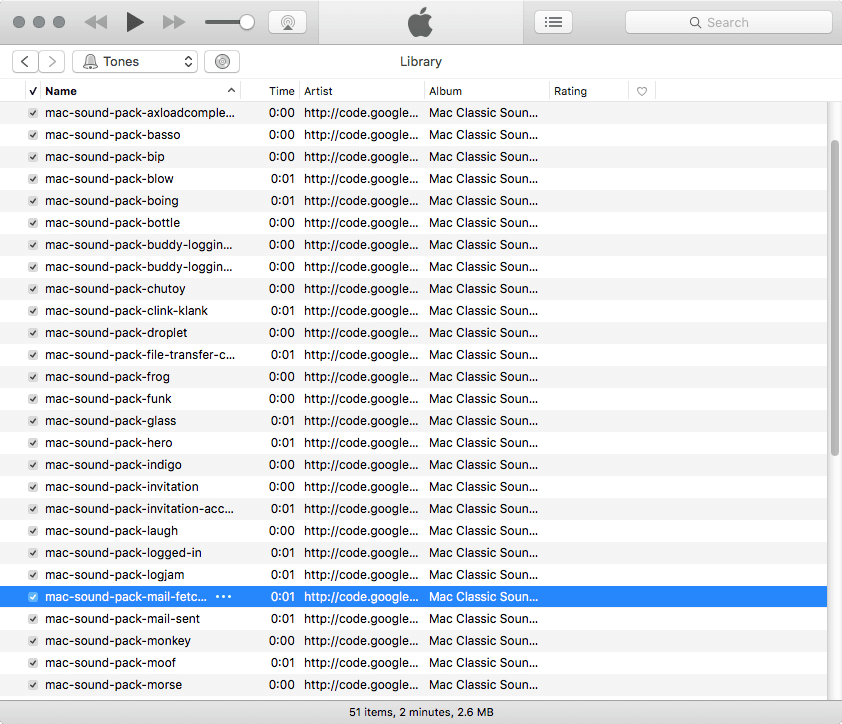
You can either drag or double-click the files to add them to iTunes. Once added, to see them you'll have to switch to "Tones" to preview.
Step 3: Attach your iPhone

You may not even need to attach your iPhone if you sync wireless and click on the phone icon.
Step 4: Sync
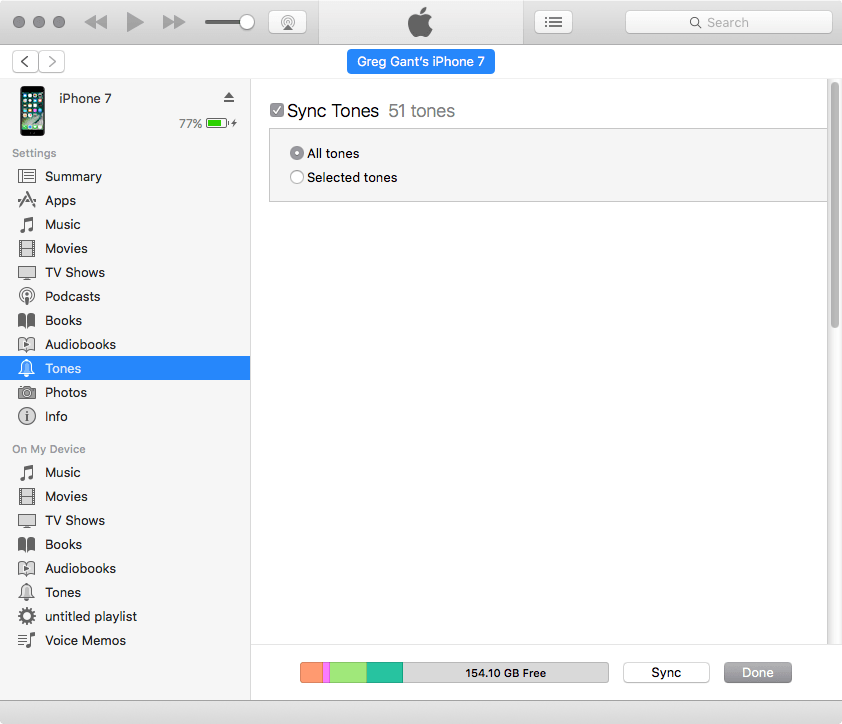
Go to Tones and Click sync...
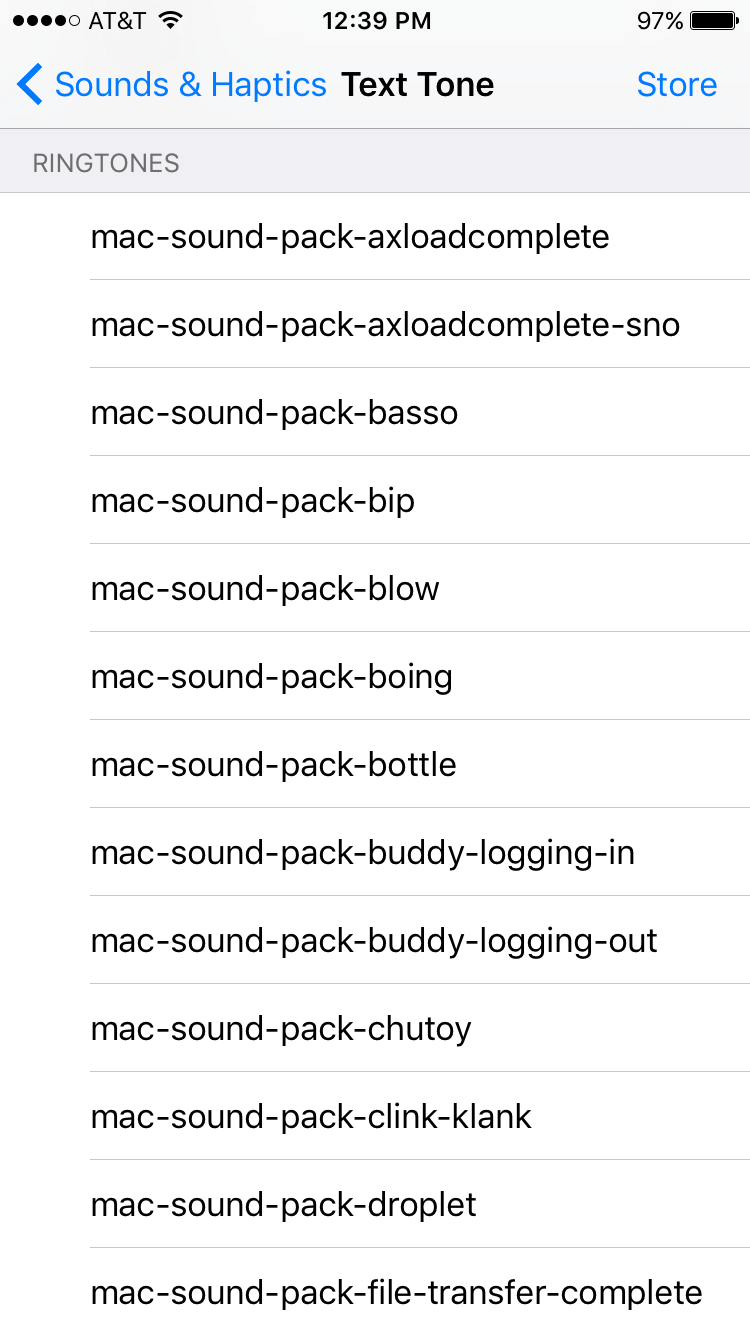
Step 5: Select your new text tones
Go to Settings -> Sounds & Haptics -> and scroll down to the Sounds and Vibrations Patterns on your phone, select one of the alerts.
-
MacUpdate.com switches to dark UX and forces Shovelware in place of expected files
Back in the day, there was a company called TechTracker that tracked OS X update apps, and other platforms. It eventually was purchased by CNET and folded into the abysmal mess, downloads.com. Fortunately, we always had MacUpdate, and while it evolved over time to a place that sells software bundles and its own service, MacUpdate was generally a safe place to go software searching.
One of my most read articles (accessed around 20,000 times) is a tutorial that walks through how to add text-tones to the iPhone using ifile. In this, I recommended using a package of Mac OS Classic sounds and linked to none other than Mac Update.
Here's what happens today when you try to link download it today:

So far so good...
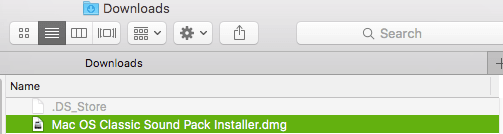
The download URL is to a zip file, but DMG?

So much for a good thing, instead of the expected content, in this case, a zip containing classic OS 9 sound files, I got a mislabeled, which struck me as nefarious. It's misleading and wrong. Not to be detoured so easily, I tried grabbing the URL to the file directly https://www.macupdate.com/download/19079/macossounds.zip. Still, I was given the same damned DMG. It appears that the ID number in the URL now just redirects to an ID number to the mislabeled dmg as https://www.macupdate.com/download/19079 grabs the same file. I suspect for all hosted files now just use a reference ID to the old expected file and returns a DMG with a like name to the same installer DMG. I'm sure the update manager is nice and wonderful but I do not want it. Instea, your website is directly trying to deceive me into installing it. So MacUpdate, I'm calling you out.
-
Thoughts on Front End Development in late 2016
Despite my blog supposably being tangentially related to the fact I do develop stuff sometimes, recently most of my blog posts have been about not-front-end-development, likely an outgrowth of the fact I spend 40 some hours any given week talking or thinking about front end development.
To keep me on course, I'm going to try to do a quarterly update on what's been bouncing around in my head, what I've been up to, what excites me and what disappointments me.
Preload seems like the next no-brainer step in optimization for campaign and CMS driven sites.
CSS's Object-Fit isn't much better than using Background-cover. You need JS to calculate the actual image size> as the DOM reports the image as the space occupied by the area that the image could occupy as opposed to what it occupies.
I'm learning React... slowly.
I finally built a simple useful coding tool, CSSFilterGenerator.com in early August.
Principle App & Flinto are the best ways to date to mock up UX interactions since they rely on Sketch. Previously attempts to introduce Pixate was a bust.
I still love Grunt, but I'm thinking its time to switch to Gulp.
Apple's re-commitment to Safari with Safari Technology Preview makes my heart swoon.
The IoT revolution has yet to impact my job, either it still hasn't hit, or we've learned that Twitter on refrigerators is silly.
You can rename IE to Edge, but it still is a laggard.
Flex and floats were meant to live in harmony, not in isolation.
- The PS4 4.0 release supposably updated the browser, I should do more browser tests.
-
Initial Reactions to the iPhone 7
Despite the amount of frustration I've had over the iPhone 7's headphone jack, I ended up ordering one, a 256 GB matte black. Since so many people have written far better reviews than I could hope do on my own, I recommend reading Ars Technica's amazingly good review. Instead, I'm presenting my collected thoughts in a semi-organized (or semi-disorganized) list.
-
The iPhone 7 is the worst Apple experience I've had out of the box, I say this as an iPhone 3g, 4, 5, 6 owner, numerous iPods, PowerMac G3 / G4, PowerBook G3 / MacBook Pro Retina 2013/2015, Mac Pro owner and Apple TV 1 and 2 owner.
Why may you ask? Software. As a 128 GB iPhone 6 owner, I backed up my phone locally as my paltry $1 a month iCloud 50 GB account is only big enough for my photos. Normally upgrades are simple: back up old phone, restore the new phone. This goes around, the OS X 10.11.6 security update that was piled in with iTunes bricked my Mac Pro which meant a 10-hour recovery while Time Machine restored my Mac Pro, first time I can remember since 2009 that I've needed to use Time Machine. When I finally got my Mac Pro up and running, I discovered iTunes doesn't have a simple way to download missing IPA files. I ignored the Mobile Applications folders in Time Machine to save space. Thus I was left to search other drives for the IPA files and manually redownload the rest. Once restored my iPhone 7 proceeded to mangle all the iMessage profiles with the contacts. For example, My dad's messages appeared to be coming from a former roommate of an ex-girlfriend whom I didn't even realize was a contact in my phone. Fortunately, this appeared to be only related to my iPhone 7 and not my MacBook/Mac Pro/iPhone 6. I contacted Apple Support which ultimately had me restore: I guess there's no soft-fix. After a second restore, all way finally normal but I burned hours and hours on setting up my phone. I'd rank it more of a burden than fixing my dishwasher.
The iPhone 7 is bright and loud. I never had much problem with the iPhone 6's brightness, but the iPhone 7 is bright... and the second speaker makes it noticeably louder.
It's really zippy, it's hard to tell how much is just iOS 10's quicker interface but the iPhone 7 certainly launches apps faster. I found the iPhone 5 the first iPhone that didn't feel painfully slow. The iPhone 7 is the first iPhone that web surfing feels natural. I imagine the iPhone 6S truly was the first thanks in no small part to the 2 GB of RAM never having used one, I'm speculating.
The iPhone 7 gets hot. Downloading apps or music seems to cause it get really warm.
-
I hate not having a headphone jack. I'm not going to bother writing more, you can read my thoughts Headphone jacks are NOT the new floppy drive and The Courage of living in a gated community. As much as I like Gruber, he's wrong about corded headphones (for now). There may be a wireless future for headphones but it's not Bluetooth.
I haven't done much shooting with the camera, but it seems like a nice improvement. RAW is going to make my life wonderful.
The iPhone 7 can drain its battery faster than you can charge it. Cue up around 10 albums you'd like to store locally and watch the battery drop.
The new home button is a gimmick.
Force touch mostly feels like a shorter version of the long press. It's the touch equivalent of a right click. It's nice feels under utilized and a bit unpredictable. I suppose right click may have felt that way to Mac Users at one point but even OS 9 had right click support so I can't really recall the two button mouse transition.
The variable bright LED flashlight is nice, although 3-steps seems a bit overkill. I'm used to my maglight and bike lights, that either have low or high beams.
Apple's aesthetics leads to me wonder if the end game is a wireless charging iPhone? I can only imagine a ludicrous inconvenience of packing around bulky pad chargers, and strapping our phones to them to charge on the go. Perhaps one port is the plutonic ideal in Ive's universe? Are dongles really less unsightly than unused ports? This doesn't bode well for an Apple car... a sealed box that can only be serviced by Apple, using a non-standard charger that requires carting a giant dongle, without any physical buttons in the car.
256 GB is finally getting to the storage levels the iPhone needs. A device that shoots/edits 4k video, RAW photos, can store music / movies, games, documents, and surfs the web is a mobile workstation. It's time it has RAM and storage to reflect that. 3GB of RAM should have been standard for all iPhone 7 models. We're almost there in performance, RAM and storage and I/O.
Speaking of I/O: Where is USB 3.1 or at least USB 3.0? It'd make transfers so much nicer and give quick charge options. Lightning Cables are silly in the era of USB 3.1, and only points to Apple's desire to gouge the consumer. At least FireWire was an open standard used on Windows PCs as well as Apple products. Lightning cables are dated.
Perhaps one of the better features of the headphone jack was the ability to discern jacks without mics and headphones with mics. This meant my line level was always maxed on my iPhone and my earbuds were at listening level. The dongle doesn't seem to have this ability. So much for the ease-of-use in my car.
The lightning port earbuds are unreliable as a microphone. Using a dongle set works better, file this under "headphone jacks are better". Edit: Apparently I'm not the only one and there's a fix on the way, not that I care really, they need to fix the ergonomics first.
The iPhone 7 is the least exciting iPhone generation update. The iPhone 7 very well could be the iPhone 6.5s, or the iPhone 6$ or the iPhone 6$E or simply the middle finger emoji.
I have no plans to buy a bluetooth headphone set. I have enough devices that require charging. I'm also tragically unhip and use a wired keyboard and mouse at home.
Edit: Only hours after completing the post, I saw daptr announced a case with a headphone jack. I told the Apple sales guy I was banking on cases with headphone jacks. He gave me a "Yeah right buddy," and I mentioned a thread on the CoreAudio mailing list. I don't think he knew what CoreAudio was but hey, we can't all be me right? Looks like I was correct. Now to survive to December for something that should have been part of the original phone...
iOS 10 reactions
Some of the transitions of the iPhone 7 are also locked into iOS 10. iOS 10 seems to be the same exact experience for iPhone 6S users as 7. For 2 year releases that's usually not the case, the iPhone 5s vs iPhone 6, and iPhone 4s vs iPhone 5 both had real estate changes. It looks like we're committed for the next 2 years to the same resolution. The biggest changes between the 6 and 7 mostly lie in RAM and force touch, much akin to the iPhone 5 vs 6 with 64 bit and Touch ID. With the SE, we can probably reasonably expect iOS 11 and possible 12 to continue to support the iPhone 5 or at least the 5s.
The Messages revamp was necessary. While the stickers and emojis will wear thin, the live link preview feels expected in the age of Slack, FaceBook messenger etc. OS X's messenger needs the same revamp. Messages send very fast too.
The dock change is neither good nor bad.
TI feel a bit of Stockholm syndrome with Apple. I use their products for iOS and OS X. They make damn fine hardware but given a choice I probably wouldn't use it. I didn't feel this way towards iOS until the iPhone 7.
Organizing Applications is painful as it was in iOS 6. It's time for a change.
Hey Siri spooks me when both Venmo or Square support it to transfer money. Seems a little too easy to transfer $1000.
Security with Touch ID needs a second layer for the paranoid like myself. Touch ID + 6 pin validates the phone for X amount of time for Touch ID only. If touch ID doesn't work, it defaults to your choice of pin or text password.
iOS is starting to need a minor file system. Having a common /documents for inter-app exchange would help with guess work, and allow for easy storage management (Delete, or share or edit with options). It sounds un-iOS but this is starting to become problematic and iCloud Drive already provides the interface. Loot it. Allow users to mount their phones as a disk drive. Not everything needs to be on iCloud nor should it.
iOS 9's ability to install content blockers hasn't changed, and we're all better for it.
I didn't even notice raise to wake until I read about it, I'm so programed to pressing power.
iOS 9's app switcher still lives on much to my ire. I prefer seeing more apps opposed to more of the app.
As one of the few stalwart non-emoji users of the world, I'd like to auto suggest to disable emojis. I like my smilies to be text, :) and :( have effectively served me for nearly two decades. I like the retro-ness.
I'd really like Apple's color sweetening/processing profiles to extend to RAW captures. The best thing about the iPhone camera is the gorgeous smart-processing. I'd like the RAW files to have the embedded recommendations. In fact, I dream that Lightroom on my desktop had Apple's auto adjust feature for lazy corrections.
iOS 9 to iOS 10 has absolutely no downsides that I've encounter besides the suggesting of emojis. It hasn't lead us to the promised land of power user features, but the new APIs do open up better avenues for developers. At the same time, it's a nice forward upgrade that takes little time to adjust to.
Update: 9/19/16 - Case update
Update: 9/20/16 - Lightning port headphones note
-
-
The Courage of living in a gated community
John Gruber's defense of courage takes a remarkable amount of "courage" to write with a straight-face. For anyone who gives a damn about audio quality, wired is the way to go. Ever wonder why Bluetooth headsets tend to sound worse? It requires transcoding to A2DP. It's removing the most successful port of all time, dating back to 1878 in its 1/4 inch iteration, and the billions of devices the iPhone can connect to headphones, speakers, cars, home audio systems, to the more esoteric like audio inputs for recording, square readers, turntables and so forth.
In the Steve Jobs era, when the technologies were killed we were offered, superior successor. When Apple killed the floppy, I hadn't used a floppy for ages and USB was infinitely better. When Apple killed its own FireWire port, USB 2.0 was far more widely used, and USB 3.0 was trickling in. When the MacBook Air was introduced without optical media, streaming media was the new normal and USB thumb drives offered larger, faster, rewritable storage that could be attached to a keychain.
The difference is in the Tim Cook era; the practicality is gone. The Mac Pro slashed its PCIe slots for no discernible reason other than the planned obsolescence. The 20 inch iMac dropped its ability to upgrade its RAM. The MacBook sports a single port for no apparent reason. And the iPhone 7 has dropped its headphone jack with no-benefit to the consumer. Gruber making the analogy is of Apple dropping Flash support isn't correct. HTML5 is superior. Instead, a more apt analogy would be to argue the MacBook's singular port is better than having 2, as users love expensive easily lost dongles.
This isn't a "What would Steve do?" article but more Apple's slow realization that once we're locked into its eco-system, we'll tolerate most of its attempts to gouge us in the wallet along the way. If Apple has courage, it's courage lies in its willingness to fuck every consumer in the wallet.
-
Gifbrewery 3 - Mini Review

Years ago, I reviewed Gifbrewery, a gif creation software, that converted video to a gif, and in my usual style lamented over the death of, GifBuilder. GifBuilder remains the gold standard of gif creation, even acing out Macromedia Fireworks for its simple and insanely effective ability to create gifs frame-by-frame. It wasn't perfect, but it did offer the most control.
When I reviewed GifBrewery back in 2013, it was revelatory, as it made the creation of video-to-gif easier than any solution. Creating a GIF's workflow was simplistic:
- Open Video file
- Crop / Add text overlays
- Assign gif properties (frame rate or frame count, looping mode, colors, color dithering)
- Create
GifBrewery mostly focused on quick and dirty video to gif conversion with the only editing allowing users to fade in and out text overlays (with blending modes), image crop and in and out points for the video edits. While it wasn't GifBuilder, it was something novel and certainly worth its small price.
Gifbrewery to Gif Brewery 3
One of the more unusual changes is a product name change from Gifbrewery to Gif Brewery, along with a flat icon. Outwardly Gif Brewery 3 sports a more polished UI. Out the gate, the icon bar is right-clickable allowing the user to display icons, or icons + text or simply text, along with a customizable toolbar. It's a nice and welcome improvement and keeps in line with OS X centric applications like Sketch.
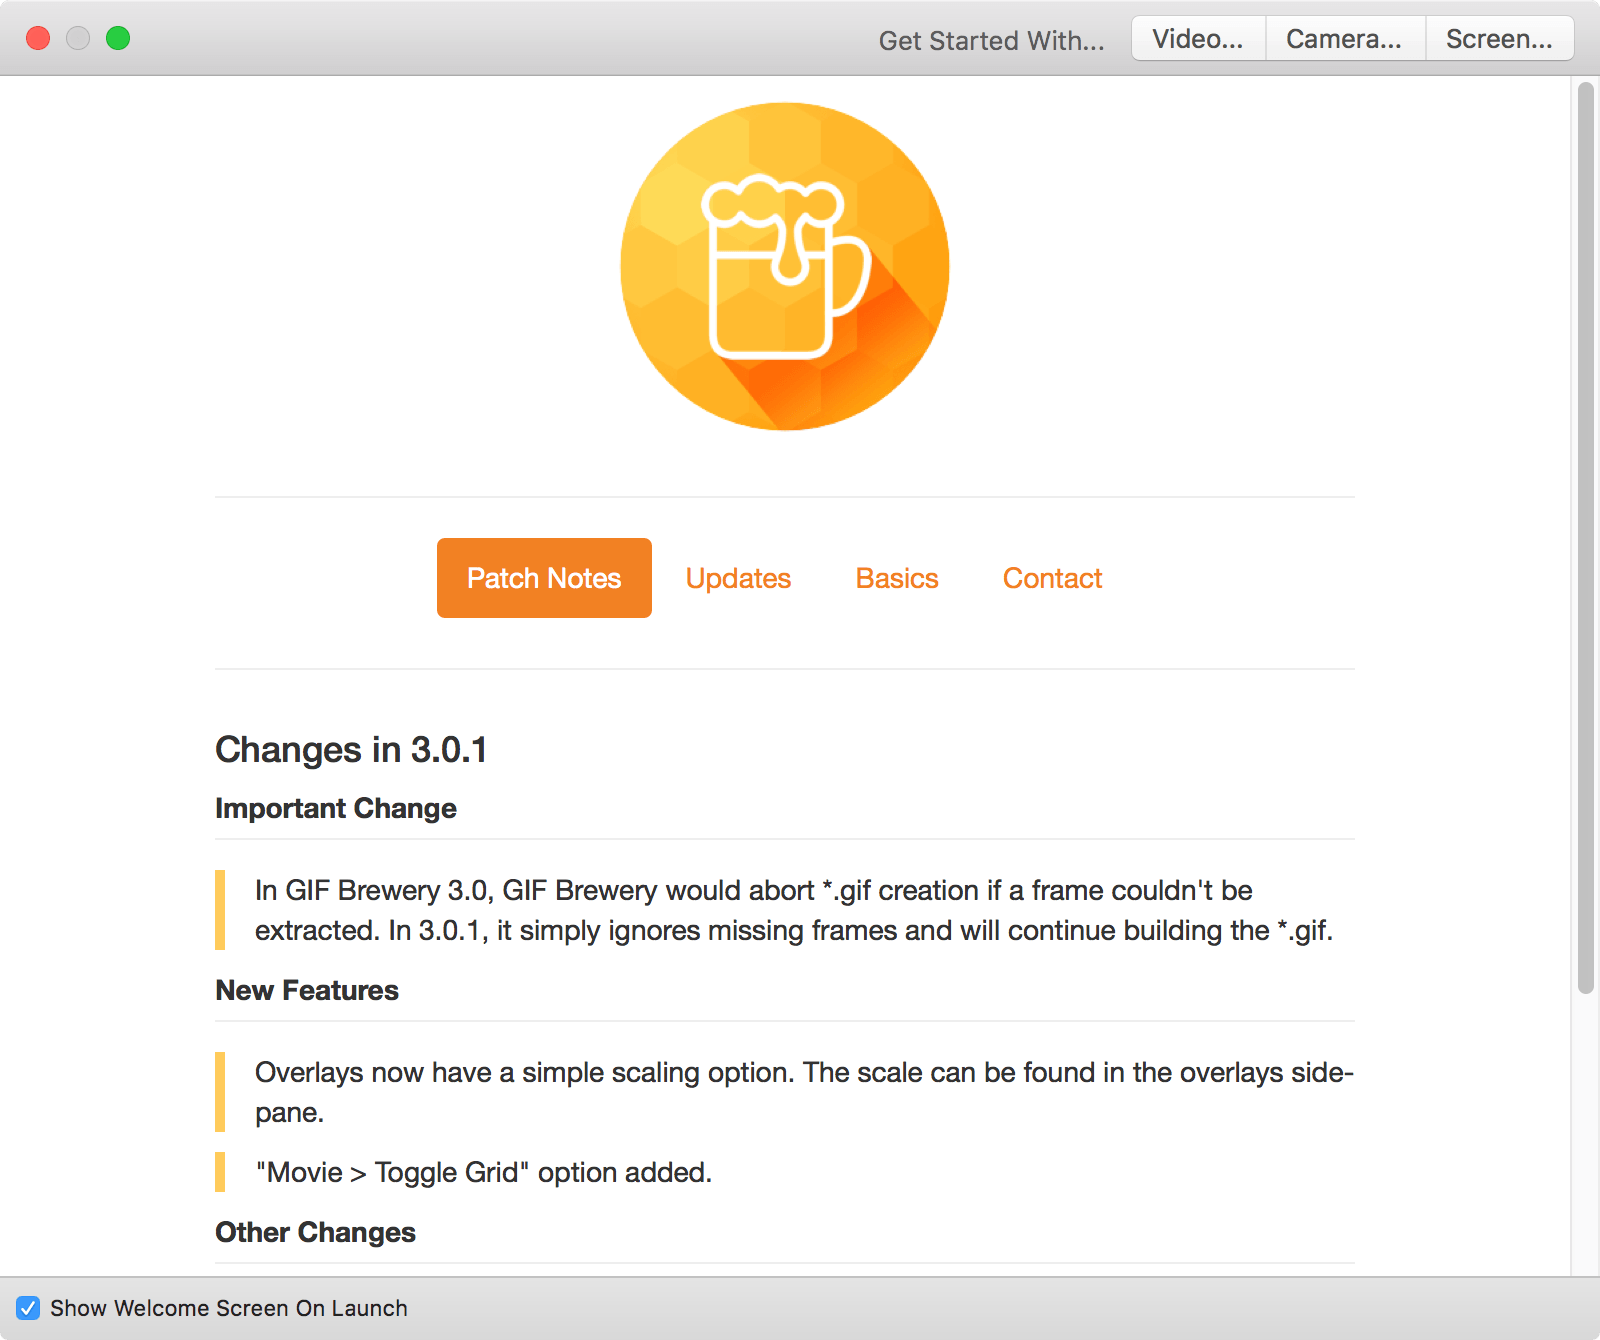
Gif Brewery 3 splash screenThe splash page greets you with a few new features: screen capture, camera capture and video import, the first two being entirely new. Screen captures/camera captures allow the user to record to a movie file, that is automatically imported to Gif Brewery. It's essentially the same as importing a video except removing the step of using a 3rd party program to capture. It's surprisingly useful.
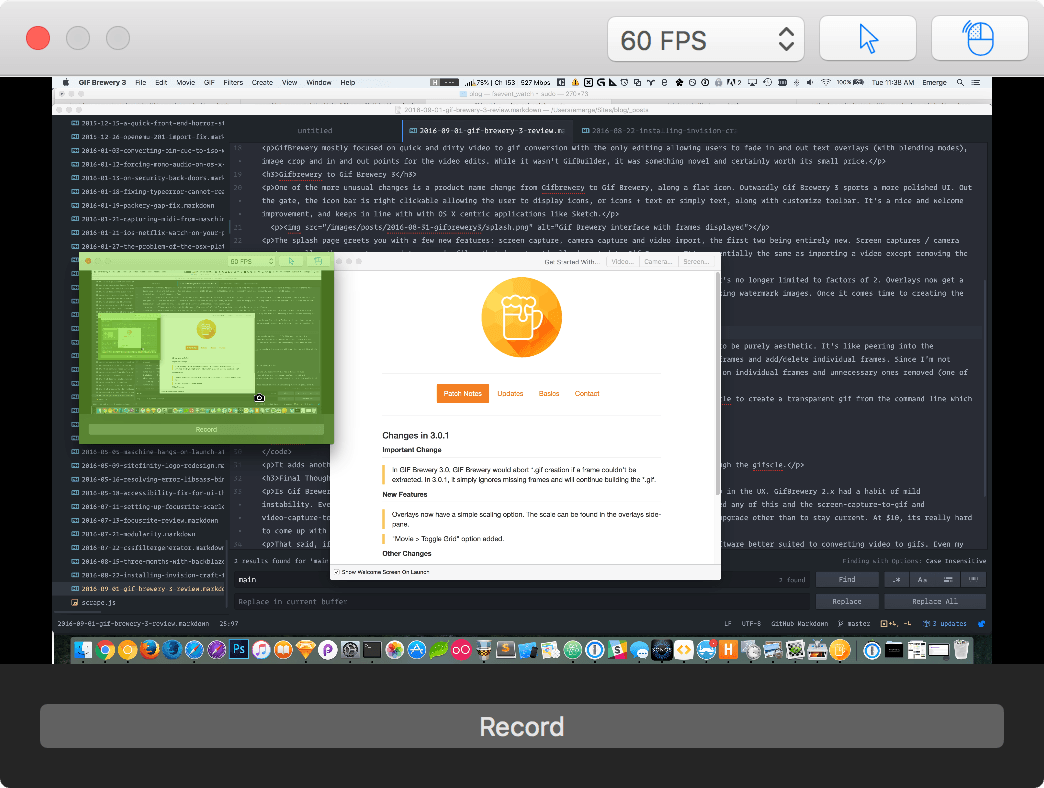
Screen Capture only captures full screen, cropping happens in post.The gif properties operate almost exactly as GifBrewery, except with a much more useful color count that's no longer limited to factors of 2. Overlays now get a bit more TLC with the ability to add image overlays. It's a welcome addition, likely useful for anyone looking watermark images. Once it comes time to create the gif, Gif Brewery 3's seems a little zippier and has a more meaningful status bar.
View frames but to what end?

Gif Brewery now can to view each frame inside a gif in a frame view function which appears to be purely aesthetic. It's like peering into the potential of what GifBuilder offered in almost 20 years ago: the ability to set time delays on individual frames and add/delete individual frames. Since I'm not privy to the minds of the developers, I can only hope it allows a per-frame editing mode so that gifs can hang on individual frames and unnecessary ones removed (one of the most sorely missed features in Gif Brewery).
The other tall ask I have is the ability to create transparent gifs. At this point, I use gifsicle to create a transparent gif from the command line which looks something like:
gifsicle -U --disposal=previous --transparent="#ffffff" -O3 opaque.gif > transparent.gif
It adds another step, and the optimization seems to go out the window once I've run my compiled gif through the gifscle.
Final Thoughts
Is Gif Brewery 3 worth it? That depends, if you own GifBrewery 2.x, the differences are mostly locked up in the UX. GifBrewery 2.x had a habit of mild instability. Every now and again it'd crash, but infrequently. It's nice that Gif Brewery 3 hasn't exhibited any of this and the screen-capture-to-gif and video-capture-to-gif could be a killer feature for some users. That said, there's not a huge incentive to upgrade other than to stay current. At $10, it's really hard to come up with any good reason not to upgrade.
That said, if you don't already own Gif Brewery 3, it's the best game in town. You won't find a piece of software better suited to converting video to gifs. Even my beloved GifBuilder never had that functionality.
Developers, if you're out there reading. If Gif Brewery 3 adds my much pined for individual frame editing, it'd be worth every penny and then some. Gif Brewery 3 is now only inches from becoming one of the stars of the indie Mac scene. Even as I write this, it's already a piece of software I use professionally in my front end web development and love.
Version Reviewed: 3.0.1
Official Website: Gif Brewery
Mac App Store: Gif Brewery 3
-
Three months of BackBlaze - A Review
Review in progress
I finally bit the bullet and plucked down $50 for a year subscription. I'm a bit data paranoid, years and years ago I lost an IBM 75 GXP Deskstar (a 45 GB HD) in early 2001. It's a funny detail that I can remember something so esoteric as a hard drive model, especially considering how many I've owned over the years but it speaks to the gravity of it.
I had a PowerMac G4 at the time, with a set of two 18 GB Western Digital HDs, a 40 GB Maxtor, and had moved to my new (fast for the time) 45 GB IBM Deskstar. Back then, I was near the absolute fringe with so much storage. All it took was self encoding a sizable collection of a few hundred CDs to 320 Kbps MP3s to fill nearly my entire 40 GB. It all came down to a realization that I had: Data storage would become so abundant that there was no reason to store my music other than at the highest bitrate. Thus, I decided I'd eat the cost upfront to save myself regret in the future.
I wasn't the only person to be burned by IBM, soon a class action lawsuit followed but the damage was done. My 45 GB Deskstar, (affectionately dubbed the "deathstar" by legions of scorned customers) was my boot drive, storing all my most important documents. While I didn't lose my music collection, the data I did lose was irreplaceable: art projects, websites, school work, among other things. My lesson was learned and data backup became part of my life. My first attempts were CD-Roms, followed later DVDs. Eventually using I started other HDs as manual backups, even Carbon Copy cloner and a RAID1 + 0, setup.
While it might sound like paranoia I had good reason to fear, my income throughout college and after was always tethered to my web projects. Even my art major, digital arts depended on a working computer. When Apple debuted Time Machine 2007, all of my previous habits were abandoned and it changed the way I fundamentally approached my computer for the better.
Backblaze

So as I write this, I've been using Time Machine for 9 years. Time Machine ranks as absolutely one of the best features Apple has ever added OS X. If you're not using it, you should be. Time Machine provides backup repository of your entire HD, including revision histories.
Time Machine is damn near magic but it has major flaw: Its a local only backup solution. Unless you have a friend with a beefy internet connection, a VPN, and who's willing to leave a NAS (Network attached storage) drive on 24/7 and a little OS X know-how, you're limited to backing up Time Machine only when you're physically at your Time Machine Drive's location. It doesn't take much imagination to see how this could be problematic: a catastrophic power surge could ruin all your electronic devices, frying your computer and time machine drives, or perhaps your house is burglarized, computer, hard drives and all. For these and many more reasons is why offsite backup is the holy grail.
So what is Backblaze? It'd be easy to simply call BackBlaze a "cloud" time machine, but that'd be inaccurate. Backblaze doesn't do version history, and it isn't particularly designed for single file downloads (although it can be done).
Pros
- Inexpensive!
- Offsite backups
- Time Machine level of simplicity
- Backups can be downloaded or shipped to you at no cost on a USB drive (long as drive is return within grace period)
- BackBlaze has a "find my computer" feature for stolen computers (assuming your drive isn't wiped or replaced)
Cons
- Not full backup: OS and applications aren't backed up
- Backups are entirely dependent on internet speed, expect weeks of backing for drives larger than 500 GB
- No back up prioritization
- No file versioning
- Files stored for 30 days
The 30 day backup for BackBlaze is a bit tricky but basically if a file has been deleted, BackBlaze will stop storing it after 30 days, unlike say, Time Machine which will keep the file until Time Machine is forced to delete old backups for storage. Clearly, for Backblaze this is an overhead check. Storing every file indefinitely for each user is likely a very tall order. However, it's also important to understand the implications. If you use Backblaze to backup external drives, they will need to be connected to the computer in question at least once a month while Backblaze is running to reauthorize the index of the files. I wouldn't count on Backblaze to backup data from infreuqent external sources, and if you're going to be away from your data for more than 30 days without connecting to the internet, Backblaze may not be for you. 30 Days isn't bad, but I'd much prefer if they were a bit more generous.
The Setup
Setting up BackBlaze requires two things: Signing up for a trial or paid account, and downloading and installing it's application. The initial takes a fair amount of time, it probably took longer for me than the average user with 6 HDs to sift through, which took about a half hour.

The installer, nearly complete
Once installed, Backblaze lives as a control panel in your system preferences. For those familiar with Time Machine, the options are similar: you can pick the drives/folders you'd like to exclude, but unlike Time Machine you can specify backup frequency, max file sizes to upload, and what speed to upload.
Get used to this moving at a snail's pace
Updating over time
Currently I'm only two days in on BackBlaze, and uploading around 10 GBs a day by leaving my Mac Pro roughly 16 hours a day on a medium data capping, over the weekends I intend to untether the data cap. BackBlaze is a passive experience. My intent is to update this review as my impressions.
Currently it appears that the service shoots for small files first, the first 1.1 million files appears to have constituted roughly 20 GBs of space. My best guess is that roughly 10,000 files constitute 90% of the space. I have a feeling I'm on the extreme end of who this service is geared towards. Most users are on laptops, and most laptops are on SSD, very few users probably have larger than 1 TB drives. I'm an outlier, my Mac Pro's bootdrive is a 750 GB SSD, and the backup boot drive is a 2 TB Hard Drive. BackBlaze auto-ignored my two time machine drives, and my bootcamp HD. I picked to ignore my 3 TB external drive, and my other external 2 TB HD. So in short, I'm backing up two drives since those both store what I'd consider my valuable data. Between more than a decade of shooting photos (RAW and between several iPhones) and digital music as my hobby, I probably have more irreplaceable data than most users, (sans the hardcore videographers). Will I manage to get my first back up within three months? I'm unsure.
A week later (8/22/16)
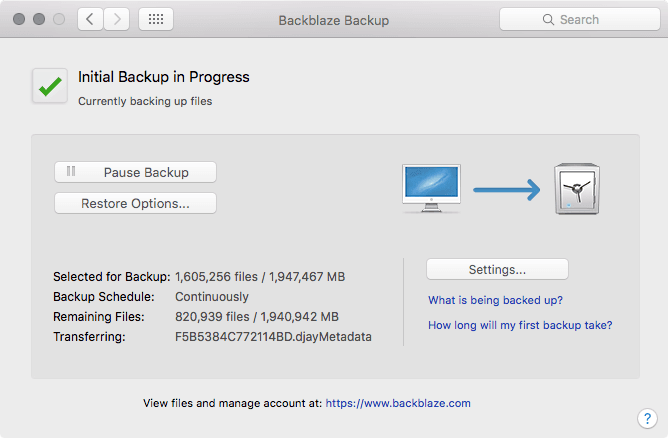
After a week of roughly 16 hour runs on my 50 Mbps/20Mbps connection, I've uploaded 200 GB of 1.9 TB for my initial backup with roughly 300,000 of the 1,500,000 files being uploaded. I noticed by default the Downloads folder isn't excluded by default, added it which reduced my uploads by about 60 GB, a drop but in all likelihood 3 less days of uploading. So far the biggest miff I've had is there isn't any prioritization to what data is targeted first. Smallest files to largest seems like a logical strategy but I'd also like to assert some data as more valuable that supersedes the base priority, especially after the initial upload. I still have some questions about how daily backups are handled, and what happens if a file changes before a backup is complete. I'm guessing if its been uploaded, it will not be backed up until the next batch update.
Two weeks later (9/3/16)
I was gone for two nights and left my Mac Pro operating 24 hours instead of the rough 14-16 hours a day. Backblaze this morning e-mailed me to let me know I've backed up 646,284 MB of 1,906,920 MB, a hair over 1/3rd done. It's a slog but I'll get there.
One month later (9/18/16)
Only 734,542 MB left of 1,832,009 MB. I got a little smarter and added to the exclusion list: ipa (iOS apps), irdata (Lightroom preview cache file), and mkv (video containers as its a distribution format that I do not use, any video work is in other formats). Looks like in less than a month, I'll have completed my first back up. Much better than its initial scare of 100+ days.
One and half months (9/27/16)
I've added a simple graphic that shows remaining files and remaining data, the data is listed in MB. For the most part, I've run my computer about 14-16 hours a day with only a two 48 hour bursts. Slow and steady, and it appears roughly 500 files constitute for 1/4 of my data. I was slightly off roughly 10,000 files counted for half my space on my HDD.
See the Pen D3plus visualization of Backblaze by Greg Gant (@fuzzywalrus) on CodePen.
Is Backblaze worth it?
Considering that Backblaze is cheaper than Amazon's Glacier, Backblaze already makes a bit more sane. However there are competitors, like iDrive which is cheaper but is limited to $35 a year for 1 TB and offers multi-computer backup/accounts. There's also SpiderOak, Tresorit, CrashPlan, Carbonite, and SugarSync.
-
Manual Install Invision Craft for Bohemiancoding Sketch
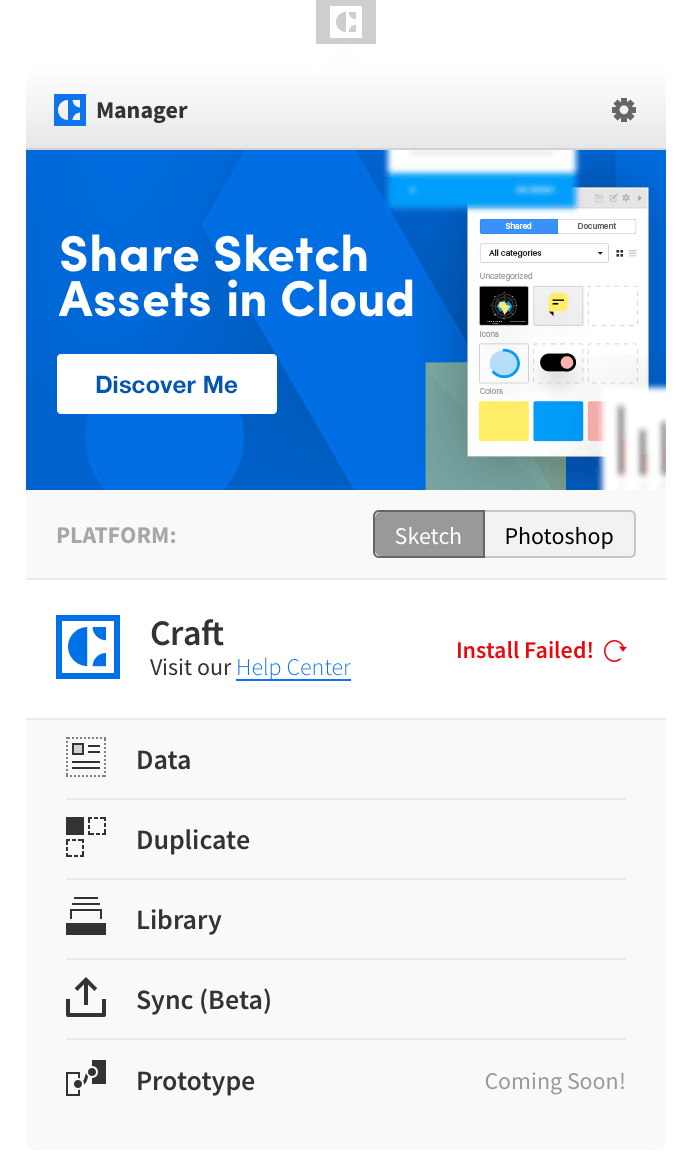
This installation failed...
Manual installation
Craft's help page is woefully unhelpful about installing the plugin manually for sketch, and it only reads "We don't recommend manually installing the Craft plugins for Sketch." without any additional steps, fortunately the good people behind Invision made the plugin URL available to reverse engineering :)
- Download craft-sketch.zip and unzip it (doubleclick)
- Go to ~/Library/Application Support/com.bohemiancoding.sketch3/Plugins and drag in the Panels.sketchplugin
- Go to ~/Library/Application Support/com.bohemiancoding.sketch3/Panels and drag in the Data.sketchpanel, Duplicate.sketchpanel, Library.sketchpanel, and Sync.sketchpanel
- Launch Sketch and verify it has been installed under Sketch plugins.
Enjoy your new plugin?