The 10 Step Guide to OpenCore Legacy Patcher (with pictures and video)
OpenCore Legacy Patcher recently hit version 0.6.x, an important milestone. It finally added support for Non-Metal Graphics Acceleration, older wireless network chipsets, UHCI/OHCI USB 1.1 Controllers, and AMD Vega Graphics on pre-Haswell Macs (Mac Pro 2008-2012). It continues to be updated, with recent advances to support macOS 13.3.
The goal of this guide is to provide a very granular step-by-step guide to installing OpenCore Legacy Patcher on a supported Mac for users who are new to the world of OpenCore.
As a quick primer, OpenCore is a boot loader. OpenCore functions as middle wear between the firmware and macOS. This allows changes to be injected without modifying the OS. Through these modifications, discontinued hardware can be supported. OpenCore was designed to replace Clover and other Hackintosh solutions as a way to avoid repeatedly patching after minor OS changes. However, OpenCore proved not to be useful for Hackintosh owners but also for Mac owners as well.
OpenCore Legacy Patcher (OCLP) is a utility that automates the installation of OpenCore on older Macs that Apple no longer supports and has matured to a point-and-click utility. Users do not have to understand esoteric software configuration in OpenCore and instead can rely on a community to test the latest developments from the OpenCore community and fold them into a package.
If you're looking for a detailed explanation of OpenCore, I wrote a separate article explaining OpenCore and OCLP or you can watch the video below.
OCLP's accomplishments are nothing short of amazing but also contradictory as it really should not need to exist. OCLP proves that Apple's decision to drop older Macs has little to do with user experience and everything to do with planned obsolescence, as OCLP proves that older Macs are more than capable of running modern macOS versions and even flourish. For a company that love to talk about it's efforts to be "Green", the best thing it could do to keep eWaste out of dumpsters is to continue to support hardware for as long as possible. Regardless of where you live, please support the right-to-repair in your city or state or province or country.
This guide also exists in video format as "How to install OpenCore Legacy Patcher in 5 minutes".
Requirements:
- 16 GB+ USB flash drive
- Supported Mac, see OCLP's website,
Before you install OpenCore Legacy Patcher on your Mac, go to the OCLP website and confirm your old Intel Mac is supported. Some Macs may not support the latest version of macOS. OCLP's team is chipping away at support for older Macs. Most Macs post 2010 are well-supported but with caveats such as non-functioning Bluetooth. Also, compatibility differs between OS versions, generally with the latest OS having the least amount of support. Users likely will have better results running a semi-recent OS vs the most recent.
Next, you will need a 16 GB or larger USB flash drive. Not all USB flash drives are bootable but most are. I used a SanDisk 128GB Ultra Fit USB 3.1 as can often be bought for $15 (the 64 GB version generally is $10), and while not the fastest drive, it's made by a reputable company and will be faster than most $10 USB flash drives.
Lastly, always check OpenCore's website when updating the very latest OS release. I highly recommend waiting a few weeks for point releases, ones that are a major revisions like 13.3 (Not 13.3.1) for the OpenCore community to test and vet the OS update with various hardware configurations.
Step 1) Format Drive
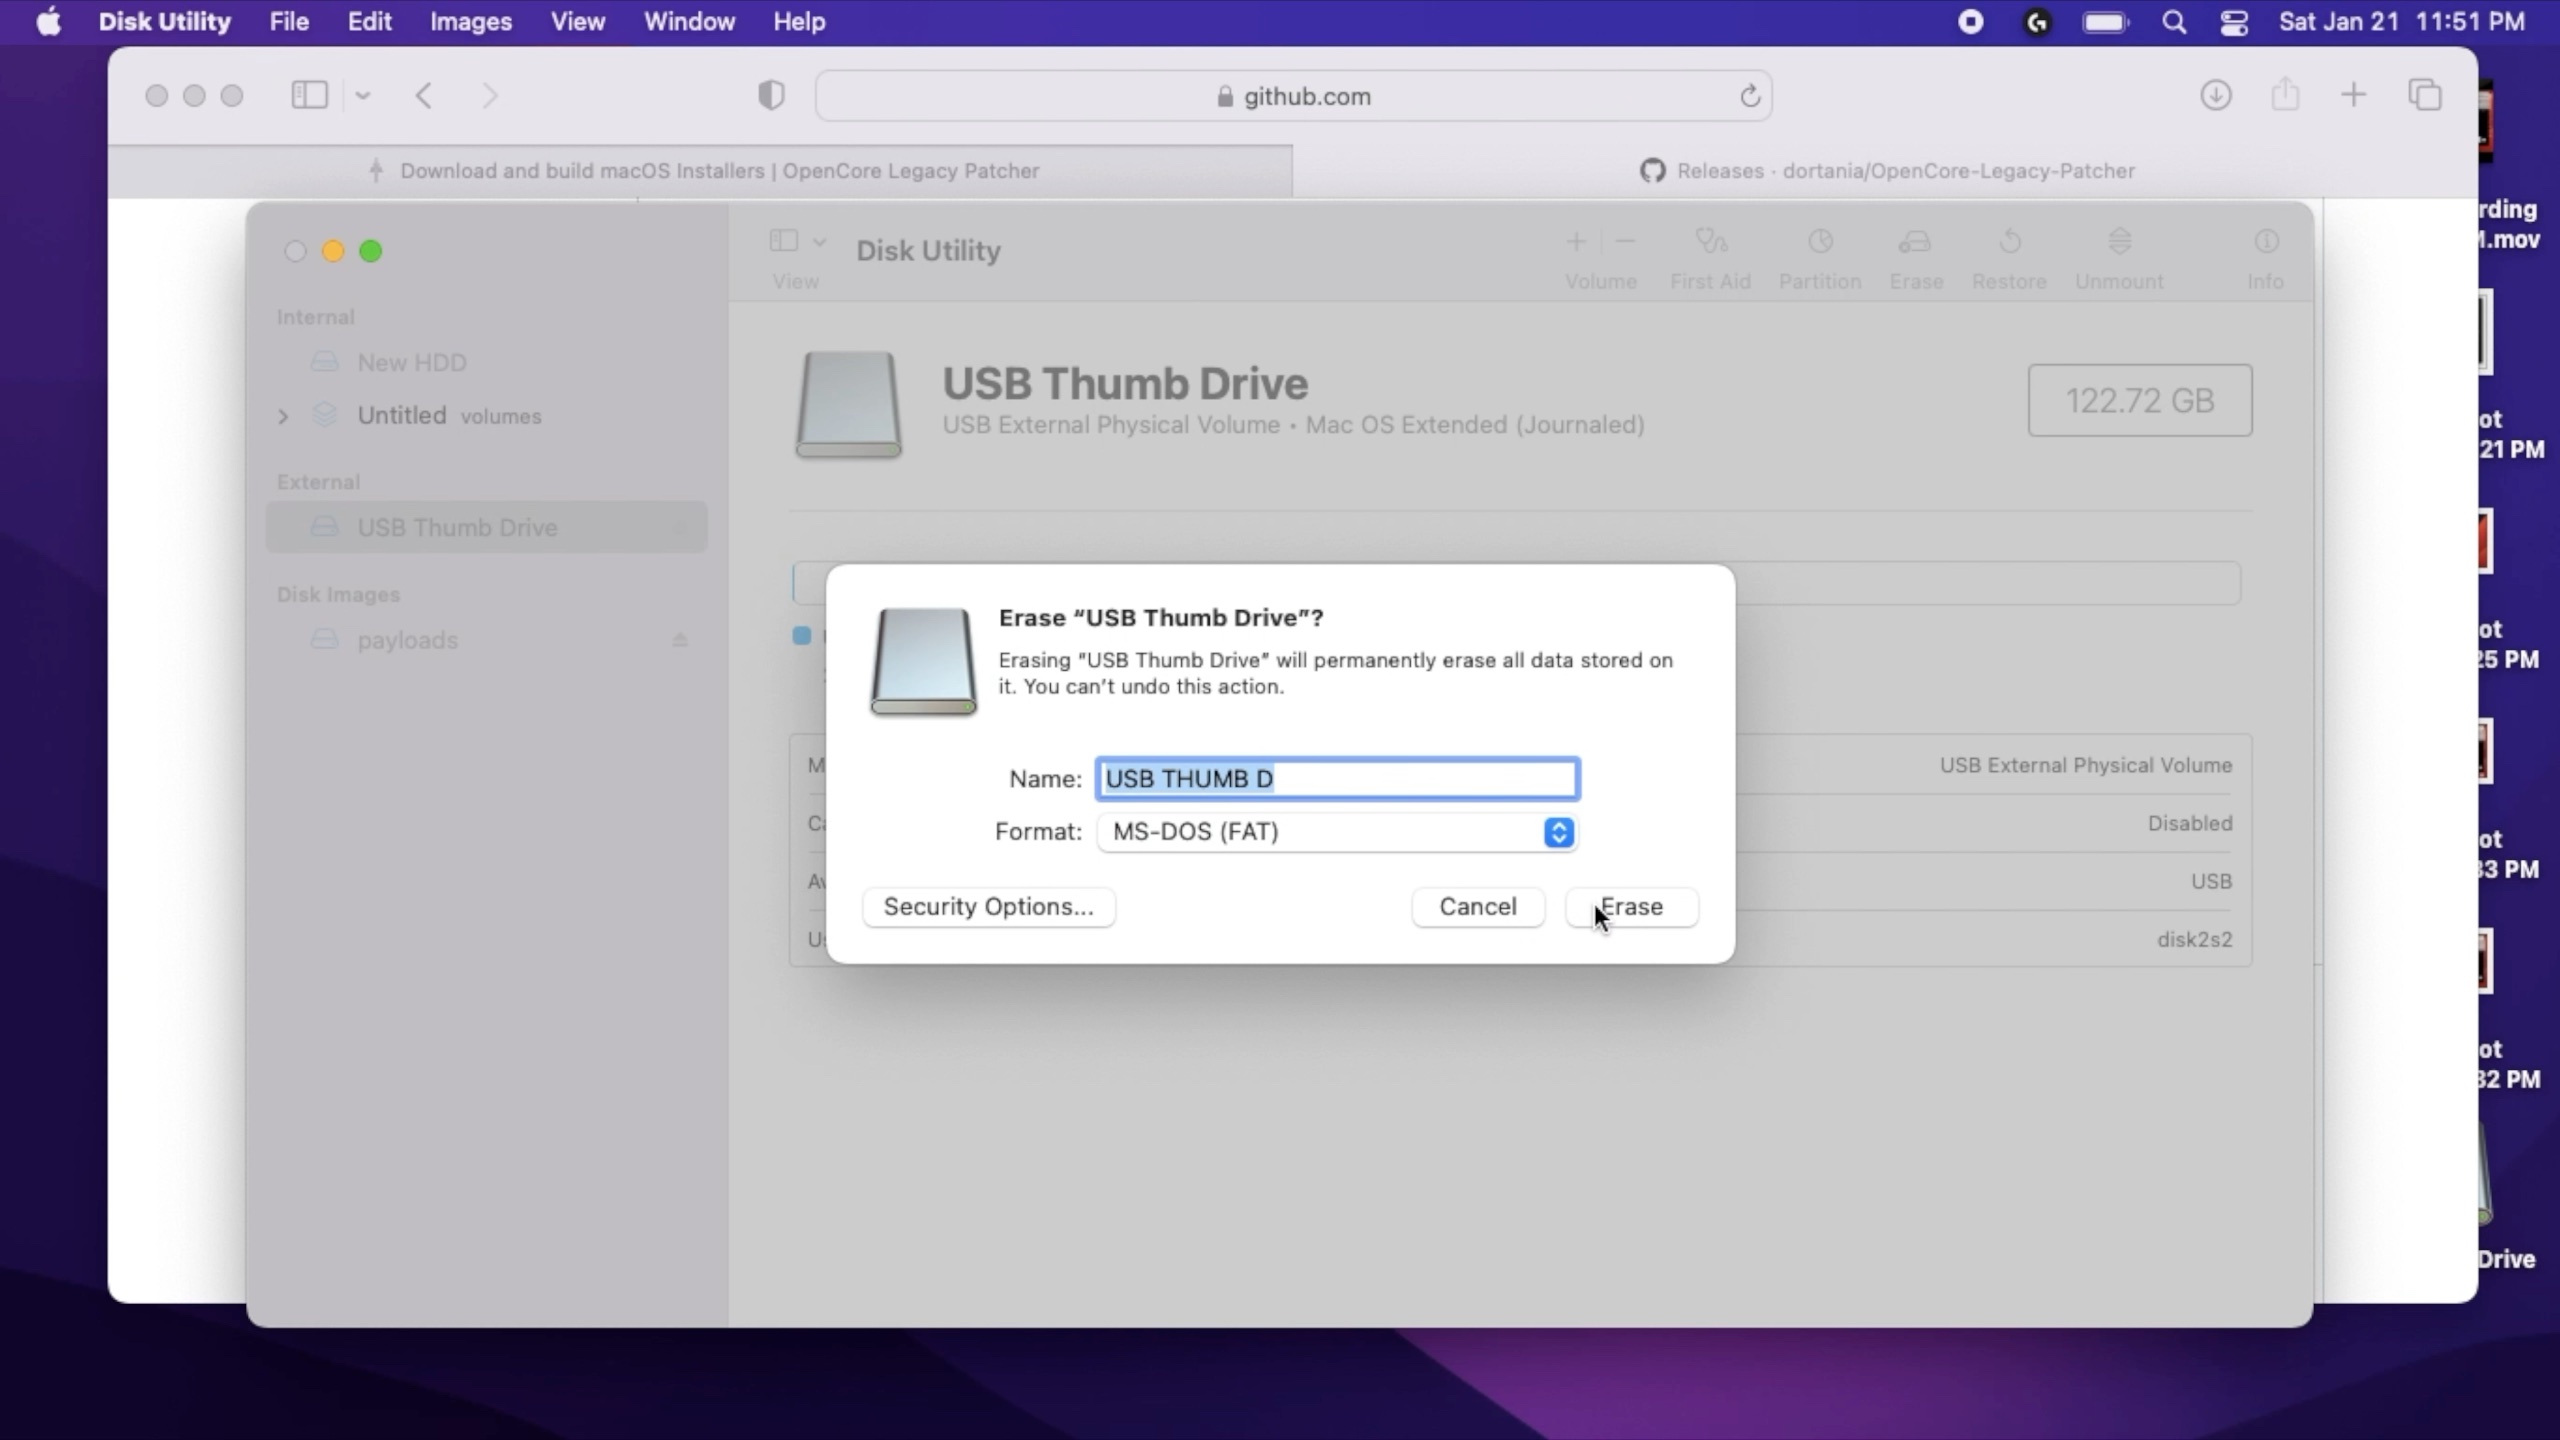
Plug your USB flash drive into your Mac (or a PC). Open up disk utility on your Mac. This is located in Utilities folder in your Applications folder, or easily found using spotlight. Highlight your USB thumb drive and select format. Format your flash drive to Fat 32. macOS lists this as MS-DOS (Fat). As a friendly reminder, Formatting will erase all the contents of your flash drive. If you have any important information, back it up before performing this step.
This is required so the OCLP utility will be able to recognize the drive, and will format it again later.
Step 2) Download OCLP
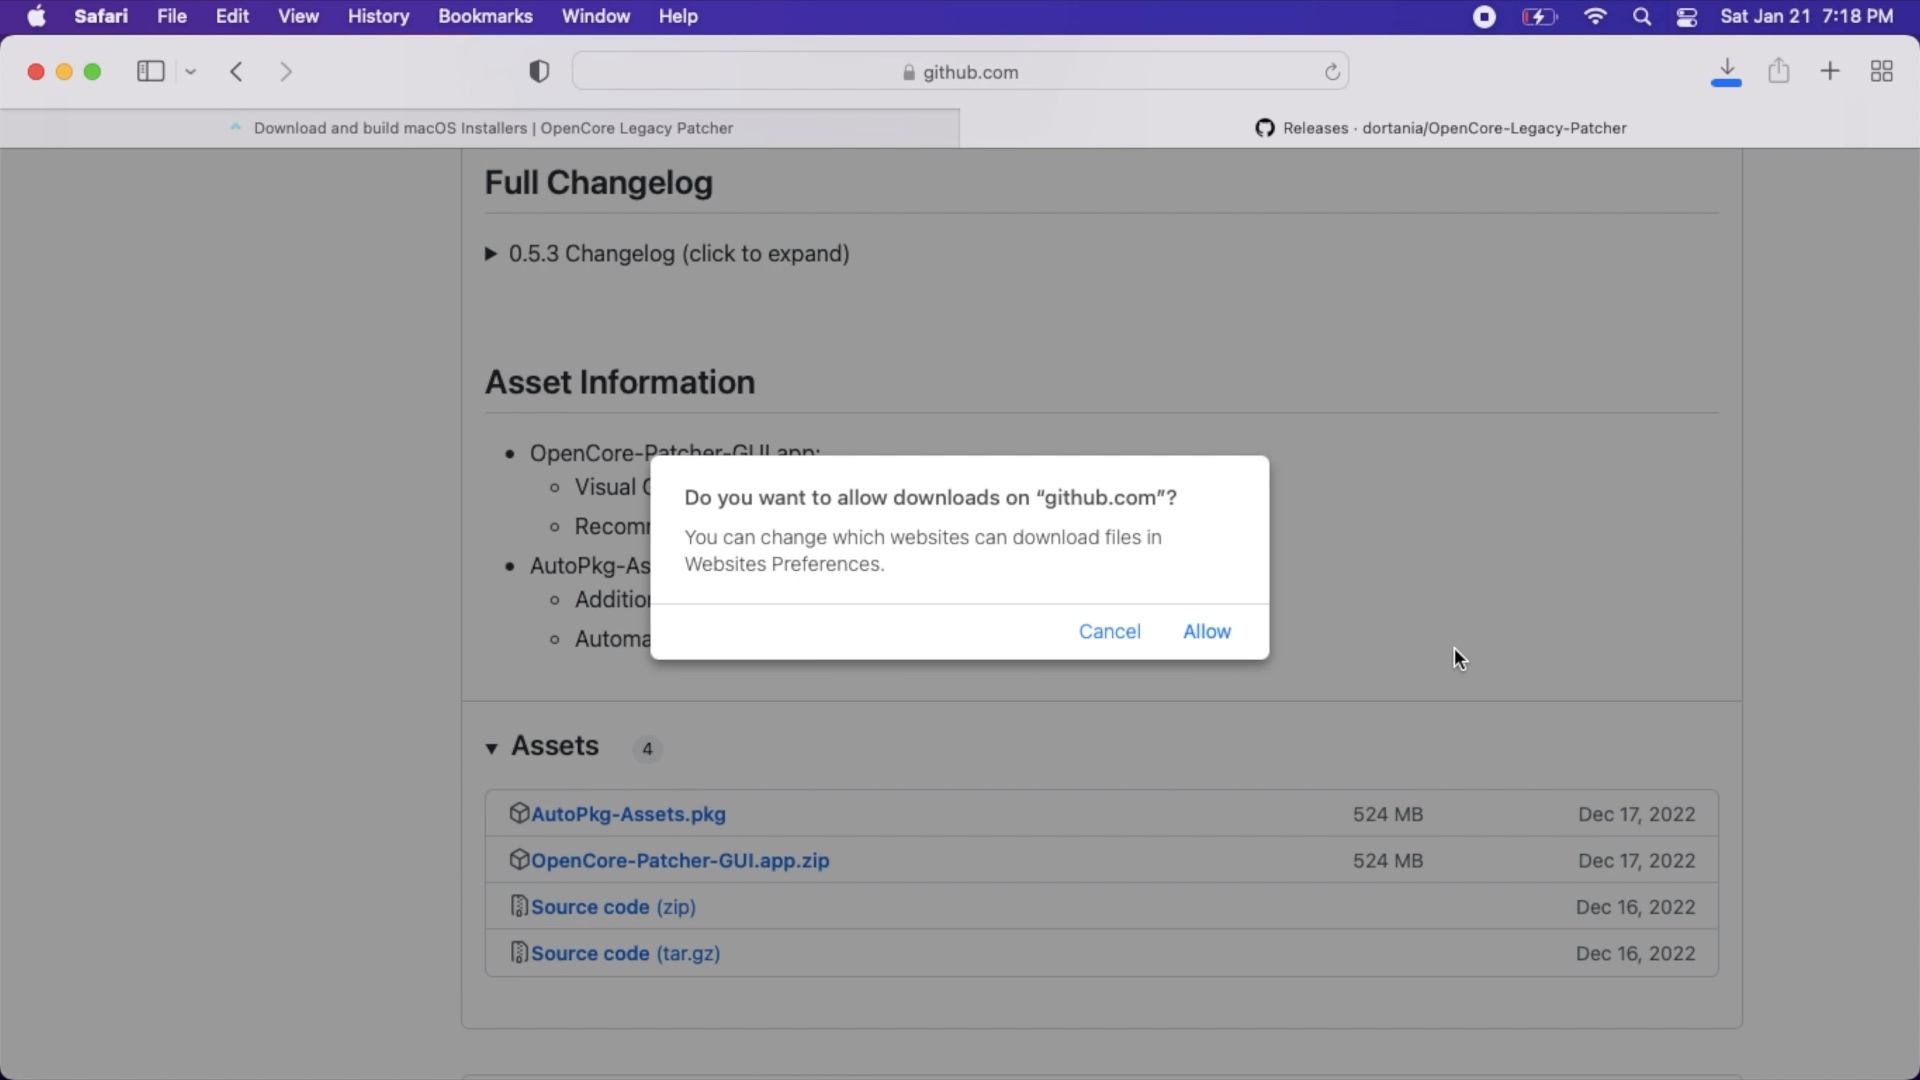
Confirm the support for your Mac, at OCLP's website, Download OpenCore Legacy Patcher from the OCLP GitHub page. As a general rule, you should download the latest version of OCLP. OCLP does receive semi-regular updates which may improve your Mac if you are already using OCLP you can upgrade it in the future.
Step 3) Launch OCLP
Depending on your OS/Browser settings you may need to decompress the zip file by double clicking it. Launch OCLP and select Create macOS installer.
Step 4) Download macOS
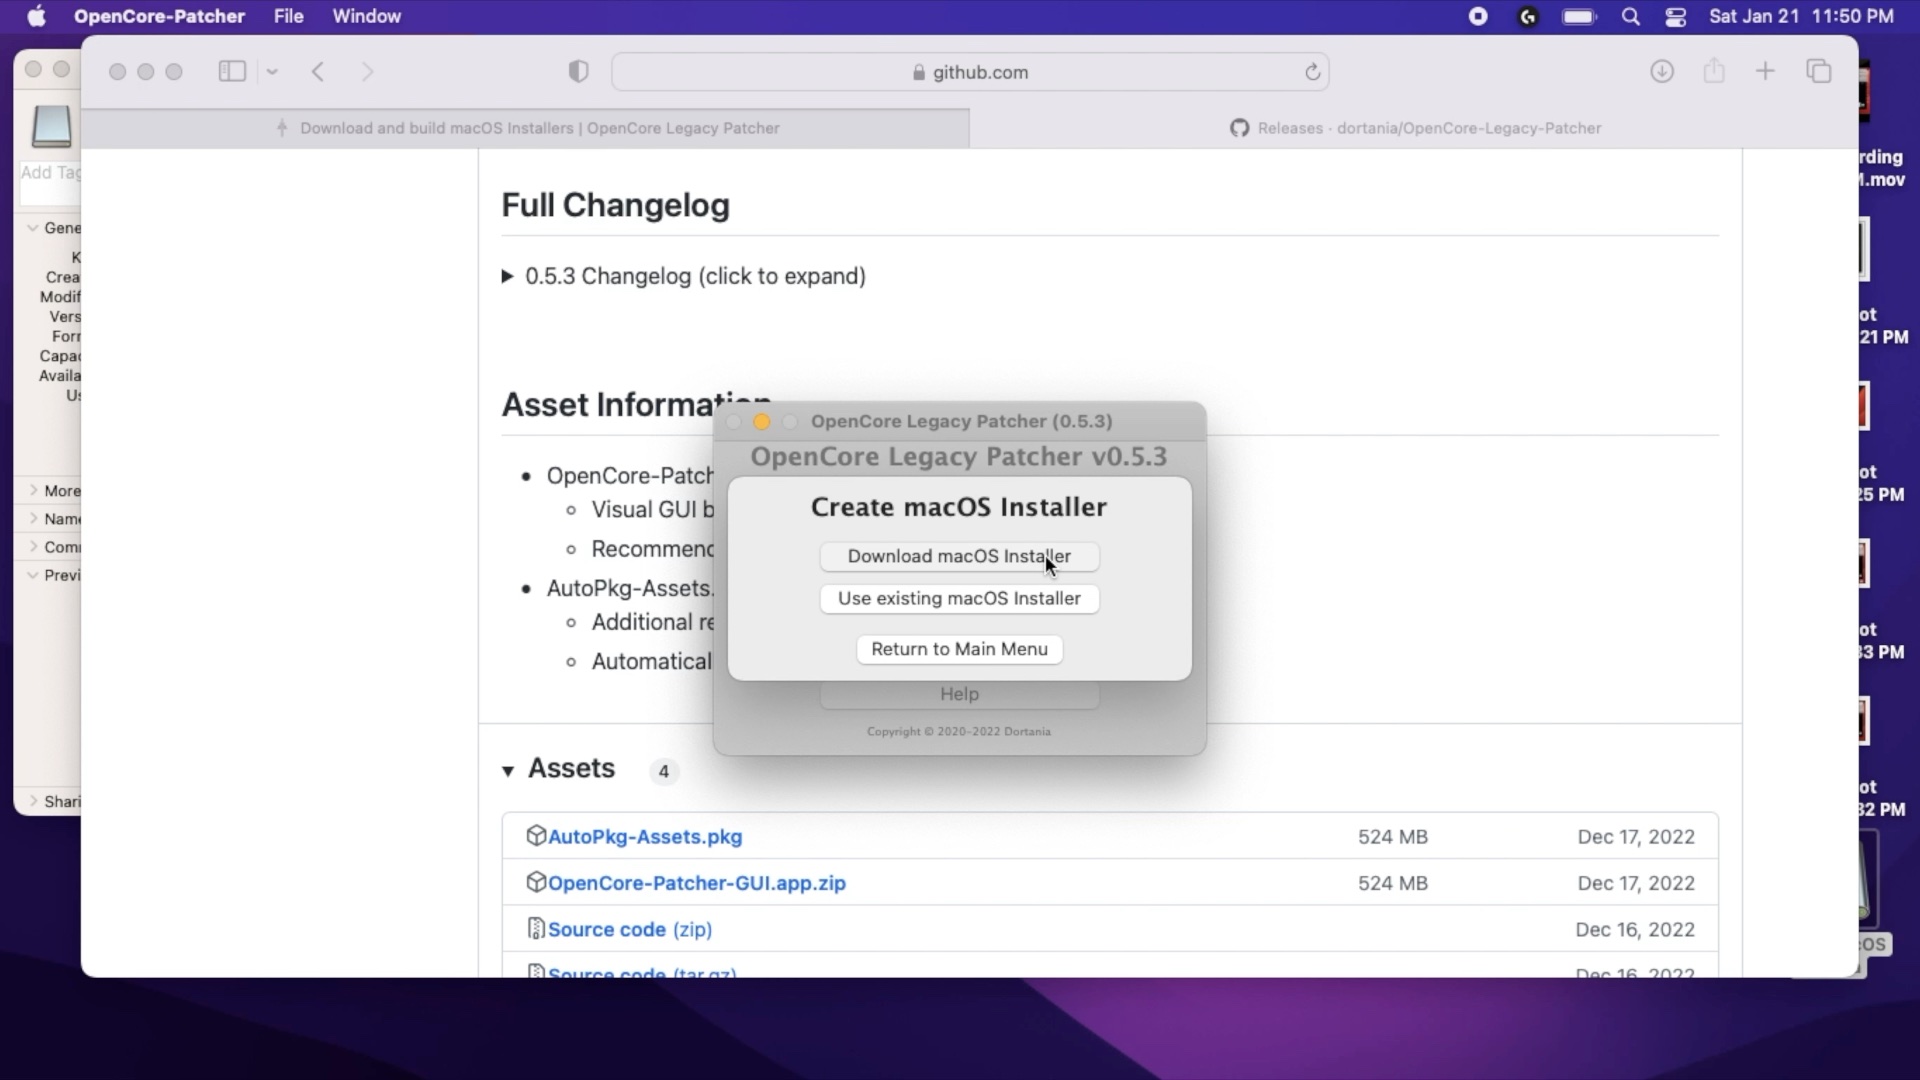
On the "Create macOS installer" screen, select Download macOS if you do not already have a version downloaded on your Mac, and then select the version of macOS you'd like to download. Downloading will take some time as the installer is 12 GB.
Step 5) Select your OS
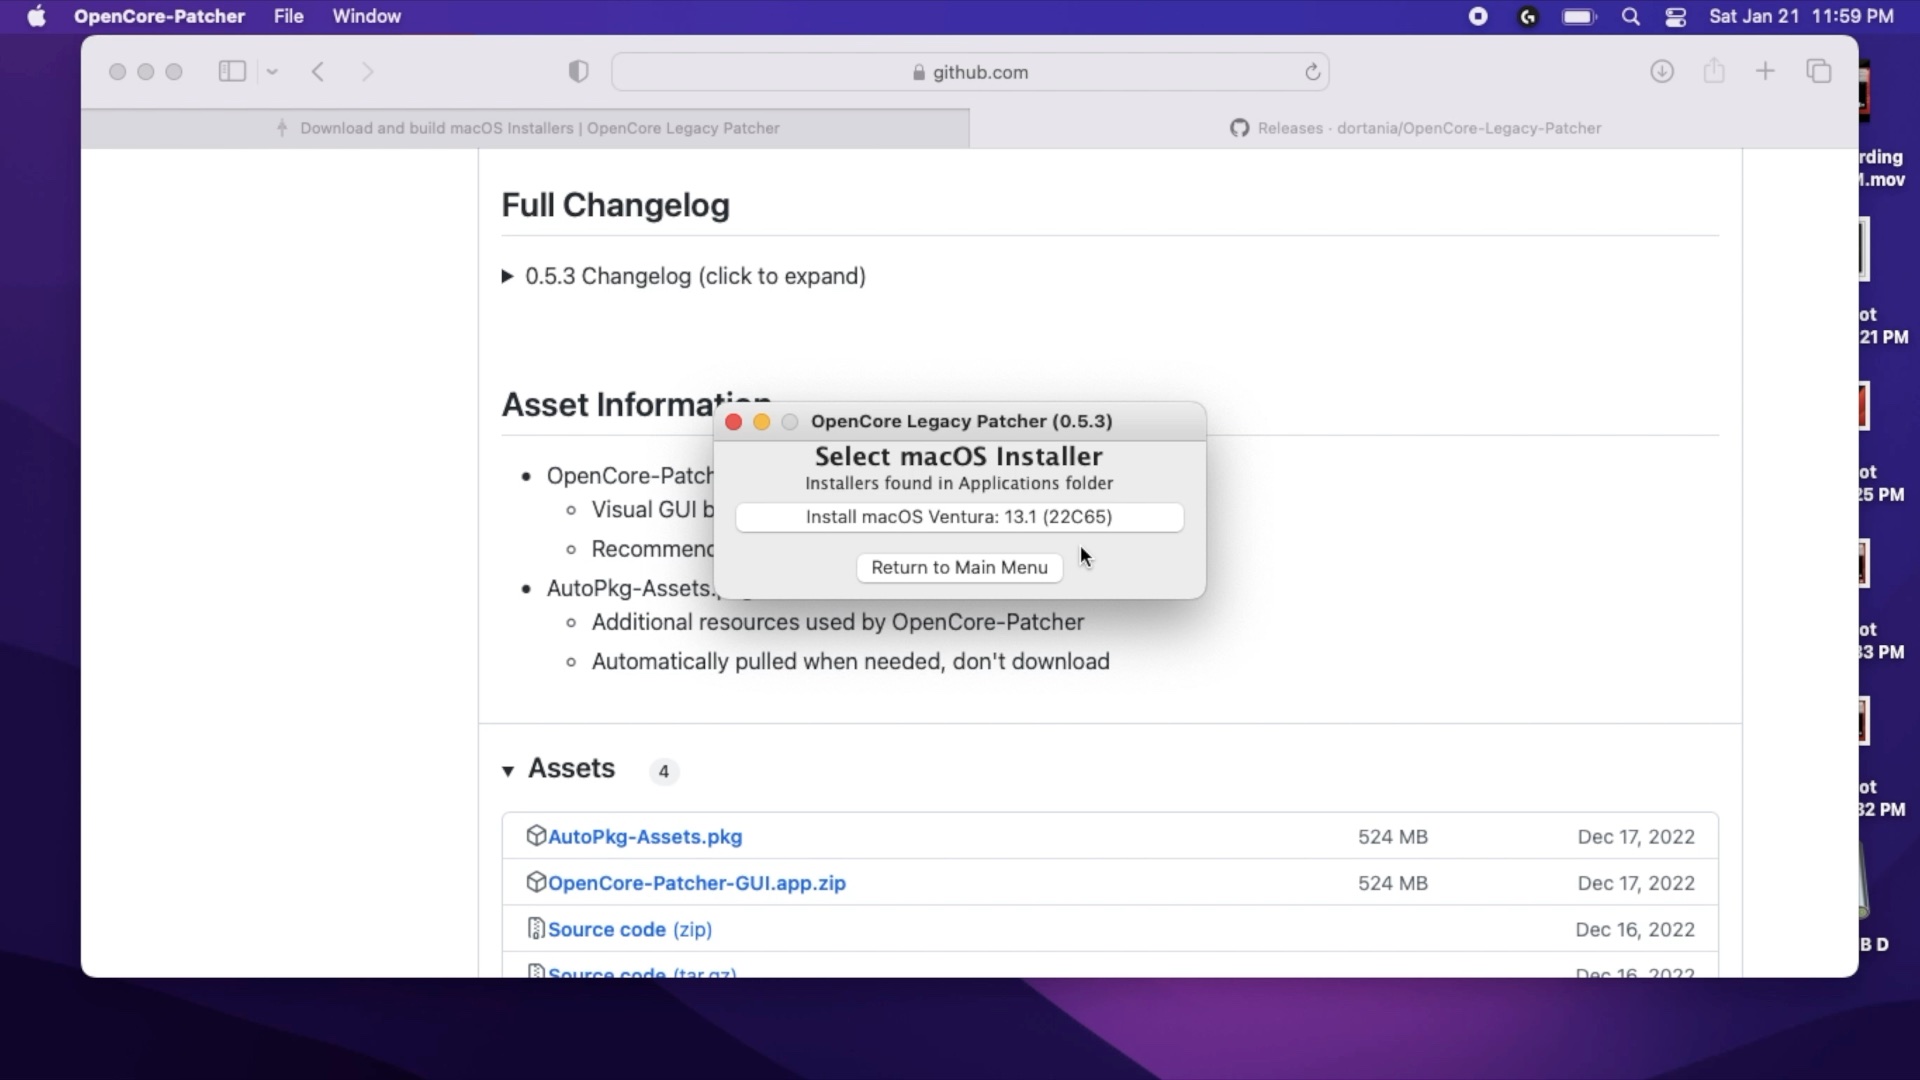
The installer should forward you to the select macOS screen and select your downloaded OS. If the OCLP utility does not automatically take you to this screen, return OpenCore's first screen and select create the installer, and select existing macOS.
Step 6) Install to USB drive
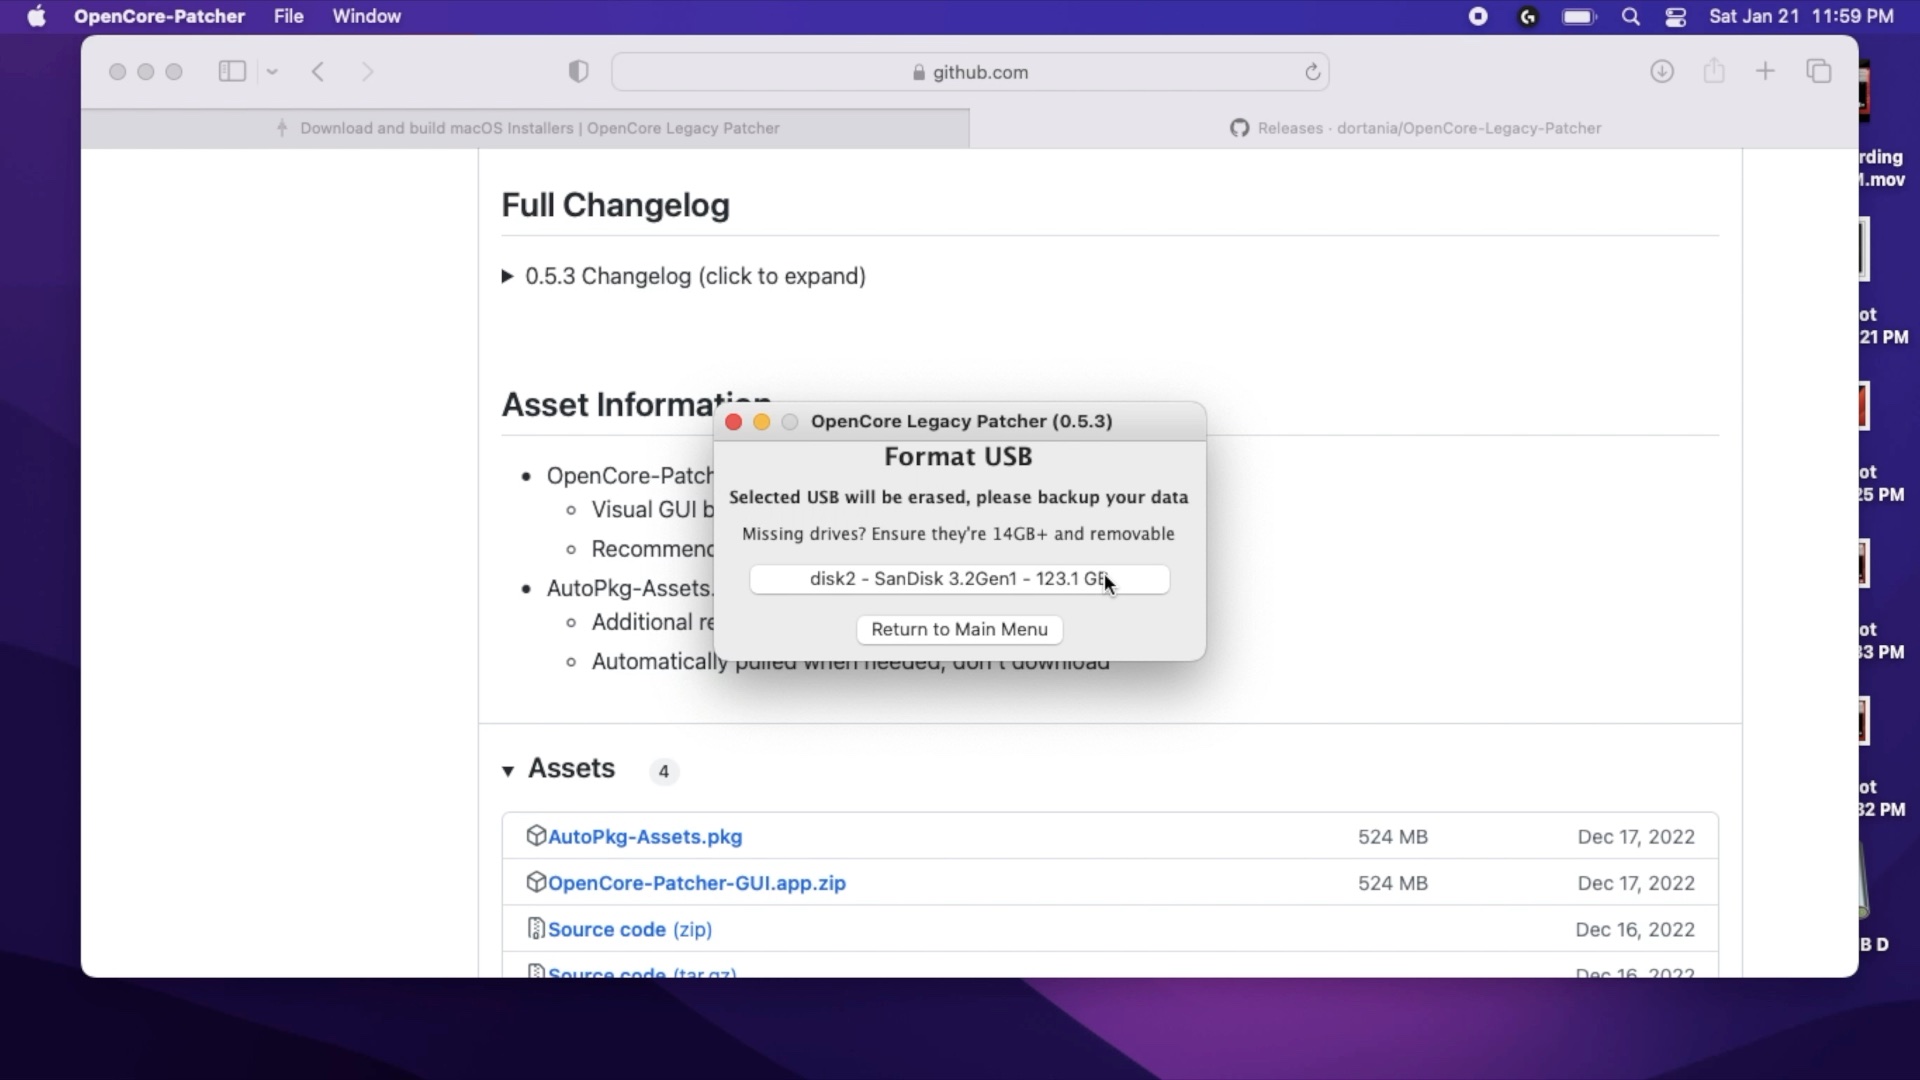
On the Format USB screen, select your USB drive. This will likely require your admin password. Enter it. This will take a significant amount of time, depending on your flash drive's speed and your Mac. This is a two-stage process as after it's copied over it will verify. You can leave this process in the background of your Mac while you perform other tasks or leave your computer unattended while this process completes. The installer will warn that it will take roughly a half hour although I found it took less time.
Step 7) Install OpenCore To Disk
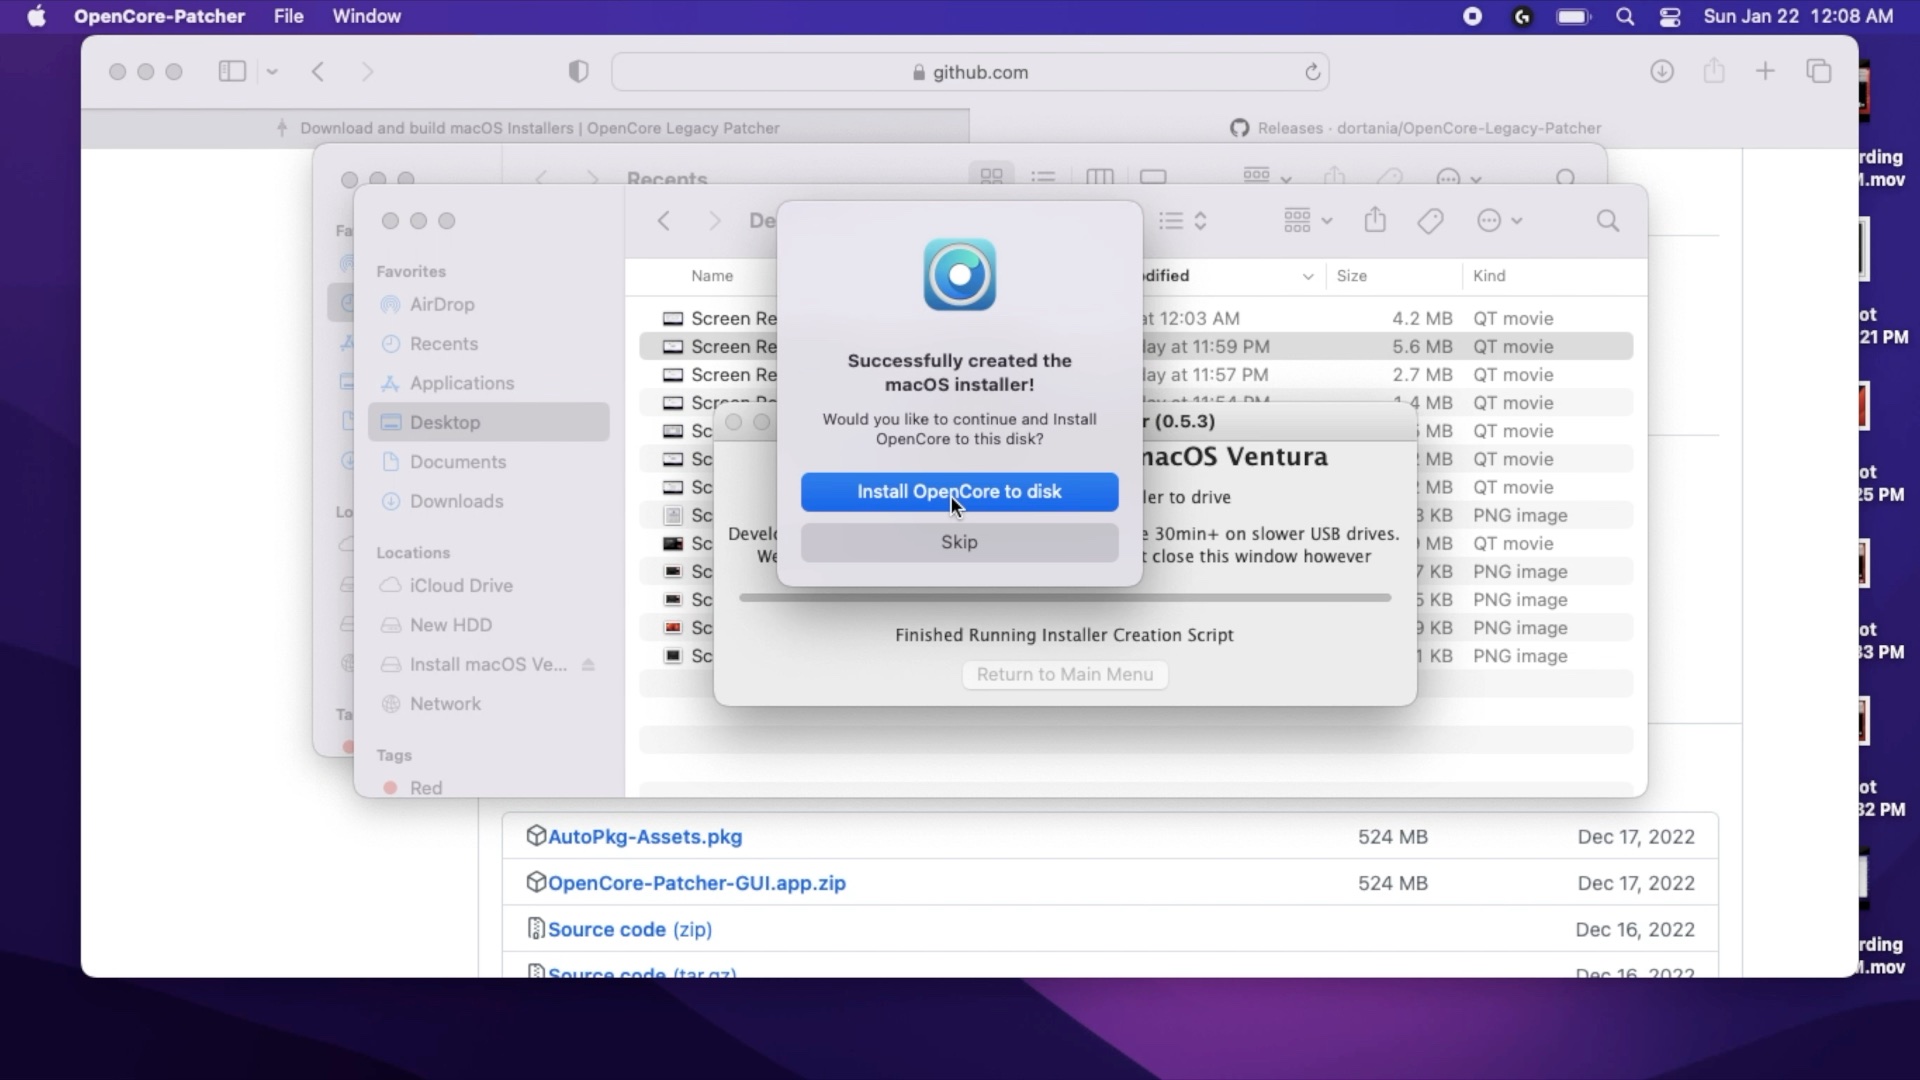
Once the installer has copied the installer to disk, it should ask you if you'd like to install OpenCore to disk. Select install OpenCore to disk. It'll build the OpenCore settings for your Mac. Select install to disk again, and select your USB drive.
Step 8) Reboot
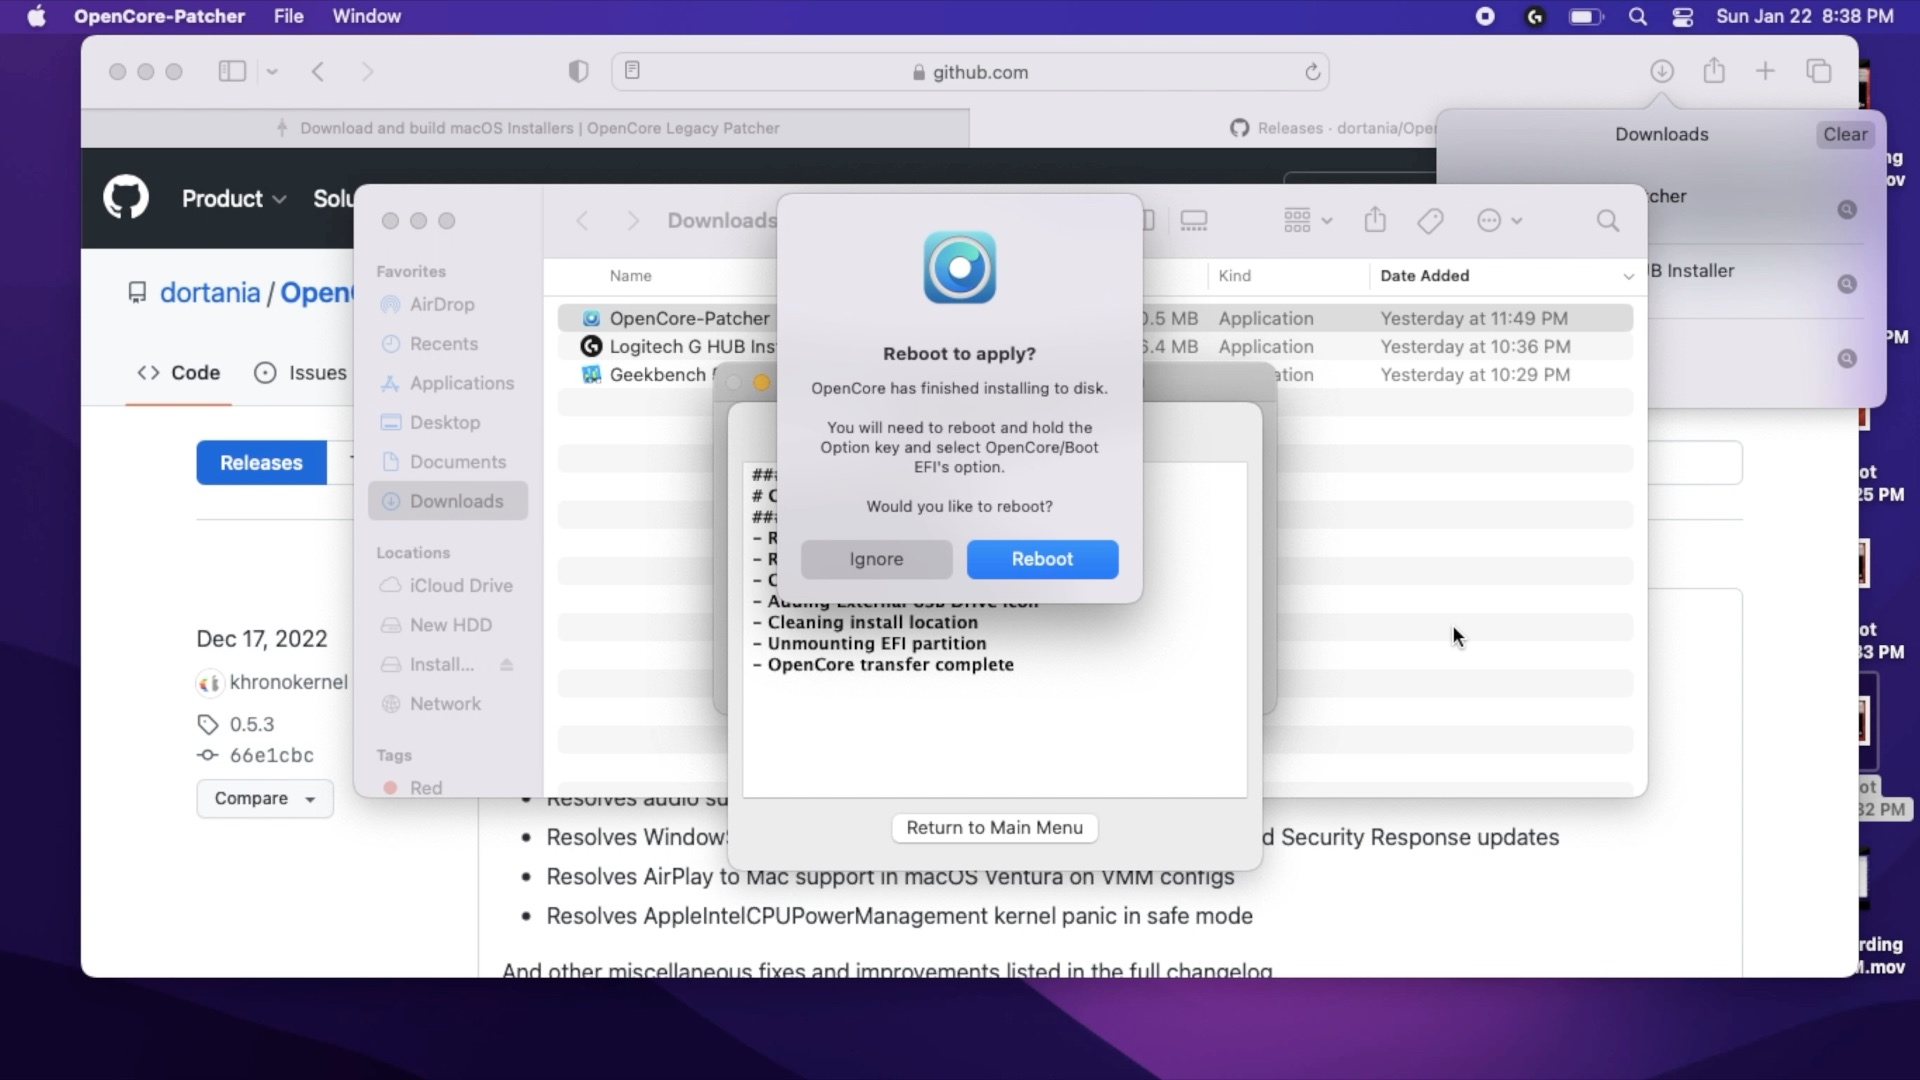
Once the installer has finished, it should ask you if you'd like to reboot. It should display the following: "You will need to reboot and hold the Option key and select OpenCore/Boot EFI's Option". Holding down the option key while your Mac is booting will cause it to boot into the boot picker.
You can reboot now or later. When you reboot, you will need to hold down the option key on your computer and then select the OpenCore EFI partition. This will be the icon with the OpenCore logo behind it.
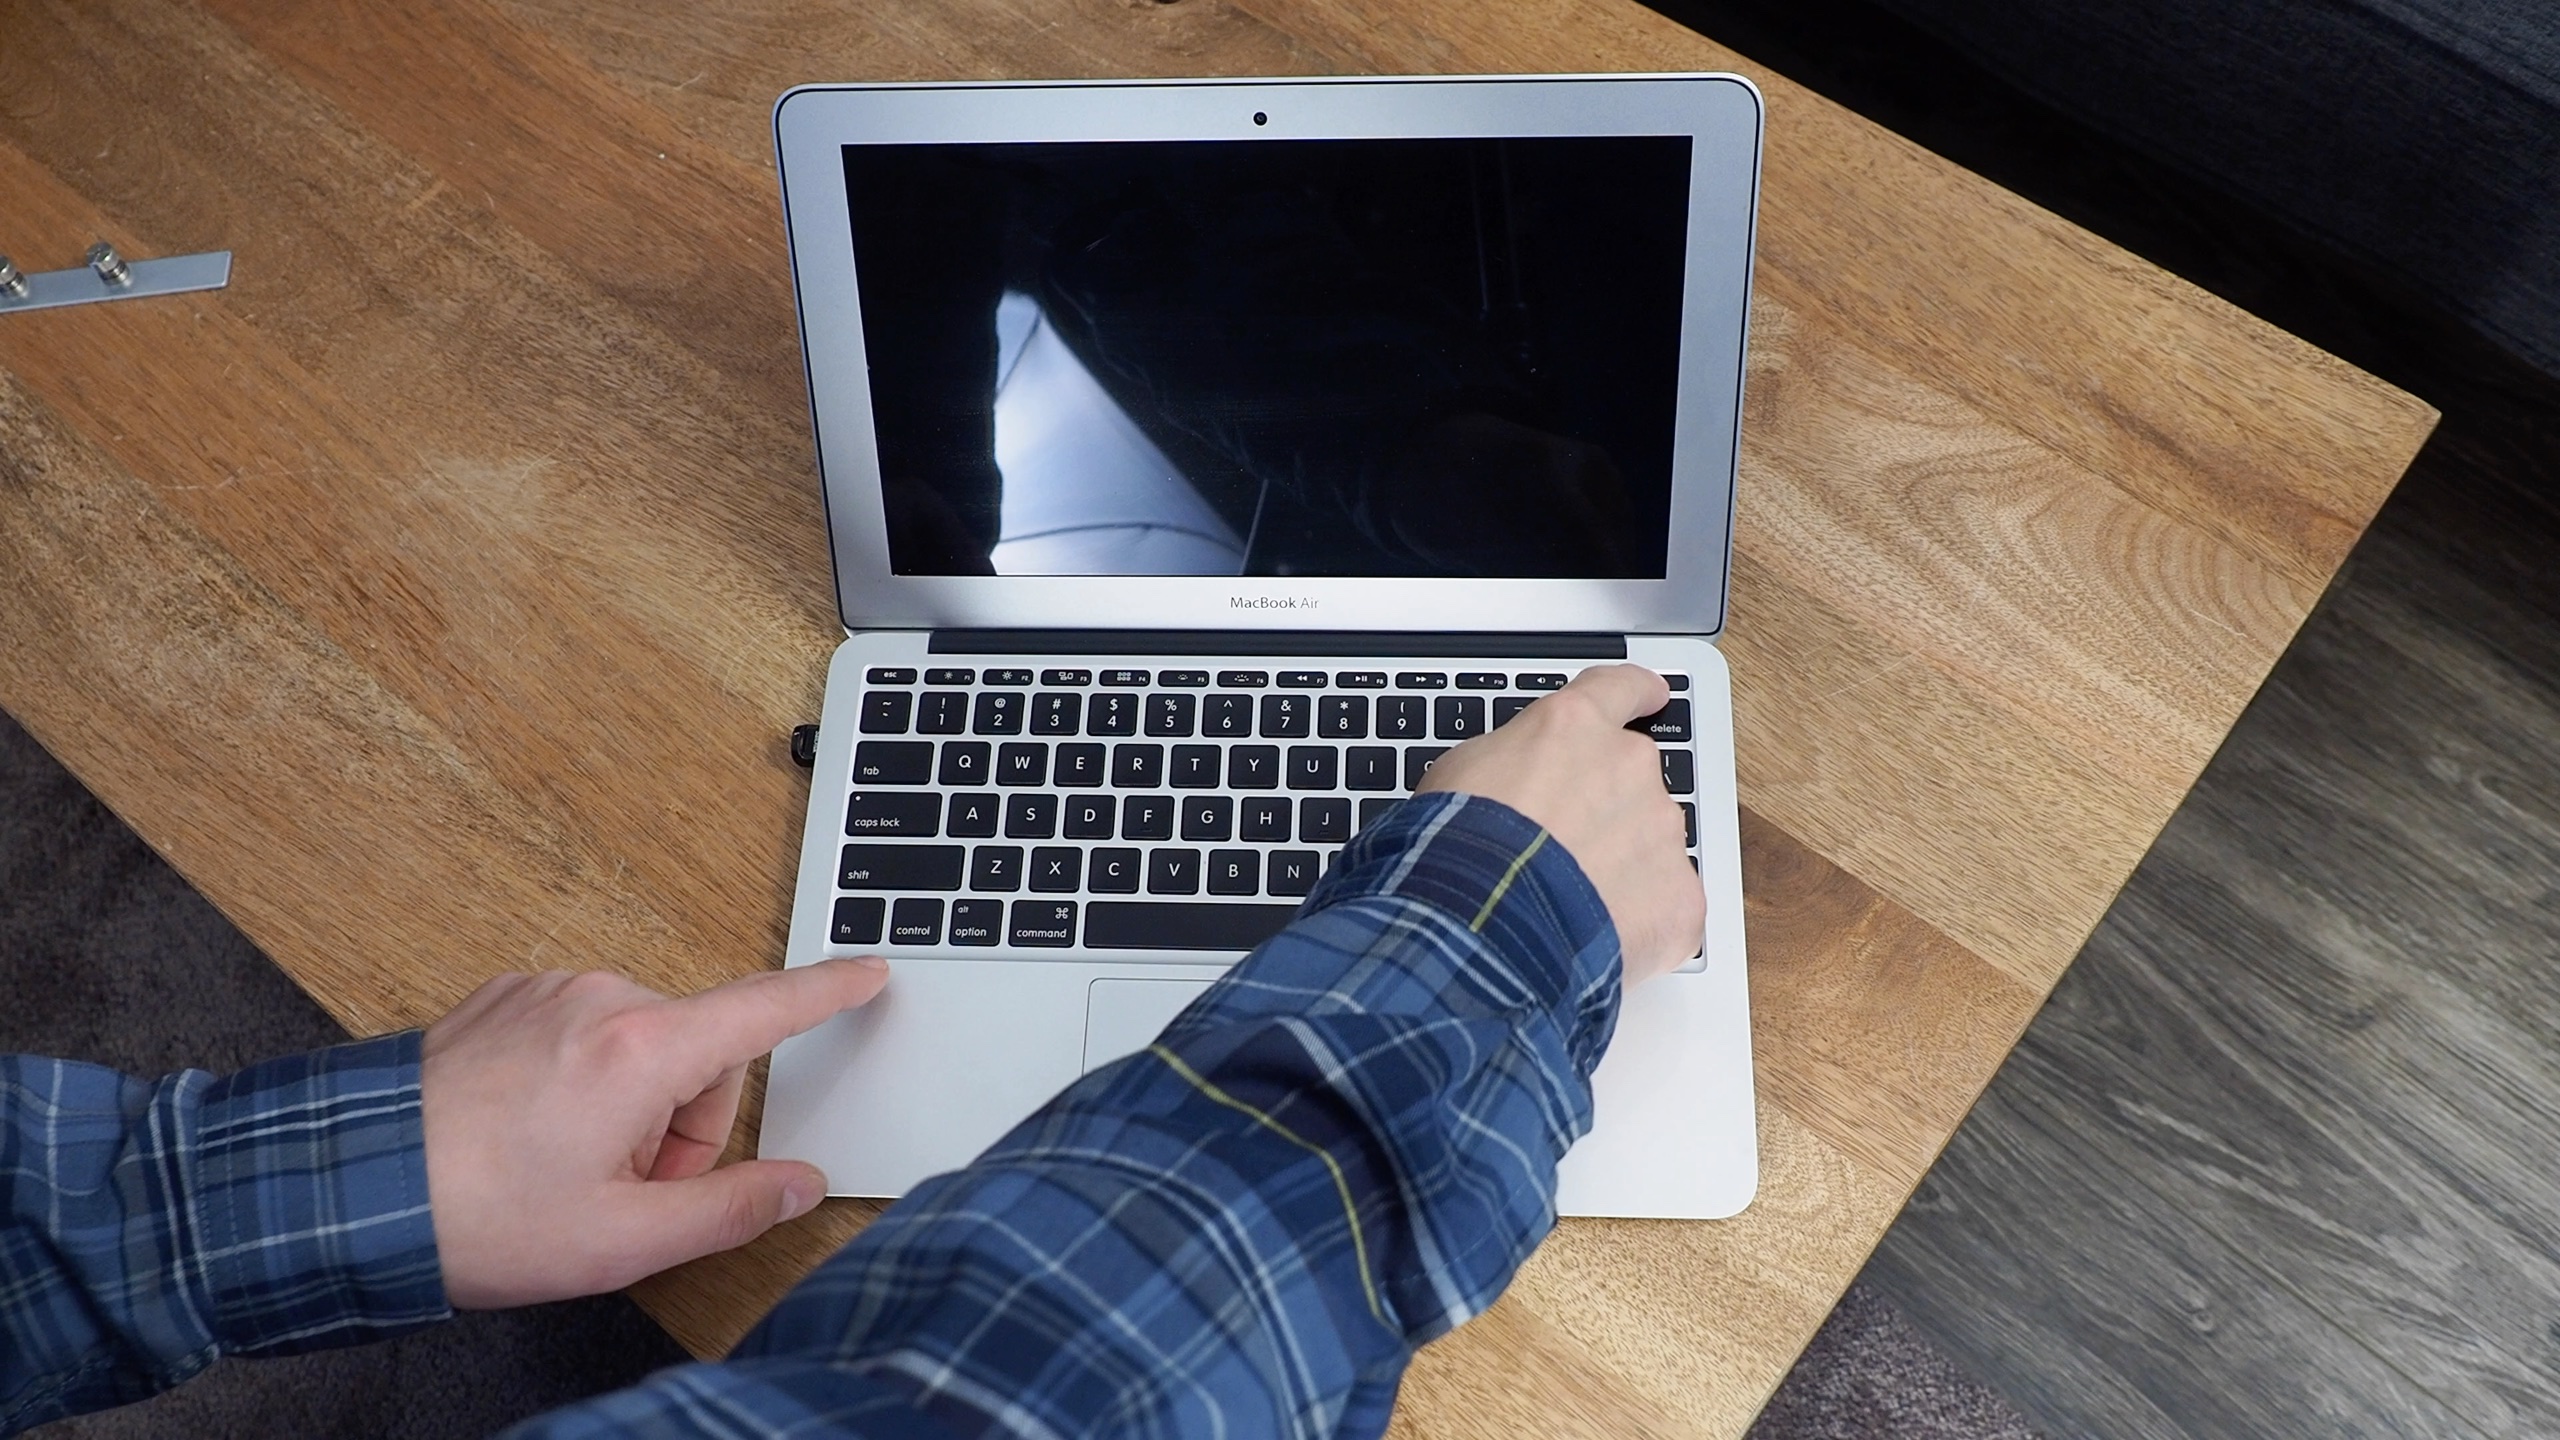
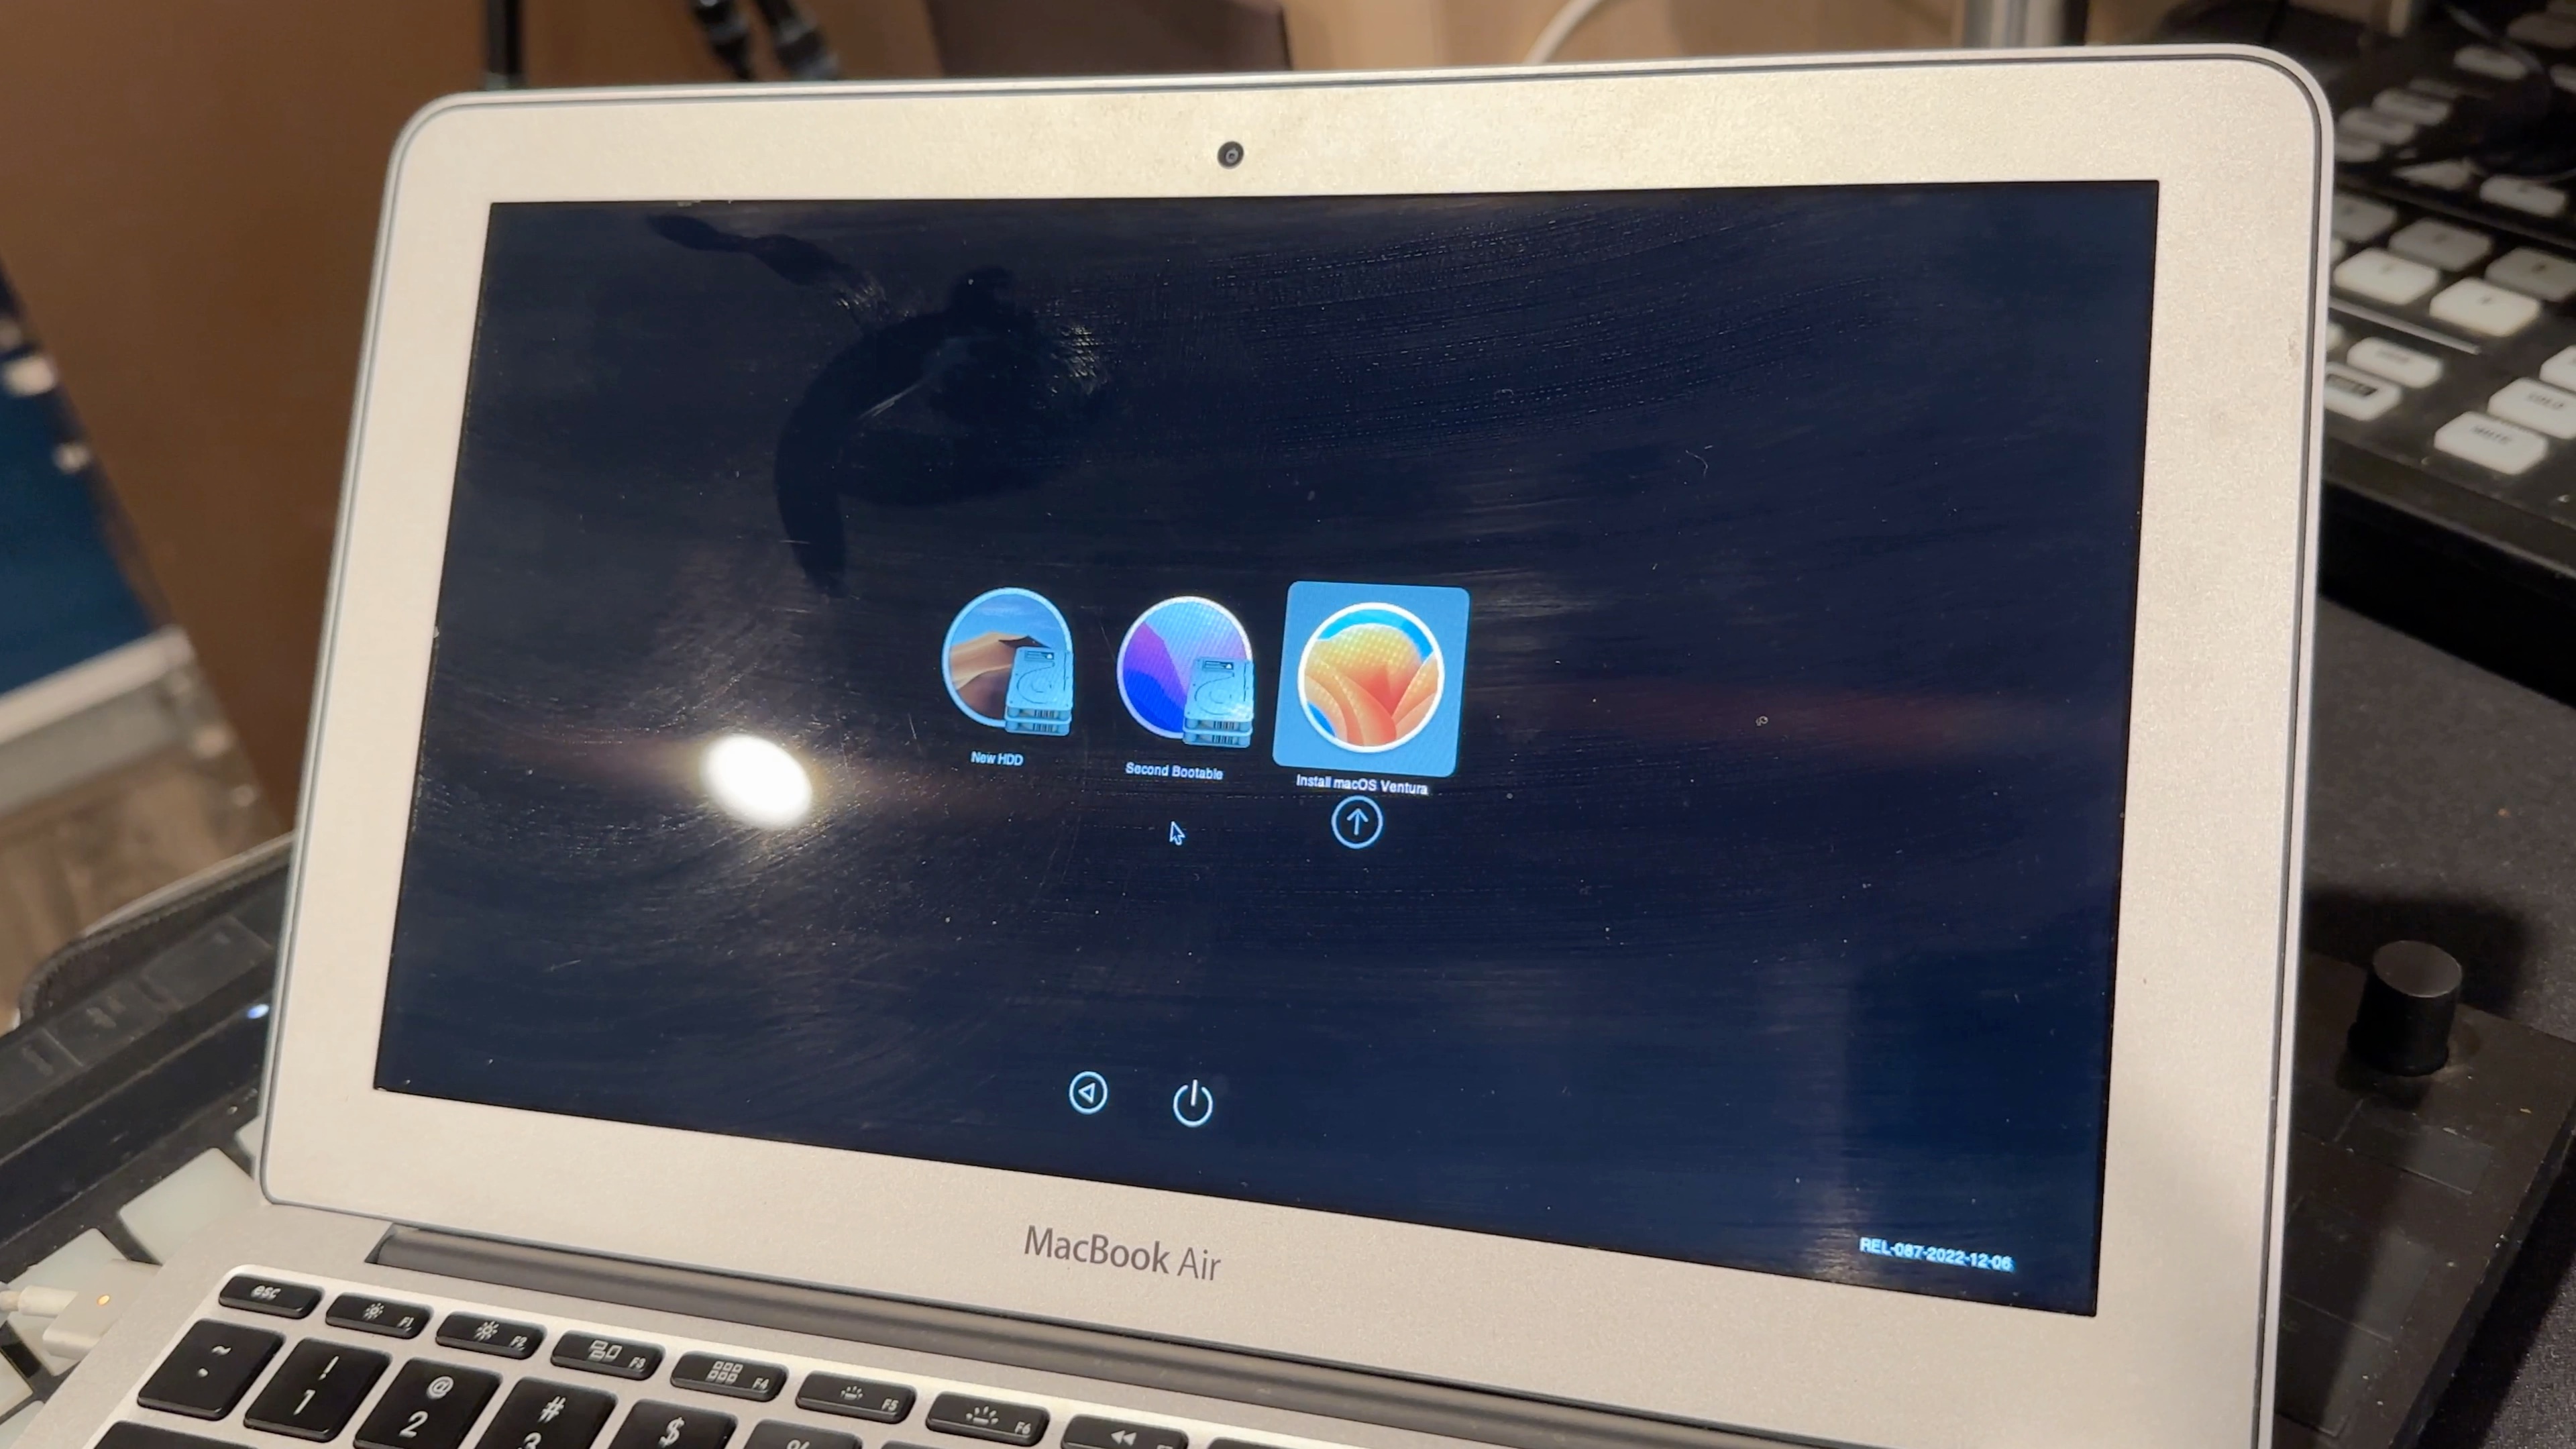
Step 9) Select OpenCore from the bootpicker and then the installer
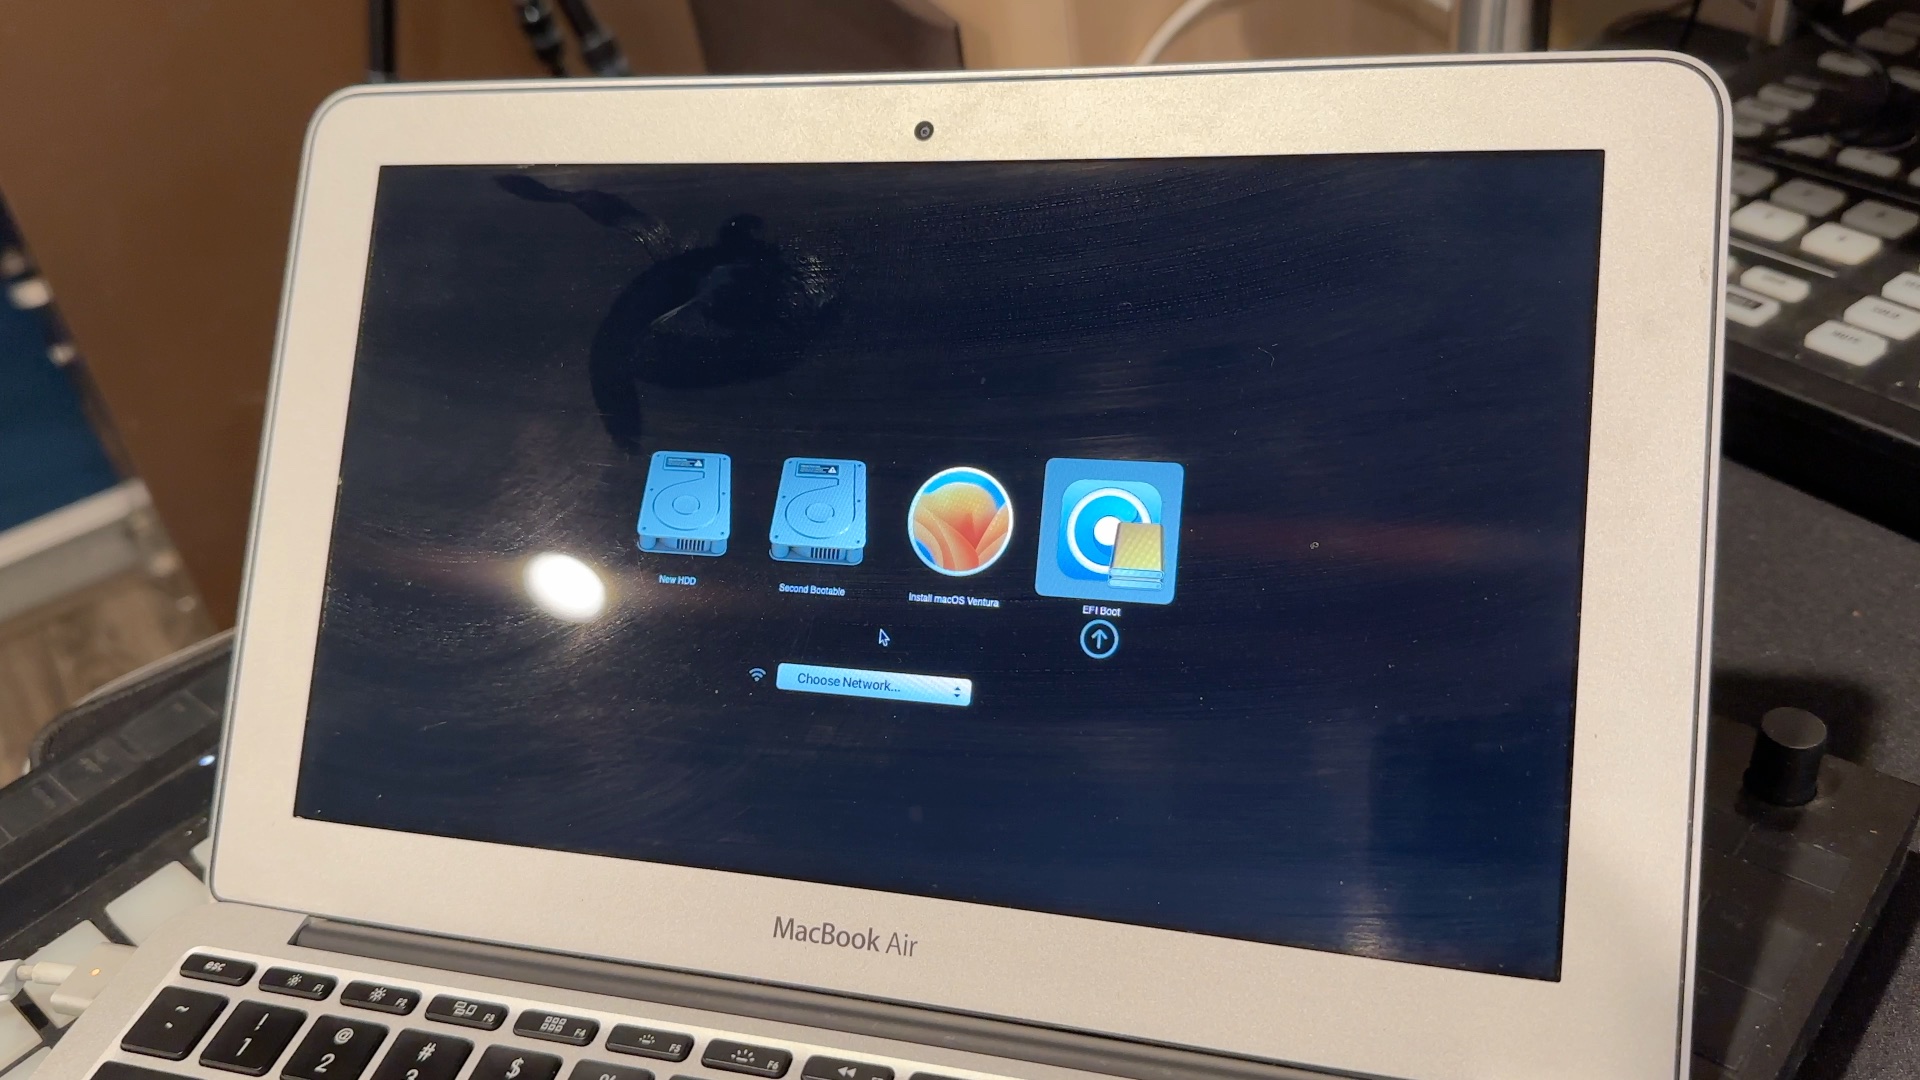
Once you've selected the OpenCore EFI you'll be taken to another boot picker. Select the installer. At this point, you have booted into OpenCore, and thus all the configured hacks are loaded in that will enable your Mac to be able to install macOS.
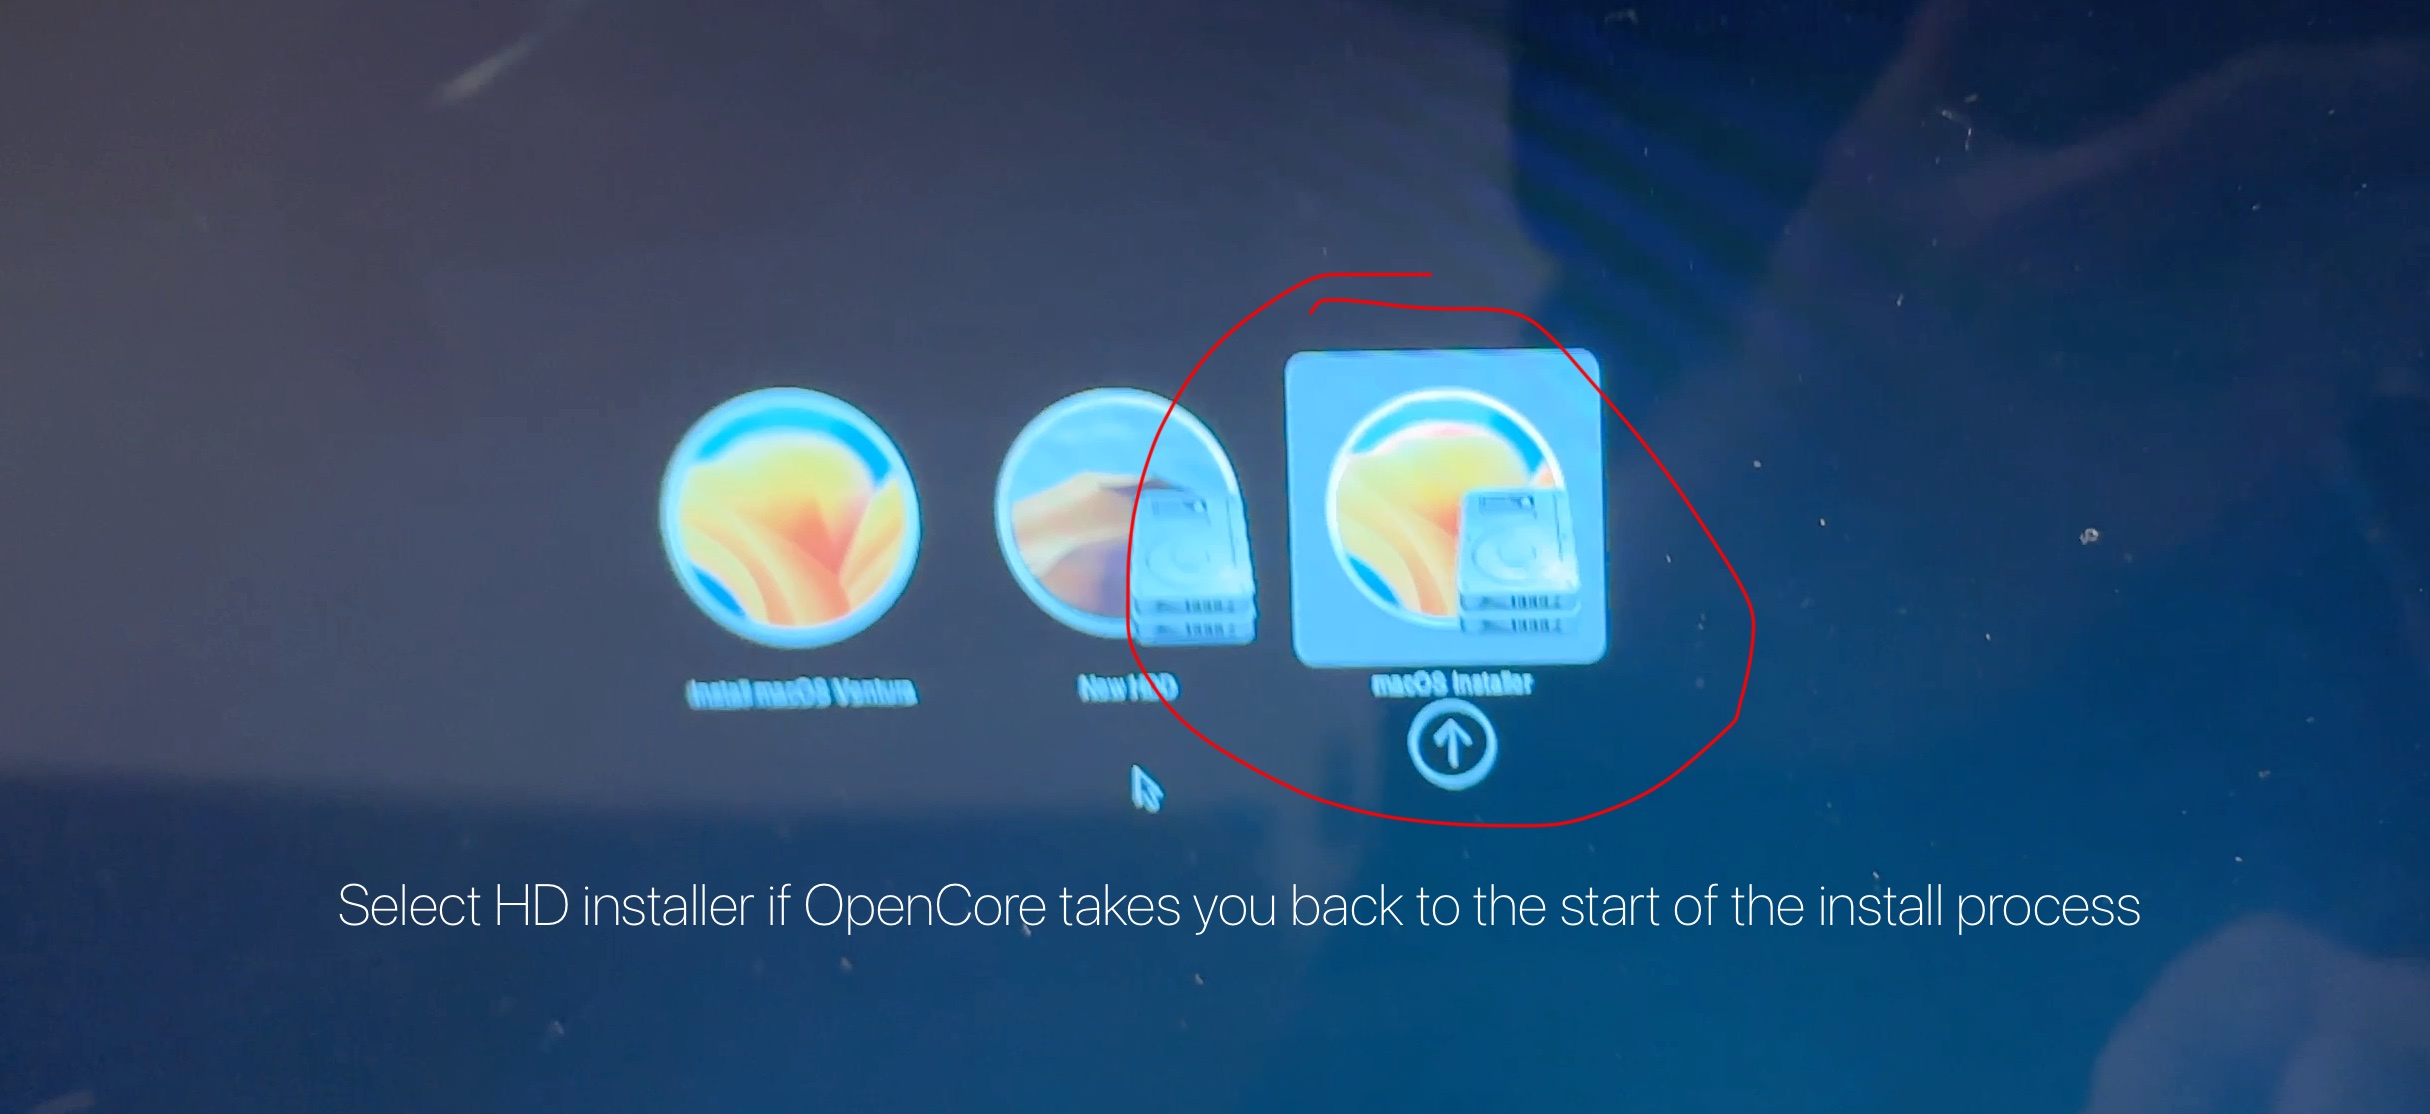
Step through the installer as normal. With modern macOS installs, the installer will need to reboot several times. It may reboot and bring you back to the beginning of the install process. If this happens, you'll need to restart your computer and from the OpenCore boot picker, select the incomplete install and not the USB installer. This will resume your install.
Step 10) Post Install
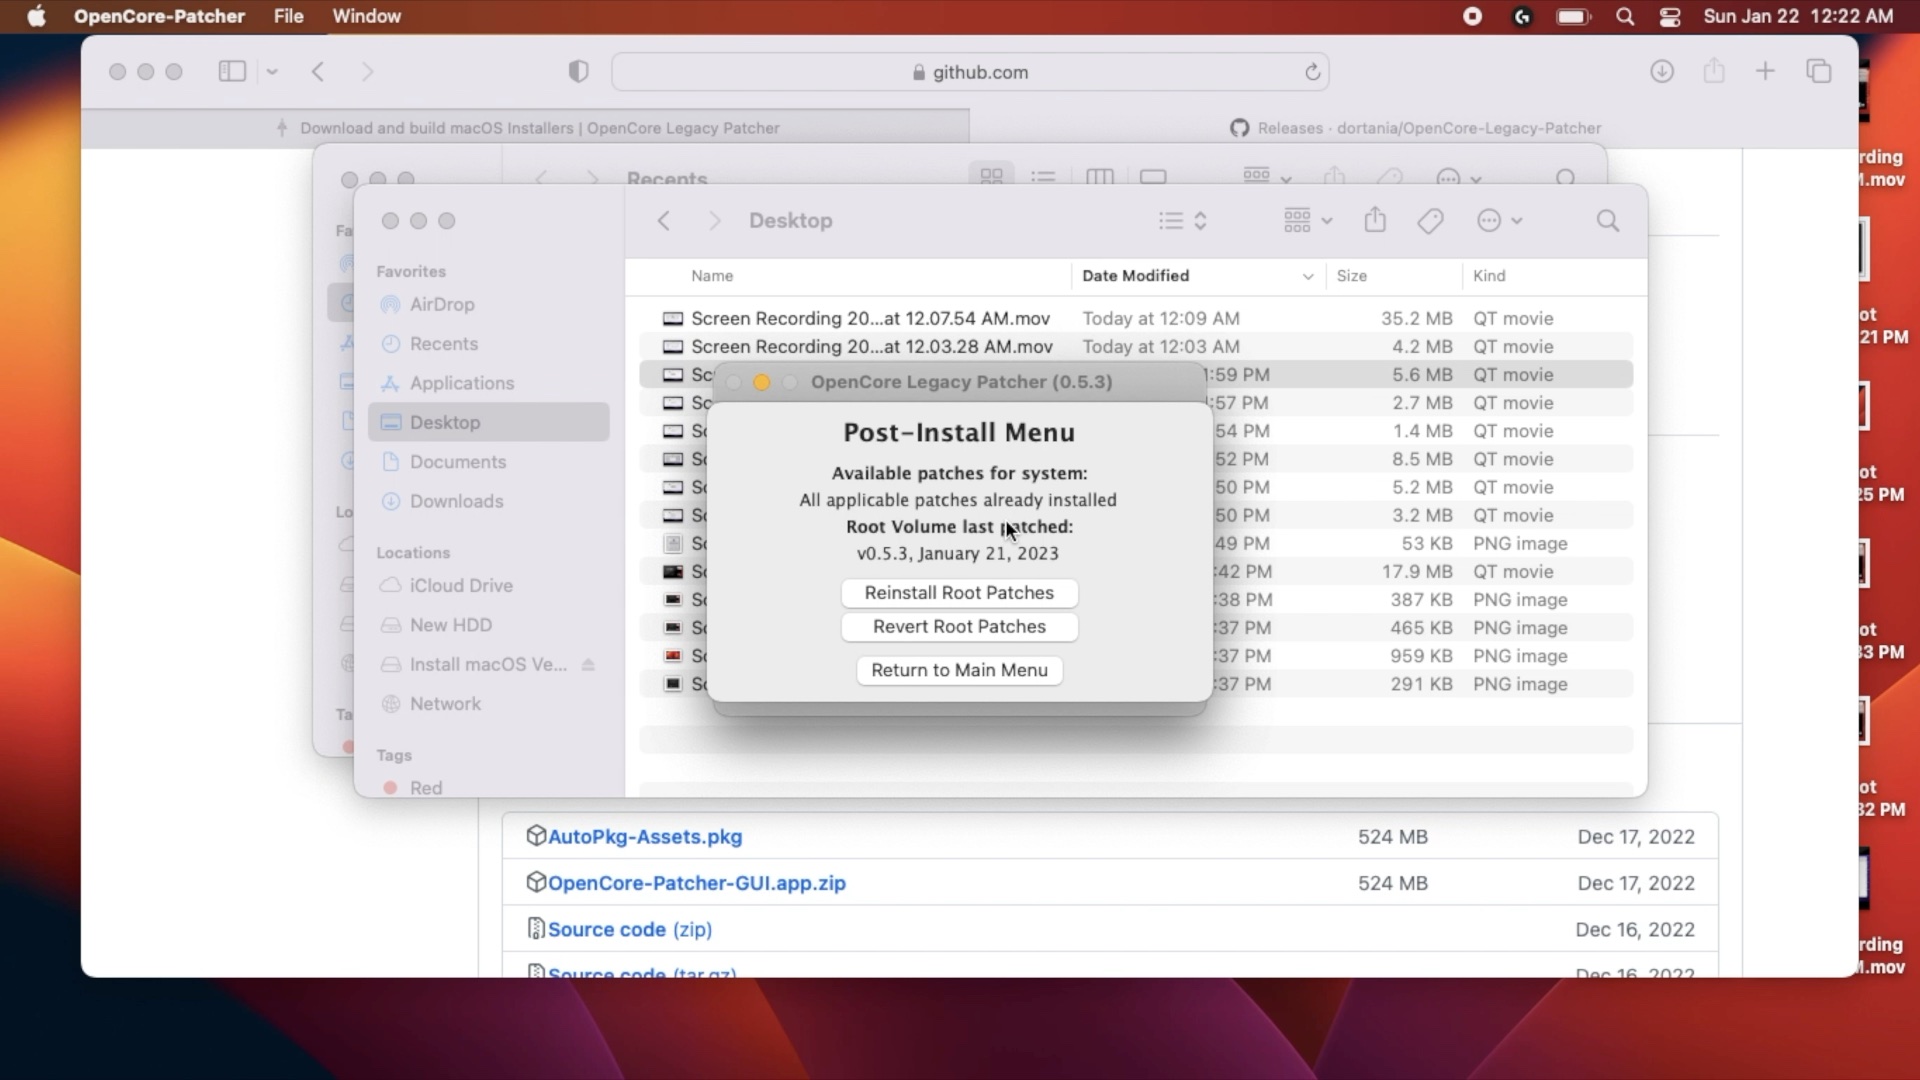
Finish setting up your Mac. Run OpenCore Legacy Patcher one last time and confirm that post-install modifications have been installed.
More OpenCore Content!
I installed OpenCore onto my Mac Pro 3,1 using OpenCore Legacy Patcher and made a video about my adventure.