Become an art legend with your Mac, iPad or iPhone
This blog post is adapted from a video version of my Draw Things Tutorial, a stable diffusion application avaliable on the Mac, iPhone and iPad via the App Store.Using any of these devices, you can follow this tutorial. Draw Things is a frontend, or a graphical user interface, for Stable Diffusion.
AI art generation is pretty CPU and GPU intensive, so for anyone using older devices, this may or may not work. The screen captures are from an iPad M2 but the Mac version looks exceptionally similar.
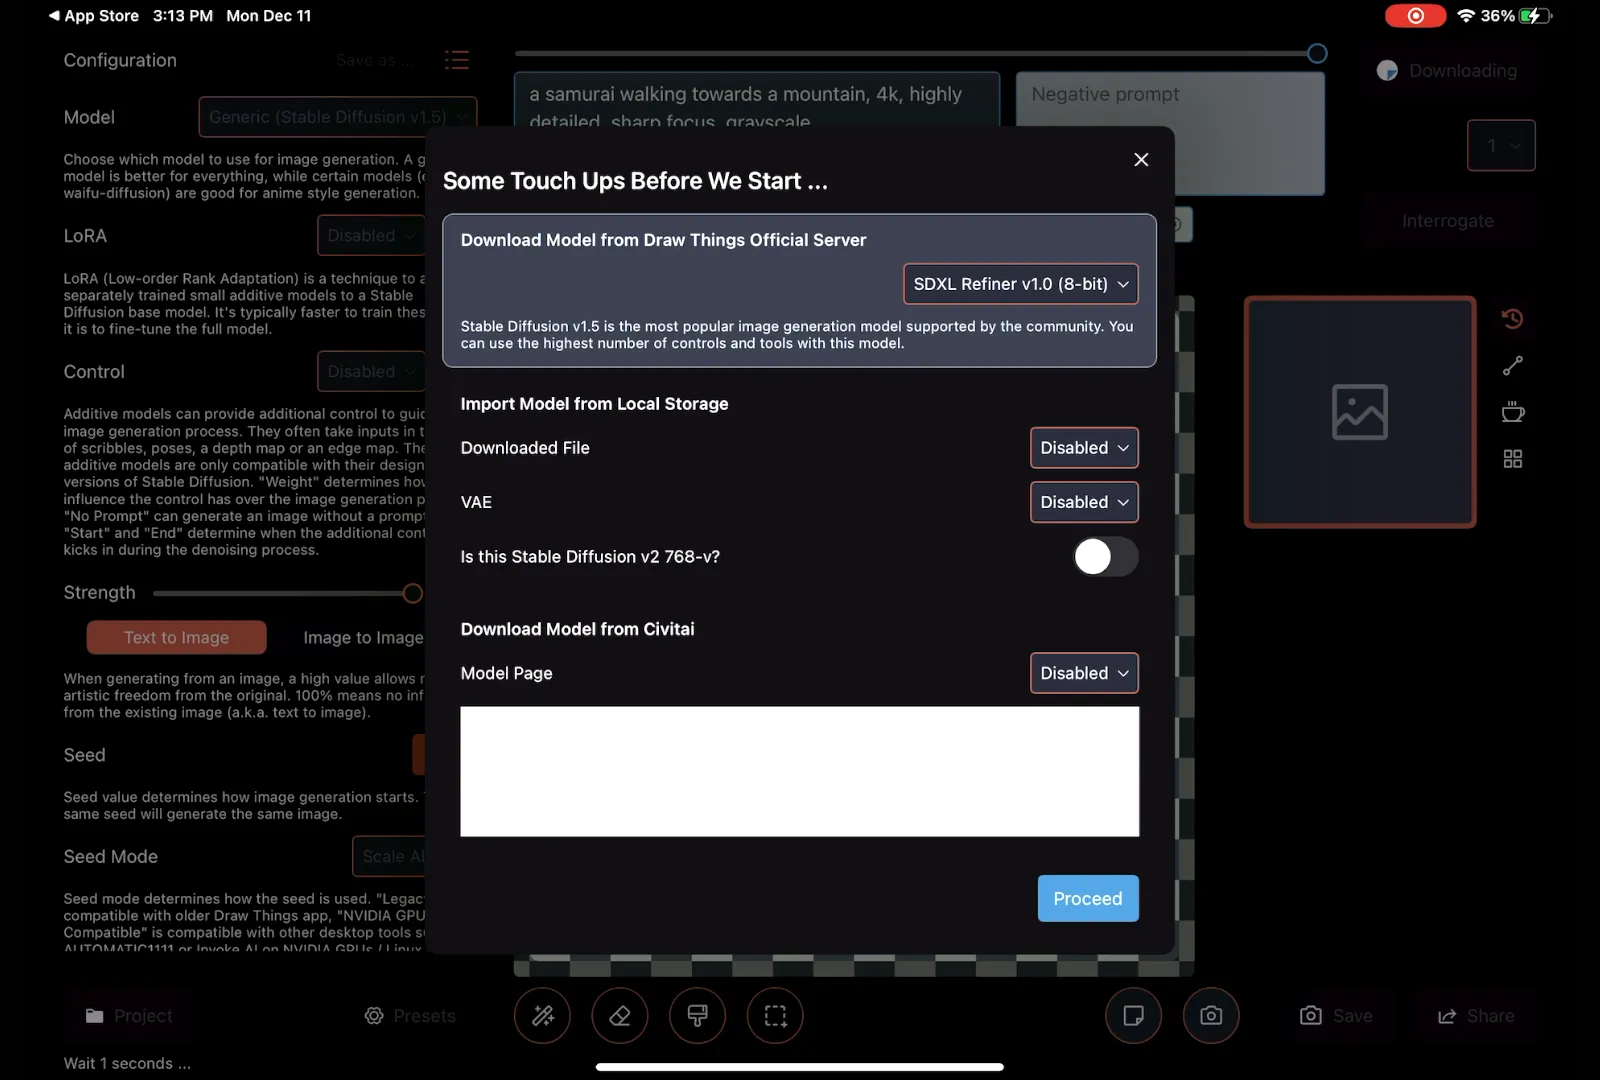
When you first launch the application, you will need to download what is known as a model. A model in machine learning, such as Stable Diffusion, is a trained neural network that has learned to generate images by analyzing extensive sets of images and text. To translate this back into human-peak, each model uses different sources for images and text. This radically changes the sort of images that a model can generate based on prompts. Some people create different models based on art styles or content. Some of them are really good at people, some are general-purpose, some are really good at meme-making, different styles of illustrations, and some are photorealistic. They also vary quite a bit in quality.</p 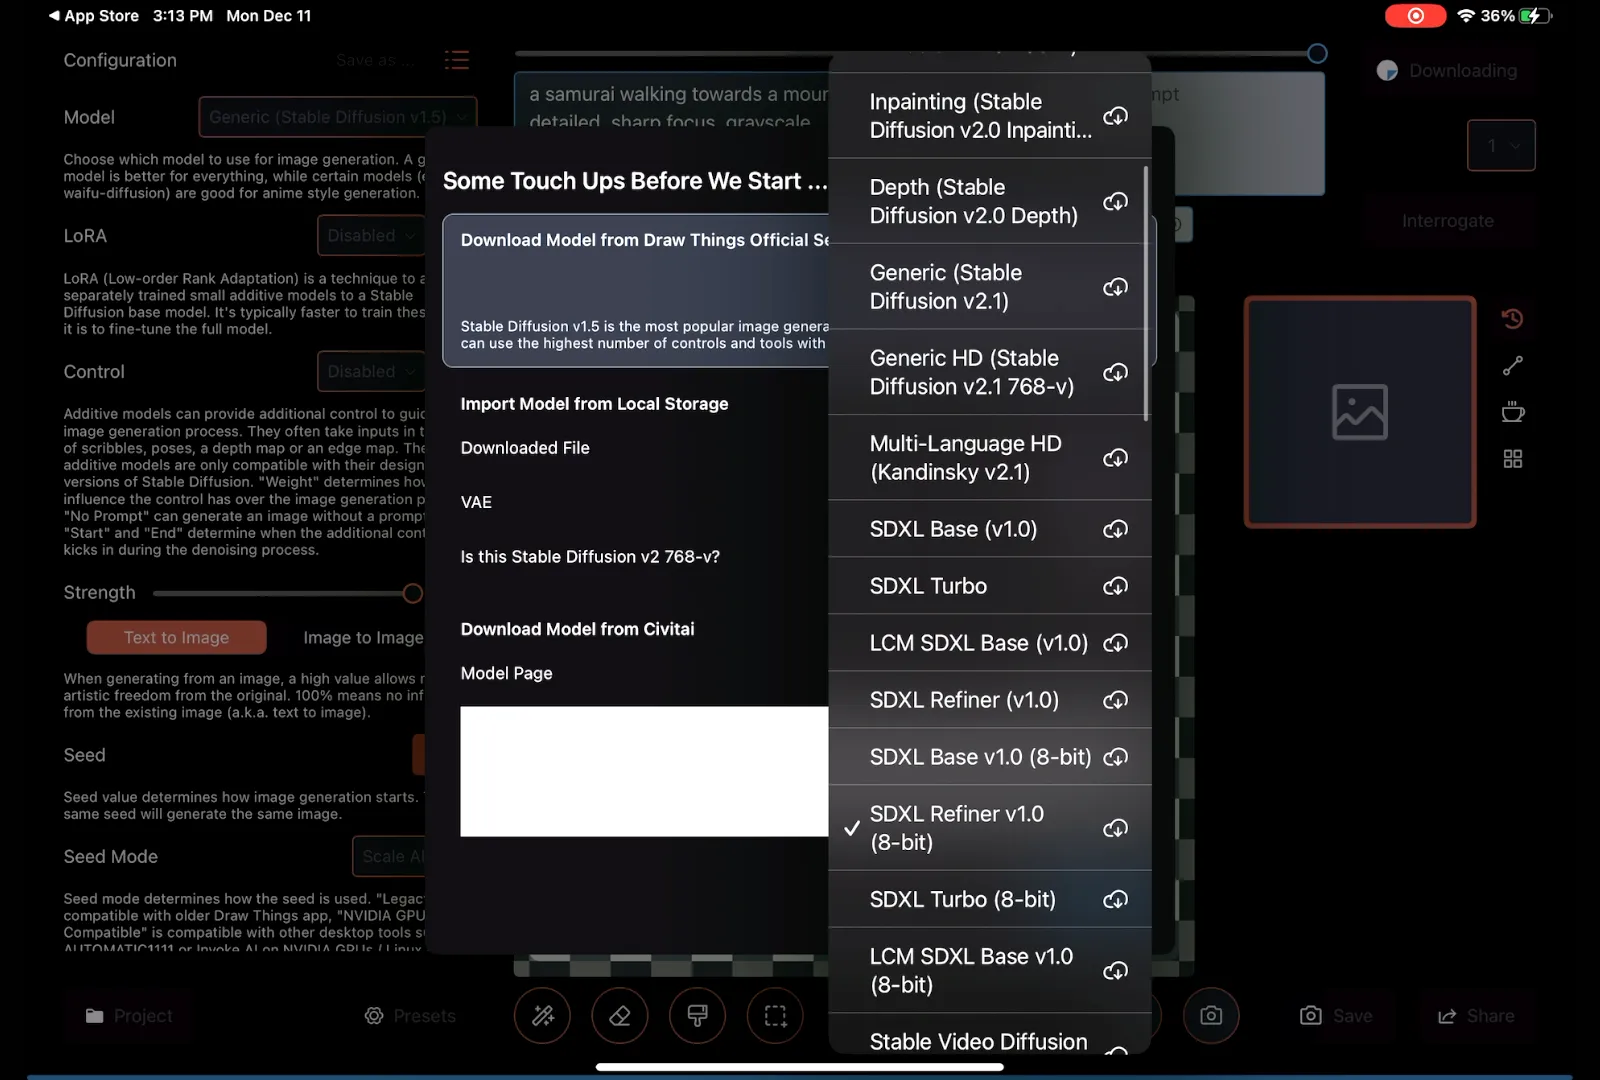
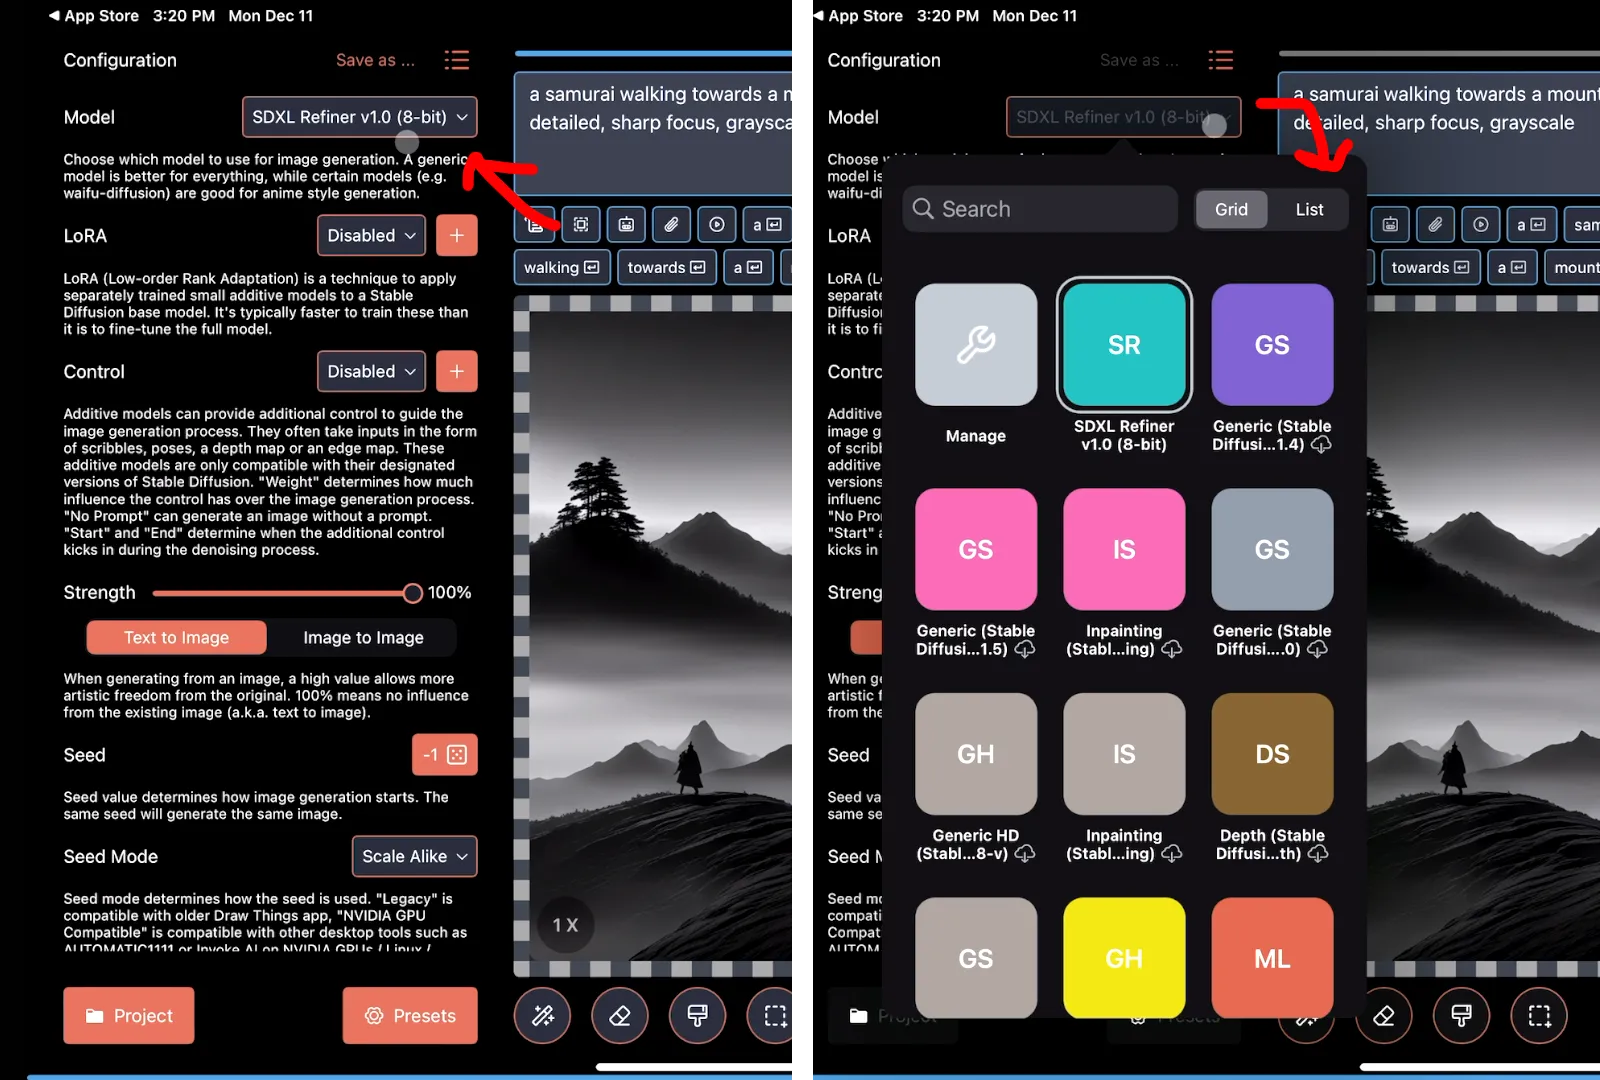
> If you click on the model, you'll see quite a few models available, but what we want is to start with SDXL Refiner. SDXL Refiners is by Stability AI, the people who created Stable Diffusion, and it's very general-purpose and generally pretty high quality.
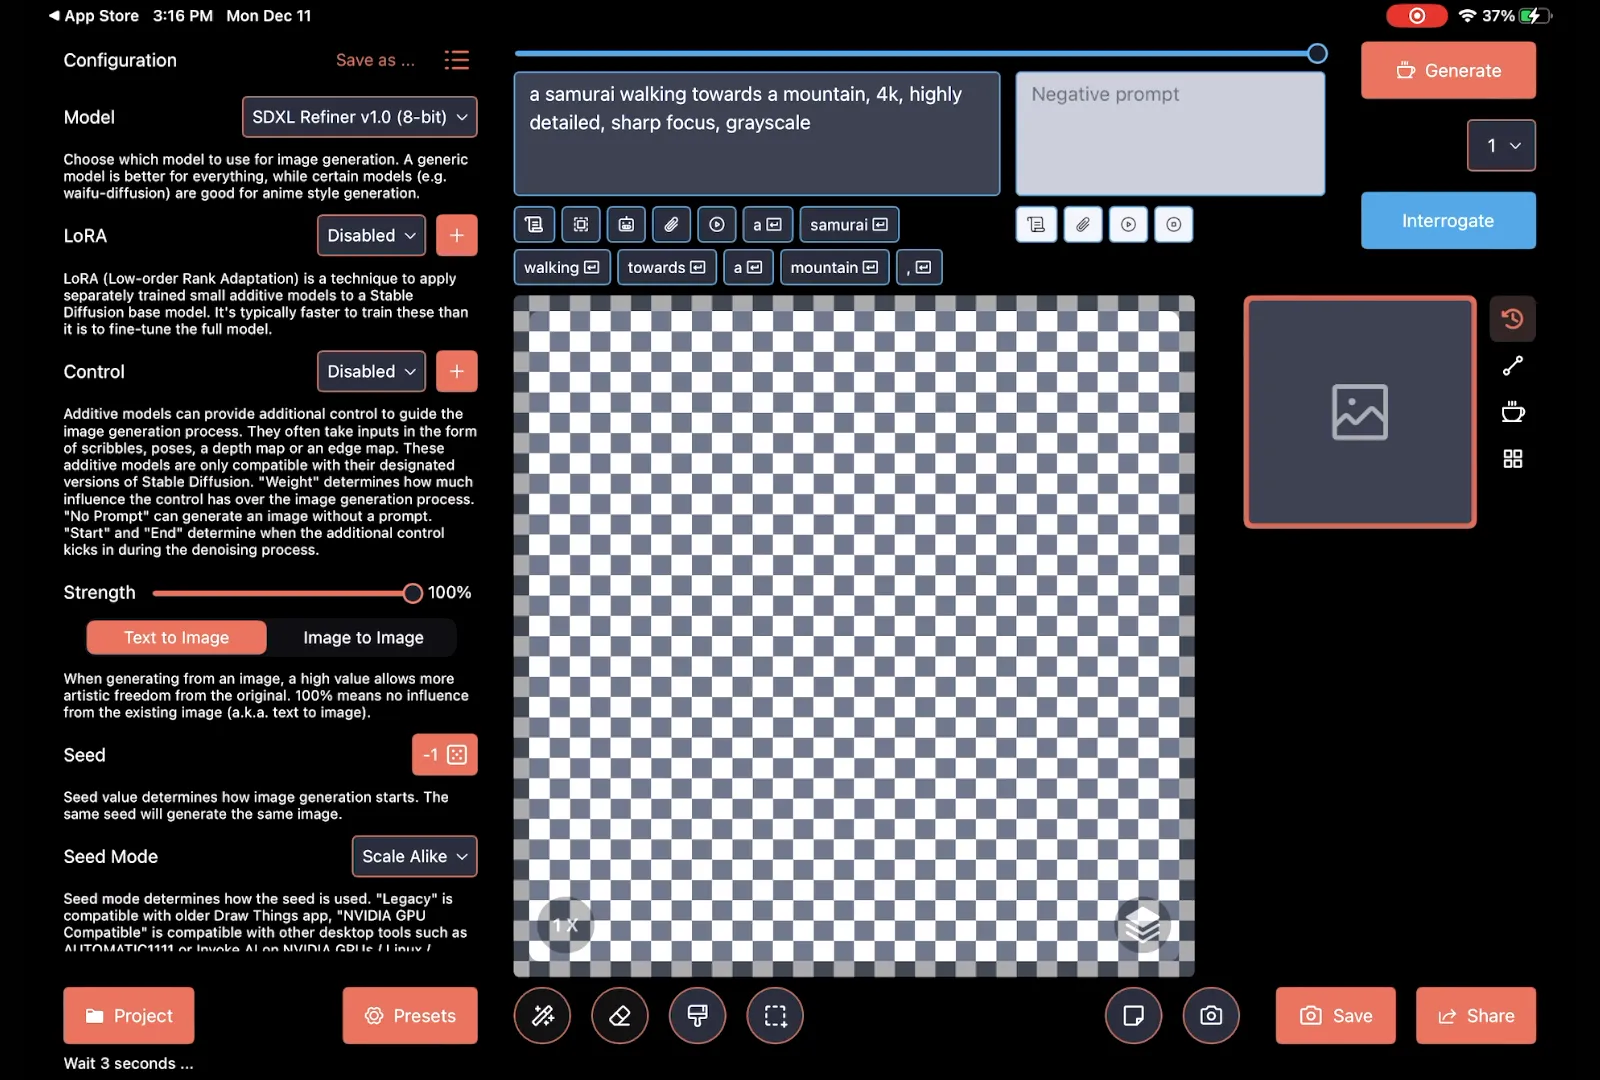
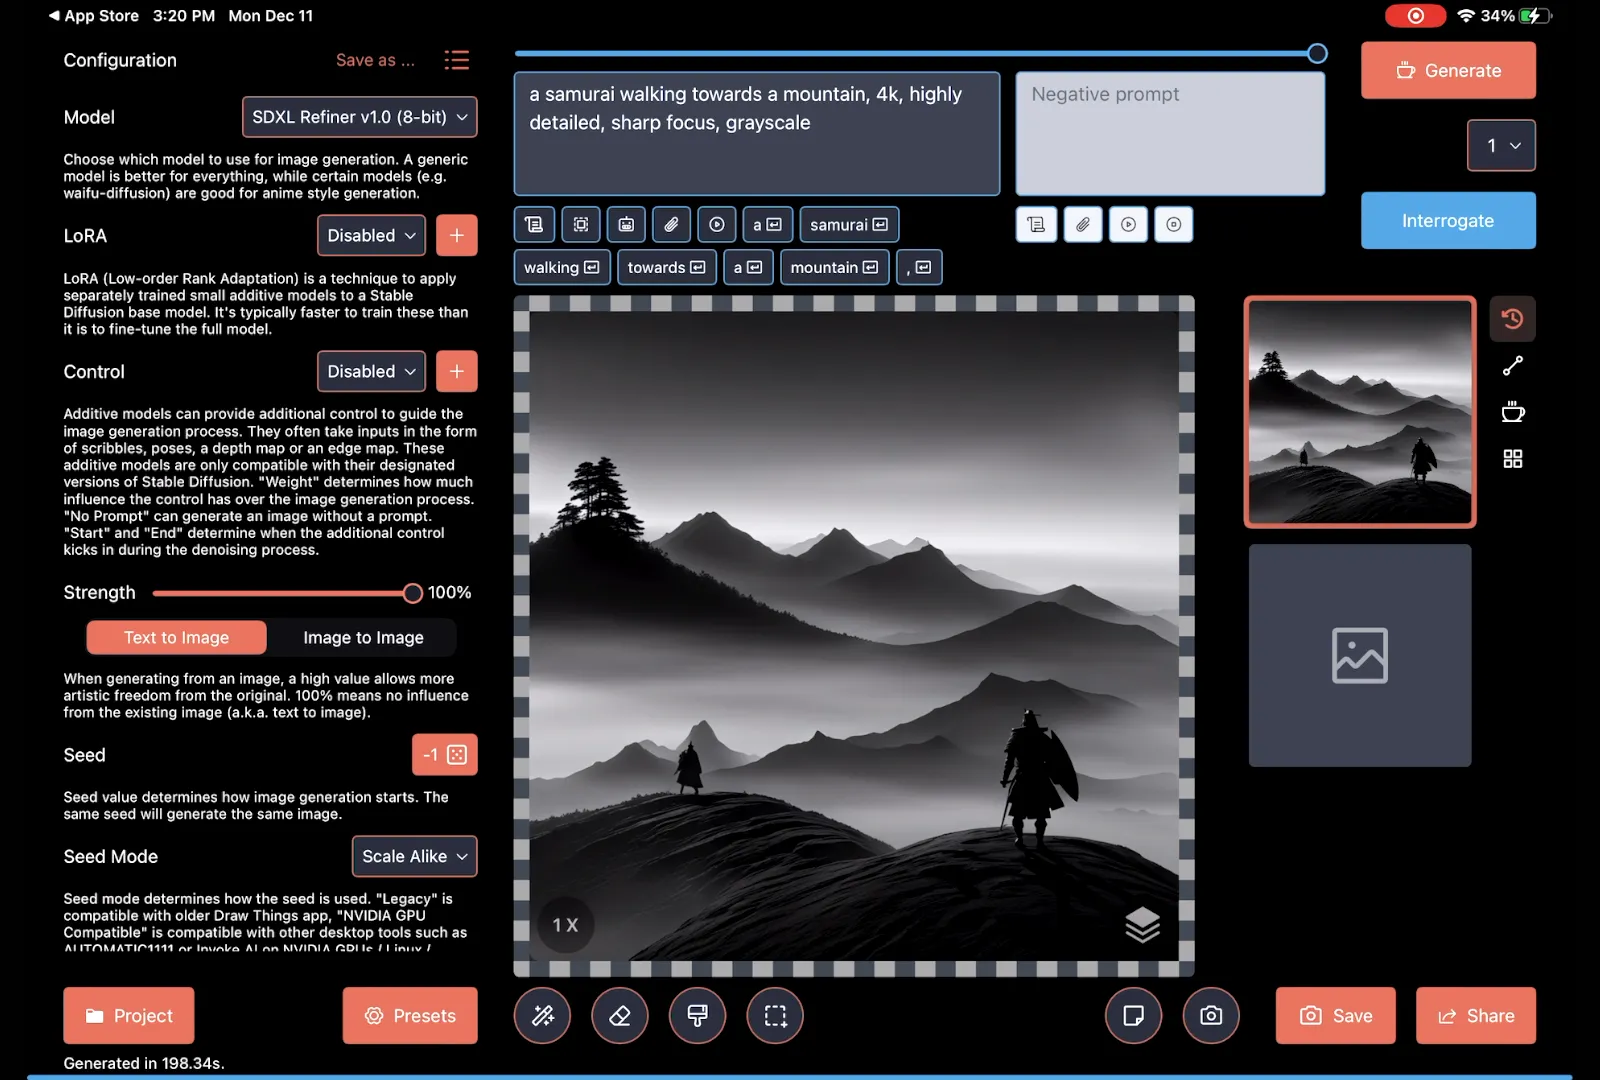
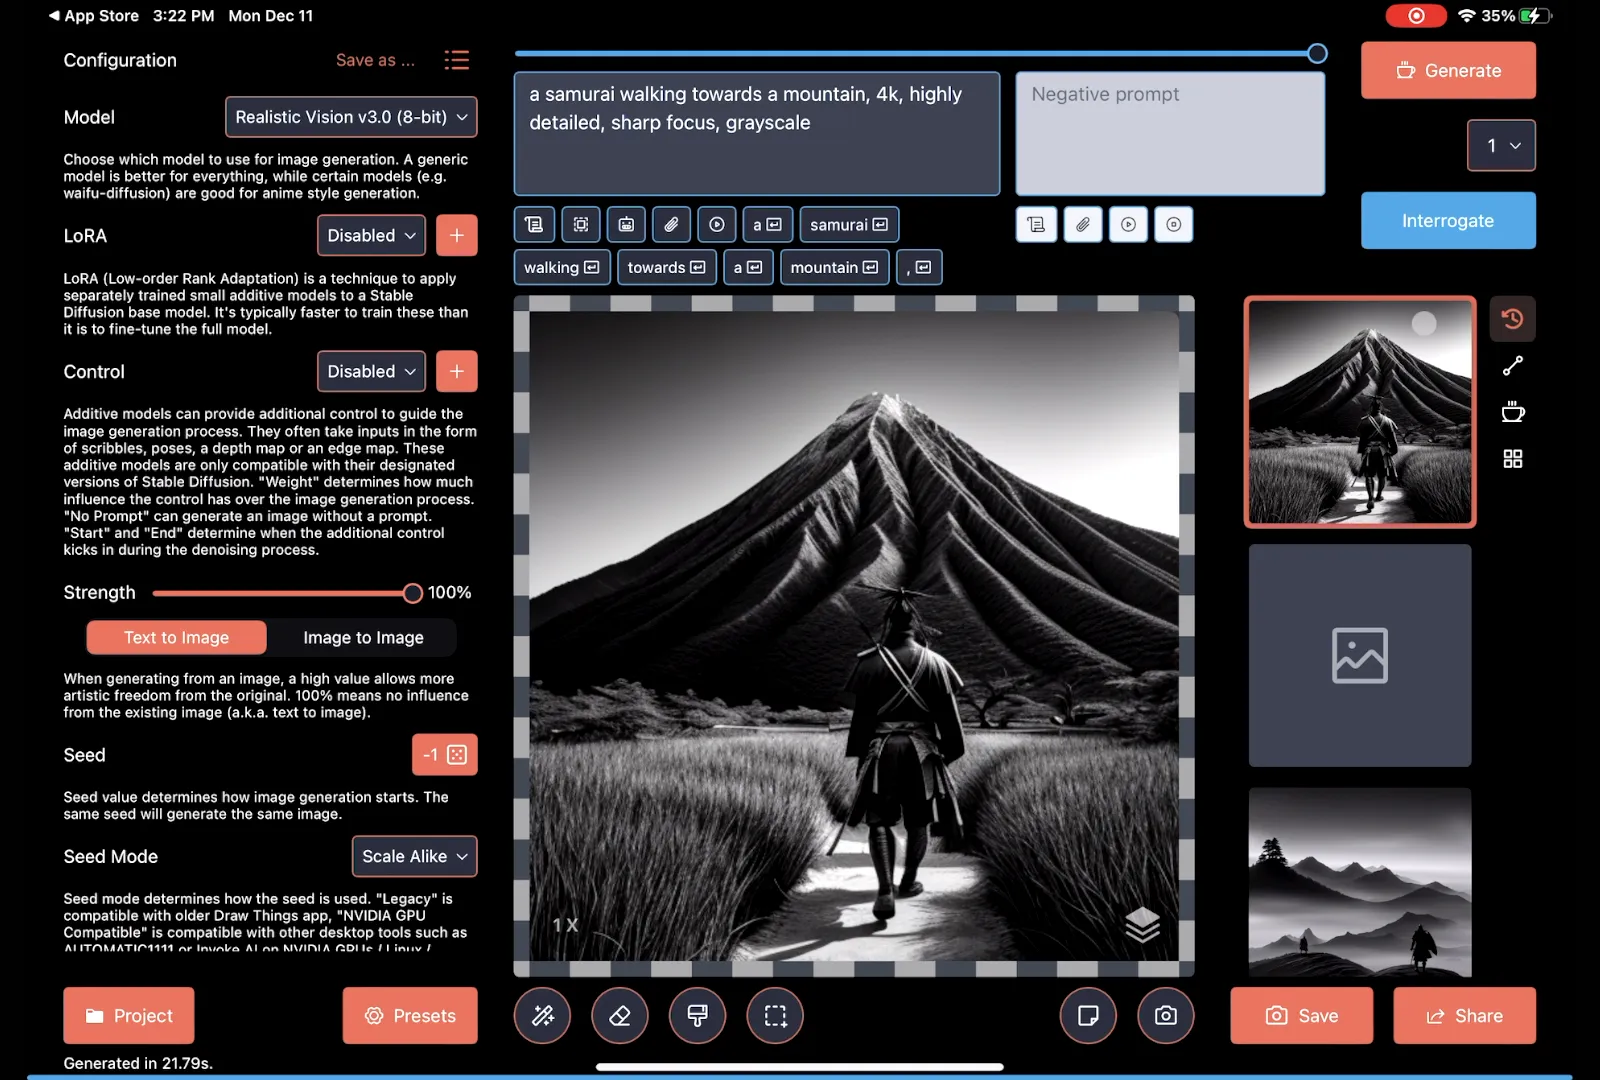
The interface looks kind of confusing, but we can see that there's a default prompt. The text on the screen, the prompt, is the thing we'd like to see. Right now, the default prompt says, "A samurai walking towards a mountain, 4K, highly detailed, sharp focus, grayscale.". If I click generate, I will see the following:
We could continue to use this same prompt and generate more images that would be similar in nature. If we were to change the prompt, it would change the content of the images that it's rendering. To reiterate that, if you type something in and hit generate, it'll spit out an image. That's pretty simple, so let's do something a lot more advanced. Since we are just talking about models, let's download a different one. This is done by tapping the model name to bring up the menu.
I can switch the model and download a new one. For my example, I'll use "Realistic Vision version 3." Realistic Vision focuses on rendering images of humans. Then I'll generate an image with the same prompt again.
The results again are fairly interesting.
Now, let's try altering the prompt and adding a negative prompt. Prompts are the results you want to see, and negative prompts are the results you don't want to see.
Inpainting lets us fill in missing pieces to an image. However, you need an inpainting model, so let's download one. I hope they change this in future versions of Draw Things, but right now, the grid layout is worthless. I can't read the full file names, so let's switch to list view and search for the inpainting. This is still not perfect, but at least now we can see 1.5 versus 2.0. By the time you watch this, some of these version numbers may have changed, so just keep that in mind. Usually, the newest version is the best, so I'm going to download the 2.0 version.
Draw Things has a few basic image editing options, and one of them is the erase tool. Click on it and let's erase this guy's face. Now that I've completely erased his face, it's time to adjust the strength. I could put this at 100%, and it'd probably do a reasonable job of filling in this guy's head. I am going to adjust this to 90% because I want it to look somewhat like our samurai. One last step, I'm going to adjust the text guidance. The on-screen description is a very good explanation. The higher the text guidance value, the more it will try to follow your prompt. If you want to know more about it, there's a fantastic article on GetIMG.
It can't always do a perfect job. Some models have inpainting versions, so you can download the matching inpainting version and have much better results. In this next section, we're going to try to incorporate real-world photos that we've already taken. I have a picture of my cat, Jeff, in Pixelmator on my iPad, and I'm going to remove some unwanted stuff from this image. Now that I've saved it, let's import it into Draw Things.
First, let's click the new page to create a new canvas, then click the camera icon so we can import Jeff's photo from our photo library. I'm going to speed through switching the model, typing up a description, resizing the image, and then setting the strength to 70%. Now it's time to finally talk about steps.
Get img.src: Time over time, Stable Diffusion improves the image, but there is a law of diminishing returns. This interactive graphic explains this better than I can do with words. Get IMG recommends roughly 25 steps. This number of steps is generally a good balance between quality and time. Each step is essentially a refinement of the image. The more steps, the more refined the image becomes. However, after a certain point, the improvements become less noticeable, and you reach a point where additional steps may not significantly enhance the image. It's important to experiment with the number of steps to find the sweet spot for your specific image and desired outcome.
I'm going to lower mine to 28. Let's speed through a few more last-second updates, and now we're ready to generate. While it's not Jeff, it definitely took some inspiration from him. Now, I like this image, but I wish it just wasn't square. Well, we can fix that. If you notice, when we zoom out, there's still the carpet background from the previous image. I could use the eraser tool, but it's just easier if I save this image and start a new canvas.
So, let's re-import the generated image. As we previously explored with the samurai, the inpainting will paint in the missing pieces of the image. Let's resize the image and move back to inpaint as our model. On second thought, I think I'm going to change the image size just a bit. I decided to off-center this image slightly so it would render more to the left of the cat. The final step is to change the strength back to 100%, which might seem counterintuitive, but watch the results. The results are actually pretty good, except for there's a line in both the images. I've zoomed in so you can really see it.
Since I'm rendering all my images to my iPad, I can go into a program like Pixelmator, open up the image, and start touching it. In Pixelmator, I can use tools like the heal tool to remove the line, use the sharpen tool to give the face a little more detail, and then even go through with the warp tool and give the cat a bit of a tummy tuck, since this is kind of a weird render. The end result is impressive, although the cat only has three toes now.
Let's revisit models once again, but this time, we're going to download models that aren't included in Draw Things off the internet. If we click the models, we can then click manage. Realistic Vision 3.0, I know for a fact, has a later version. I'm going to delete the Realistic Vision 3.0 by clicking the trash can. There are a lot of options when importing models into Draw Things, and that's unfortunately just a quirk of Stable Diffusion. I'm not going to go into all of these because it gets really complicated, but just be aware, some models do require tweaking these settings. The thing we're most interested in is "Downloaded File." If we click it, we can enter a URL to a model.
Let's cancel out of this and go to Safari. Probably the most popular host of AI models is Hugging Face's Model Hub or another similar platform. I'm not sure how it's said. From this website, we will search for Realistic Vision. This particular model is right now version 6.0 beta 1, and if you notice, it also has an inpainting version, but for this video, we're just going to download version 6.
We will do this by clicking the download icon and then copying the link. For the Mac users, you can just download this file. Now, let's switch back to Draw Things. We will click "Enter URL," paste the URL, click continue, and it'll start downloading. Depending on the model, Draw Things might download supporting files. Realistic Vision is pretty good for people, so let's just do a quick one of a woman reading a book in a coffee shop at night, and it's peaceful. The results are pretty good until you look at the cursed AI hands; it's just a thing with AI.
Speaking of cursed, let me draw a not-so-good picture of my cat, Jeff, very quickly on my iPad. To my defense, I purposely wanted a bad drawing for this demo. If I go back to Draw Things, I can import this image and then use one of the models I already have downloaded; I can then use this as a source image to generate a new image. After refining my prompt just a little bit and changing the strength to 80%, I got a pretty good result. There are some striking similarities here because it mimics the pose on a flat background.
iOS, macOS, and iPadOS all have the ability to lift objects out of photos. I've already imported my cat Jeff, and we're using the inpainting model. Apple's ability to lift objects out of photos is impressive, but it's not perfect; it has some weird edges. So, to correct for this, I'm going to do something that might seem counterintuitive. I'm going to erase the entire image, then I'm going to scroll down and set the strength to about 25%. The Inpainting 2.0 model isn't that great, but we could always download a different one and see if we could find one that would produce better results. Maybe we could put the cat in a better sci-fi background, and probably we'd tweak this strength to be even lower.
Now for our final main topic, and that's LORA or Low Order Rank Adaptation. Think of these as expansion packs for Stable Diffusion. LORAs can contain quite a bit of different stuff like characters, poses, or visual effects. Also, generally speaking, they are a lot smaller than models. I know of one that's really cool that works with Realistic Vision, and we already have version 6.0 downloaded. The process is pretty much exactly the same as importing a model. We are going to go back to the website CivitAI, search for Vector illustration, and go to that LORA. I'm going to copy the URL and then go back to Draw Things and import it by clicking manage next to the LORA. Mac users again get off easy; they just click download and then can import the downloaded file. Once it has been downloaded, we will click import. Often LORAs need trigger words. This one is a vector illustration, but if for some reason we forget it, we can go back to the website. If I click the info button, I can see the prompts used to generate this really sweet monster truck. Note the use of the word Vector illustration. I'd like to see a vector illustration of a palm tree, so we're going to use the prompts for vector illustration and palm tree. Note that I have the LORA weight set to 100%. When using LORAs, you have to pay attention to the documentation. Some will recommend settings of like 60% for the best results. Some have multiple trigger words to produce different types of images. Some were designed to work really well with a certain model, like this one, which was trained on Realistic Vision. The results are pretty cool.
There is a lot of trial and error. I tried to generate pictures of the Oregon coast in Vector art style. Some still came out as photos, and some did not. There are some topics I didn't touch on, like Samplers, and there's an amazing article all about Samplers and how they affect the image quality at stable diffusion art. If you haven't put it together by now, a lot of those scammy apps on the Mac App Store, iOS Store, and iPad Store that let you generate AI images are just using Stable Diffusion. I'm debating making a full-fledged course on this, but it wouldn't fit under this channel. I do have my Patreon, and I could also put it on Udemy or something. That way, people could really dive in with me because there are a lot of topics I didn't cover, like Control Nets or even making your own LORAs and training, because this program goes deep. If that's of interest, just let me know in the comments. And I think that's it.