Using the Korg padKontrol as a sustain pedal (or other functions)
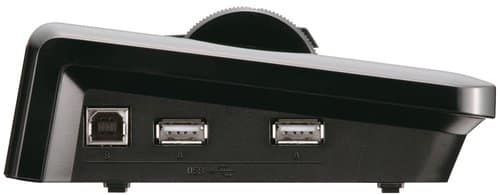
Pictured: Side view of Korg MicroKey 37, USB I/O but no ¼ input for a sustain pedal
Introduction
A lot of smaller Midi keyboards don’t sport sustain pedal inputs such as my much loved Korg MicroKey 37. Sadly, I’ve yet to see a simple USB midi pedal, (although there are standalone midi pedals that require a regular Midi I/O interface). There isn’t an easy fix but if you have a Korg padKontrol or another programmable device, here’s a workaround.
Seasoned vets may want to skip this but with a newer generation of Midi users: the solution might not be so obvious. Digital-Audio-Workstations (DAWs) such as Logic, Cubase, Protools all can accept multiple midi channels or devices at once and even route them to one single virtual instrument/synth. This means for a program, such as an organ like the Native Instruments’s B4 or the Logic’s internal Organ, you can use two keyboards at once to more accurately simulate an organ (as organs often have two sets of keys). However, this ability isn’t just limited to situations such as this. Midi instruments can be set to communicate on the same channel, so a keyboard and a set of midi faders could be linked to Native Instrument’s Massive to control the oscillators and parameters unique to that synth.
Midi is flexible if anything, but also cumbersome as a technology, having barely changed at its heart since its inception in the 80s, still rooted sending in 7-bit integer to various channels. To this day, many DAWs still allow you to view the raw midi data in channels + numerical values. With that said, modern applications make it pretty easy to use many midi devices at once.
Since at its root midi is still simply numbers being sent to various points, many midi controllers allow you to change this functionality to maintain maximum compatibility. A knob can be assigned to a particular Midi Control Channel, (commonly referred to as a Midi CC) to which software (or actual hardware) can determine how this data is used.
Example: a knob could be assigned to MIDI CC 13 which controls phasing on a synth. Twisting the knob, adjusts the phase sync accordingly.
While this all starts to get esoteric, its important to realize that this ability can be used for something simple, like adding Sustain Pedal functionality to a cheap midi keyboard that doesn’t have one.
What you will need:
- A midi device with the ability to send/receive or program its midi function with its proper software installed or which can be programmed via the device itself.
- A sustain pedal (if your midi controller supports a physical pedal. Midi pedals are generic and can be bought at many music shops. Rock band foot pedals work as well, as they are midi pedals).
For this example, I’m using a Korg PadKontrol to control my sustain pedal.
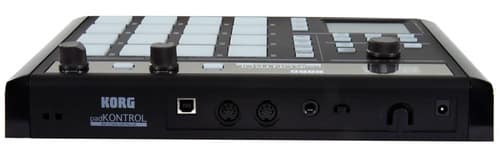
Pictured: back view of Korg padKontrol, the “headphone” like jack is actually a ¼ inch input for a sustain pedal.
Configuring your software can be pain, I can’t specifically include instructions for hardware that I do not own, but generally you will need to make sure in the preferences, the software is able to communicate with your device. Usually this requires setting the midi in and out. Often devices will have a control port when or channel.
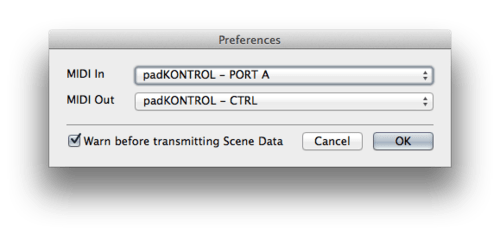
Pictured: A properly configured Korg padKonrol requires going to the preferences and setting the Midi In and the Midi Out to the padKontrol
Step 1: Program software.
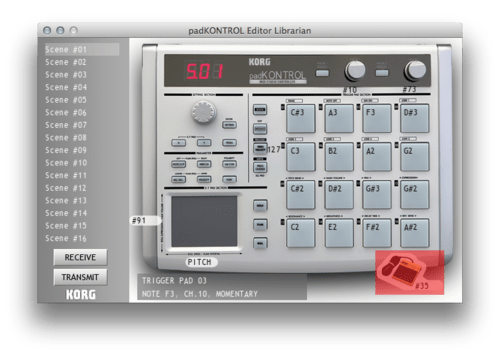
Programmable midi devices with send receive usually allow you to program the device remotely. Below is the Korg PadKontrol’s software. Highlighted in red is the setting for the PadKontrol’s sustain pedal
Step 2: Setting the up the pad or pedal
Double clicking the Pad in the Korg Padkontrol allows you to set up and change the Midi CC.
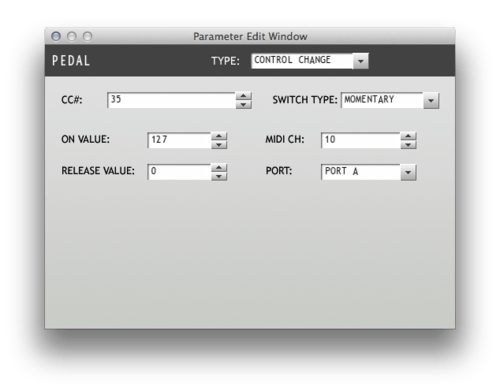
Setting up the Midi CC means setting the Midi CC to channel 64 as this is the general midi specification for sustain pedals. (A full list of common midi settings can be found at various websites such as the following website,
Step 3: Save your configuration to the device.
After the setting for the pedal has been configured, usually it requires transmitting the settings back to the device. The Korg padKontrol has the ability to store multiple “scenes” (separate midi configurations) so I set this to scene #1, which the device boots up to when plugged in.
Step 4: configure your DAW.
Once in your midi application of choice, you may need to configure the instrument input to accept all incoming midi channels from all available devices.