Recommended Mac Pro upgrades & hacks
04/11/18
IMPORTANT: Rather than re-edit this page, I've created a new guide, called "The Definitive Classic Mac Pro Upgrade Guide" which is a larger, more in-depth, easier to read, organized list of Mac Pro upgrades, aiming to encompass all the potential upgrades for the classic Mac Pros. I highly recommend reading it, as many upgrades (like NVMe storage, Audio over HDMI, PowerSupply mods etc) simply not discussed here.
For posterity, below you'll find the original guide that was maintained until roughly 04/17.
I originally wrote this in August of 2013 and it still remains one of the most read items on my blog (I've finally as of mid-April started the signifcant task of actually editing down this post with out of date information and cleaning it up). Like my Mac Pro, I’ve continually updated this page and will continue to do so until my Mac Pro retires.
My opinion of the redesigned Mac Pro still remains negative as used a heavily upgraded 2008 Mac Pro 10 years only to upgrade to a Westmere Mac Pro in 2018, waiting for the mythical return to modular computing. That said, the fact 10+ years later my Mac Pro remains a viable computer is a testament both how well engineered the Mac Pro was, and to the benefits modular computer design.
While Apple overthinks its new Mac Pro, we're stuck in limbo.
Whether you may have economical reasons or a disdain for the new less upgradable/hackable Mac Pro, this guide seeks to illustrate upgrades that are feasible upgrades beyond your typical RAM and Hard drive upgrades.
Please, contact me if there’s anything I’m missing.
– Greg
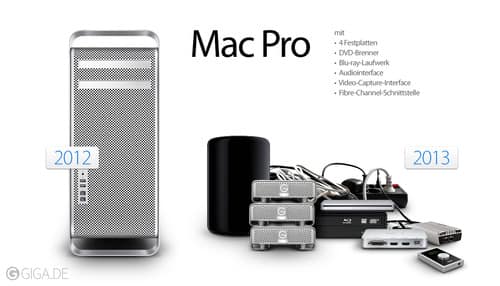
Image Source: Danish tech blog, Giga.de, lampooning the new Mac Pro
The Guide:
So you have a Mac Pro and perhaps the latest Mac Pro isn’t exactly what you’re hoping for… It wasn’t for me.
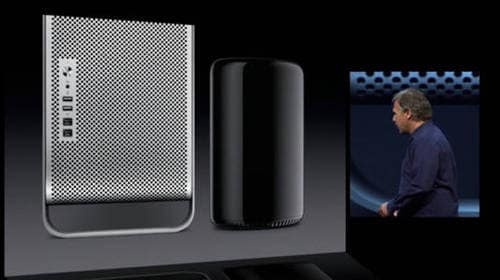
Screenshot from WWDC. The 2013 Mac Pro doesn’t leave much for upgrades.
Thanks to the wonders of upgrades and hacks, any Mac Pro is still a viable box, some more so than others. You can always upgrade the RAM and the HDDs, but there’s plenty more interesting upgrades you can do, and most on the cheap. You’d be surprised at the performance a 2008 Mac Pro has in GTA V.
Notably RAM isn’t getting cheaper and if you’re not running 16 GB+ of RAM, you’re missing out on one of the best features of the Mac Pros, the ability to have more than 16 GB of ram. Apple has yet to make a laptop support greater than 16 GB of RAM and only very recently have the iMacs been able to support up to 32 GB of RAM.
Upgrade #1: OS X 10.9+ 2006 Mac Pros and 10.13+ 2008 Mac Pros
Photo Credit: Apple Inc
Cost: $0
Effort Level: Moderate
This is a “Well duh” upgrade, except for 2006 - 2008 Mac Pro owners, which are officially unsupported, but when has official really been a barrier? You can install 10.8+ on unsupported Macs (2006 Macs are capped lower than 2008 Mac Pros). 2006 Follow the guide here.
Mavericks even on an old Mac Pro breathes new life into 2006 Mac Pros thanks to much better memory management and Grand Central. Mac Pro 2008 Mac Pros can install macOS High Sierra using macOS High Sierra Patcher Tool for Unsupported Macs tool.
Upgrade #2: USB 3.0 or 3.1c PCIe card
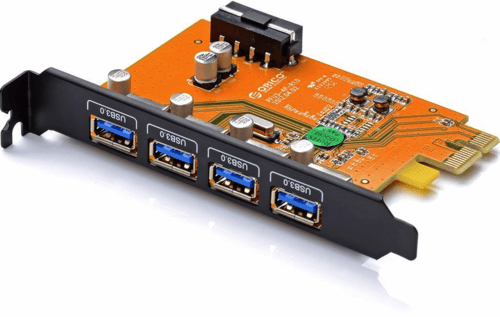
Photo Credit: amazon.com
Cost: $20-40 for USB 3.0, $50-60 for USB 3.1c
Effort Level: Minimal
At the top of the list comes USB 3.0 as its cheap and effective. USB 3.1 is more "optional" as the plethora of devices still aren't USB 3.1c
USB 3.0 isn’t the newest kid on the block, but you’ll never be able to add Thunderbolt via upgrades. USB 3.0 is nearly the speed of eSATA and USB 3.1c is much faster. Sonnet's Allegro USB-C PCIe is a safe choice for USB 3.1 seekers. Sadly, there is not and will not be any Thunderbolt card for the Mac Pro as the Alpine Ridge thunderbolt cards are motherboard specific.
For as little as $18, you can add USB 3.0 to any Mac Pro (running 10.8.3). It’ll take some hackage, as you’ll need to provide Molex power to the PCI chamber. With the 2006/2008 Mac Pros, you can easily feed off the Molex power cable in the optical drive. 2010 Mac Pro owners will need to get a SATA Power to Molex Power Adapter
Note: Sonnet (Long time Mac hardware/upgrade manufacturer) also sells USB 3.0, more spendy but they carry the trust that comes with the Sonnet name. There’s others on the market, I recommend Macrumor’s forums.
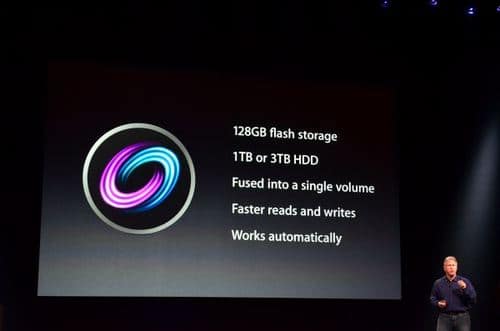
Upgrade #3 Make your own Fusion drive by installing an SSD
Cost: $100-$700 (SSDs prices are vary greatly based on make/size).
Effort Level: Significant
Yes, SSD is the future. Most modern SSDs are as reliable as HDDs (initially they weren’t).
Installing an SSD might not be as straight forward as you think. Most SSDs are 2.5 inch, the Mac Pro drive bases are 5.25 inch for optical and 3.5 inch for HDDs.
In 2009+ Mac Pros, installing a SSD is a breeze. The same guide recommends using the 2 extra SATA ports on the 2006-2008 Mac Pros, although the much easier option is to get a replacement sled that’s matched for your Mac Pro’s drive bays (assuming you have a drive bay free) or you can get the icy dock or the OWC Multi-Mount. (See upgrade #5).
Anandtech liked the Fusion drive but lamented its rather measly 128 GB. But did you know you can make your own fusion drive and you can make it bigger? In fact, You can make one with any older Mac.
Note: 10/14/14 update
… Skipping the Fusion Drive probably is a more viable option as 1 TB SSDs entered below the $500 mark some time ago. I skipped the Fusion drive for a 750 GB SSD last year. The Mac Pros are SATA2 only so you won’t be making full use of the SSD without a SATA3 card, see upgrade #6 for more details.
Upgrade #4: nVidia GeForce 700 through 1000 - (And any GTX 7xx & GTX-9xx & 10xx)
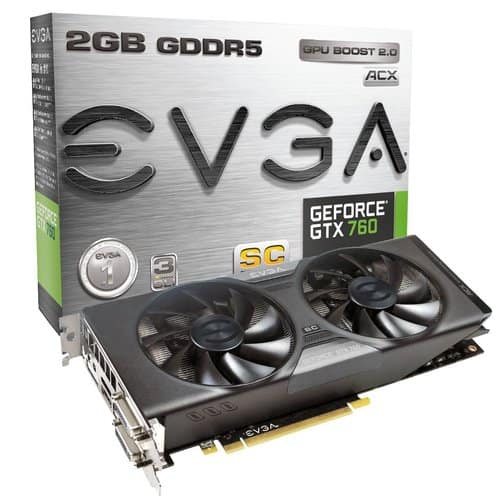
Photo Credit: Amazon.com
Cost: Graphics cards are in constant flux thanks to bit coins
Effort Level: Mild (Not difficult but ac Pros require 8 pin power adapters)
Did you know that nVidia has OS X drivers for its cards? When I originally wrote this guide 4 years ago, this was surprising fact for many users. I tested a GeForce 760 Hackintosh vs it my Mac Pro, outlined the installation process 2008 Mac Pro Full Instructions and benchmarks here. It was quite capable of playing GTA V at mostly high settings (limited mostly by VRAM) at 2560 x 1440.
Don't take my word for it, there's plenty of Amazon reviews with the 760 Check the Amazon reviews or youtubers jam a 970 in a Mac Protip.
I've since posted a guide for the GeForce GTX 1060 in Mac Pro 2010.
The GeForce drivers now support the latest GPUs, but you'll need the latest OS X. With GPU prices in flux, it'll be an expensive upgrade but one of the best ways to extend your life. Also to enable High Resolutions @60hz and HiDPI fix, you may need the Mac Pixel Clock patch
Upgrade #4: Flash an AMD (Formerly ATI) Radeon 6870 or 6970
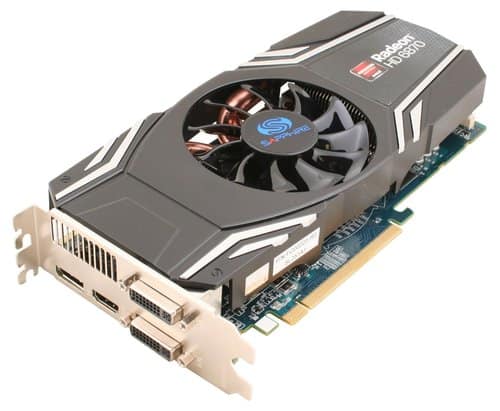
Photo Credit: Amazon.com
(I’m leaving this up for posterit and history's sake, as the information is still valid although the nVidia route is the superior option) and the latest ATI cards now support dual roms.
Cost: $?
Effort Level: Moderate (Not difficult but requires patience locate an EFI rom and careful reading)
Mac graphics cards are really expensive, but fortunately with a little TLC you can flash Radeon 6870s and 6970s in your Mac Pro, I retired my GeForce 8800 GT a year ago and haven’t regretted it. Out of the box, the 6870s will output picture after fully booting. However, you’ll get some weird issues (Quicktime does not work, games may not work, mac will not output video via graphics card until fully booted). To correct this, you’ll need to flash the firmware with the Mac rom for full EFI compatibility.
Don’t worry, it’ll still work great in in Windows. However, the Mac roms usually only support 3 video outputs so be prepared that likely one of the DVI ports will be rendered unsupported. You’ll be limited to driving 3 monitors instead of 4. :)
What you’ll need:
- A standard Radeon 6870 or 6970 (I used a Sapphire, although others are known to work). Here’s exact model I used. The sapphire 6970 is known to work...
- OS X 10.7+
- Netkas RomCreator
- The EFI Roms (You’ll need to do some digging on the forums for the 6870 and the 6970 rom can be found here)
- If you’re wary, be sure to buy your graphics card from a place with a good return policy.
If you’re too hesitant and have deep pockets, there’s always the Mac EVGA Geforce GTX 680.
Upgrade #5: Make use of your unused (semi-hidden) SATA Ports
Cost: $15-50
Effort Level: Moderate
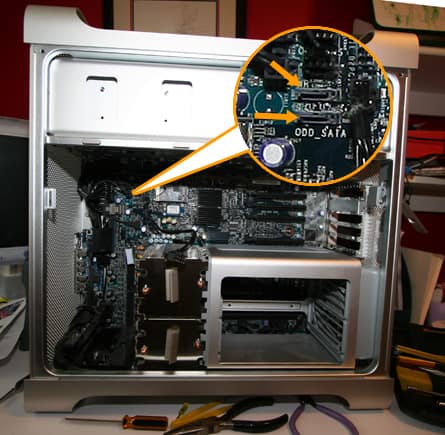
Photo Credit: macsales.com
The 2006-2008 Mac Pros have two hidden unused SATA ports, likely designed to supply the optical bays with SATA ports.
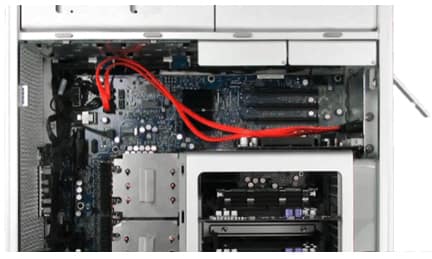
Photo Credit: macsales.com
You can easily turn these into eSATA ports with simple PCI plate upgrades with a generic internal to external eSATA port or Newer Tech’s package, designed for the Mac Pro.
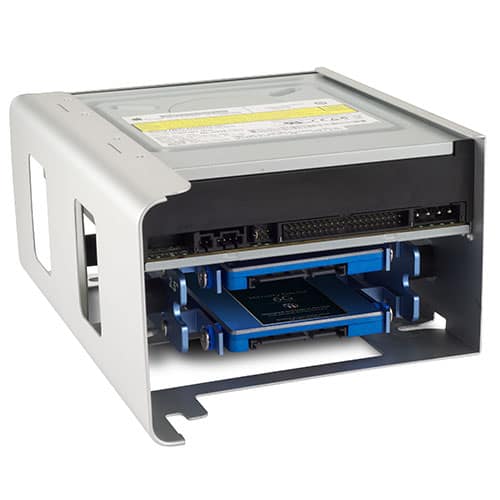
Photo Credit: macsales.com
If eSATA isn’t your style, you can easily add in two more drives into your free 5.25 drive bay using a OWC Multi-Mount
Photo Credit: macsales.com
Upgrade #6: Turbo speed your storage: Use PCIe Storage or Upgrade to SATA3 for SSD
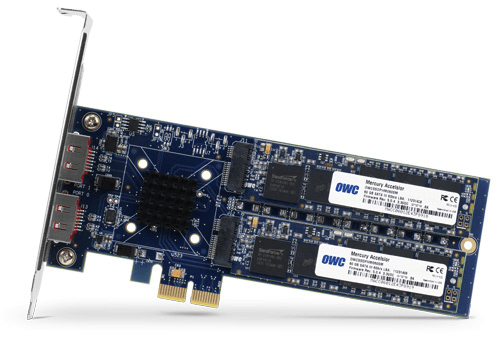
Photo Credit: macsales.com
Cost $100-1000
Effort Level: Minimal to Moderate depending on choice
The latest MacBook Airs and the upcoming Mac Pro boast PCIe storage. Its oodles faster than SATA and every Mac Pro 2006-2012 is limited to SATA2… but don’t think you’re exactly limited. There's a few vectors and all involve a PCIe card.
The fastest are PCIe cards that are chassis for PCIe SSDs, these are cards that house the same storage format found on laptops. Some cards can house two cards together in a RAID configuration, and thus deliver truly blistering performance. These are at the extreme end, and deliver 2 GBs per second according the benches. There's also the singular PCIe Mercury Accelsior E2 by OWC which provides a single slot and two eSATA ports.
Next up is the considerably less expensive option: PCIe to SATA3 housing units. Sonnet makes the dual Sonnet Tempo SSD Pro Plus which has two internal SSD mounts and two external eSATA III ports for Soft raid support, getting speeds to the 1 GB per second range, B&H carries the card for around $250 as of writing this in early 2018. Both OWC Accelsior S PCIe Adapter can house a single SSD drive, ranging from $50 to $90.
The cheaper route is to get a bootable SATA3 card. Sadly the 2006 - 2012 Mac Pros never saw internal SATA3, and cap at SATA2′s 300 MB/s. Also, see the a friendly MacRumors poster’s guide for more card options and mounting options.
With the Samsung 850 models hovering around 500+ MB/s a second, going to SATA 3 for many SSDs will nearly double the the sustained reads/writes over using internal SATA 2.
Upgrade #7: Macs Fan Control
Effort Level: Minimal
Cost: $0
Why does Macs Fan Control count as an upgrade?
My Mac Pro has always had a fan glitch where my Mac goes into leaf blower mode under any distress.
Having used it to record two full length LPs, this has been rather problematic. However, you can bypass the thermometers default settings using Macs Fan Control. The Mac Pros have an impressive amount of fan chambers, and if your Mac is overly sensitive, you can easily reduce the Fan RPMs using temperature ranges for different zones. Also as a major bonus, there’s even a Windows version that lets you turn down your fans when booting Windows 7-8.
Its been a life saver for me, although if you’re not careful you can damage your computer. Just keep an eye on the temperatures and learn what’s normal. I’ve been using it for years now, and its my Mac Pro no longer runs in leaf blower mode while playing games in Windows. I can’t recommend it enough.
Upgrade #8: Upgrade your CPUs
Effort Level: Significant
Cost: $80-$400
There are guides you can follow like the Anandtech one linked here and everymac has a lot of great info. Any oldschool PC user probably isn’t afraid of a little thermal paste. Its not the most difficult (swapping out a busted flat panel on a MacBook requires more nimble fingers) but its not for the faint of heart or the shallow of wallet.
Mac Pro 2006s can rock 8 Core Clovertowns, you’ll just need need a Socket 771 Xeon CPU, and if you find the right place, for as little you can go from 4 to 8 CPUs for as little as $80 total. The 2006 Mac Pro makes for a very compelling upgrade, and there’s plenty of guides for it.
The upgrade options become a lot less compelling for the 2008 Mac Pro which the base model largely was octo-core. For, one could go from 2.8 GHz to 3.0 Ghz, but there isn’t much room for upgrades as the best CPU for the LGA771 is the X5492 (with the improve 1600 Mhz FSB), the few places that carry them run over
NOTE: 2009 Mac Pros can accept the same CPUs as a 2010 CPU with a firmware hack, see below
The 2010/2012 Mac Pros have more flexibility ranging from 6, 10 and 12 core configurations, there is a model difference between the Nehalem 2010 Mac Pros, and Westmere, EveryMac has a nice guide. Jamming two X5690 CPUs into a Westmere 2010/2012 Mac can yield very impressive benchmarks. Some crazy bastards have overclocked them to 4 GHz. Even the 2009 Mac with the X5690 is beast. Compare it to the 12 core 2013 Mac Pro. The X5690 aces it in multi-core and then some. It takes the iMac Pro of 2017 to best the multicore scores of the mighty X5690.
Recommend Reading:
EveryMac - 2008 Mac Pro CPU Upgrade
EveryMac - 2009 Mac Pro CPU Upgrade
Upgrade #9: Go 4k!
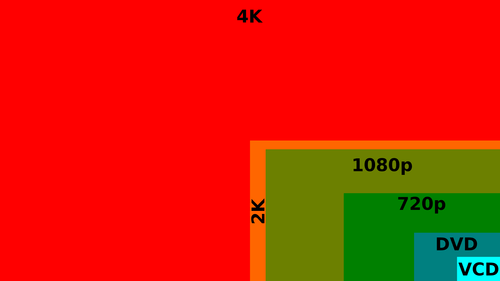
Image Credit: wikipedia.com
Effort level: Minimal with a few cavaets
Cost: $300-1200
While you won’t be able to attain the amazing 5k resolution of the iMac without breaking the bank, you can come relatively close with your aging Mac Pro with 4k.
There’s a few things to understand right out of the gate, First thing first, need a graphics card that’s 4k compatibe
Second, you’ll need 10.9.3+ for the UI scaling installed for UI scaling, otherwise be prepared to squint.
Third, you’ll need a 4k Display.
Sounds easy right? You need to carefully consider your purchase as not all 4k displays are equal. Some older low end 4k displays are 30 Hz only. This means you’ll get a maximum of 30 FPS plus you may need to install a hack to get 60 Hz for Mac Pros.
4k monitors can get qutie large but the trade off is pixel density to size...
A 28 4k monitor is 157.35 PPI (Pixels per inch) which means in-between “retina” and “standard. Previously a higher end 27 inch display normally would carry a 2560 x 1440 resolution, for a grand total of 104.9 PPI. The iMac 5k has an incredible 218 PPI, nearly the same as the Retina MacBook Pros.
Regardless of the screen size in your 4k display, it’ll be able to scale to plenty of relative sizes, based on your preferences.
Upgrade #10: Go Wireless 802.11ac + Bluetooth 4.0!
Cost: <$100
Effort Level: Moderate (Note: Installing Airport cards is exceptionally tedious due to the wireless connectors)
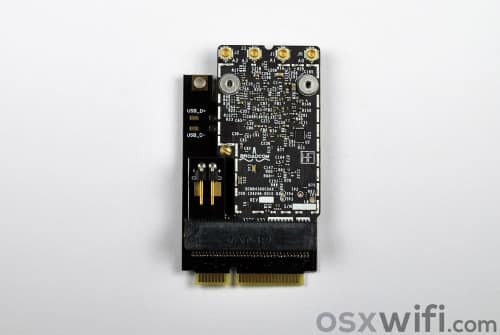
Jealous of the latest Wifi speeds? Want continuity and handoff and Airdrop support? Don’t be, wireless AC cards can be had for the Mac Pro for your Airport card slot or PCIe. (Notably, for native 10.12+ support, 2008 Mac Pros need this upgrade).
2006-2008 Mac Pro users can nab Apple Broadcom Bcm94360cd - 802.11 A/B/G/N/AC + Bluetooth 4.0.
There’s also the Apple Broadcom Bcm94360cd - 802.11 A/B/G/N/AC for 2009, 2010-2012 Mac Pros.
I can vouch too, they work great, check out my installation guide. There’s a few tips and tricks that’ll make your life easier.
User’s looking for a simpler solution can nab The ASUS Dual-Band Wireless-AC1900 PCI-E Adapter can be had for under $100 and its Mac compatible.
Upgrade #11: 2009 firmware flash to enable Westmere Xeon CPUs and faster ram
This is one of those times times where a software upgrade makes all the difference.
Ars Technica reported on the success of the 2009 Mac Pros being flashed by Netkas forum members, the same tribe of digital badasses who figured out how to flash ATI graphics cards before nVIdia did us a big favor and started loading its graphics cards with OS X compatible bios, and writing its own drivers.
Notably this will not provide any improvements beyond enabling you to upgrade your CPUs and RAM.
Cost: $0
Upgrade #12: Hackintosh?
Effort Level: Extreme
Cost: $500-1500
Hackintoshes are ever present but make for a very shaky OS X experience. You’ll be wading kext files and diving into the deep in the pool. I highly do not recommend it unless you’re a seasoned OS X user who’s not afraid of the terminal, and doesn’t mind waiting for major OS updates.
How to tell if you’re right for a Hackintosh.
- Use Bit Torrent
- Use or have used another OS than OS X
- Knowingly voided a warranty on a computer
- Successfully wired a motherboard’s LED lights to a motherboard
- Modified a PC’s Bios
- Successfully troubleshooted a Mac suffering repeat Kernel Panics
- Know what the phrase "Show Package Contents” in OS X means
- Installed Kext files manually
- sudo nanoed a plist or other OS file in OS X
- Visited one of the websites: InsanelyMac, TonyMacX86, iATKOS, osx86project and already considered a Hackintosh prior to reading this list
If you answer yes to all of the following questions, you just might be right for a Hackintosh.
Having installed 10.5 on a Pentium-D system years ago and trying it out, it made me realize that a Hackintosh wasn’t a viable option for me at the time. It worked… (mostly) but the lack of stability was unnerving. I was stuck waiting on compatible updates, and the lack of graphic support made for a rough experience.
In the spring of 2014 I got the Hackintosh bug again and tried the Hackintosh route and mostly succeeded.
Protip: Experienced Linux users will be more adapted to working on Hackintosh problems that the average Mac user.
Recommend Reading:
LifeHacker’s guide is probably the best jump off point, followed by InsanelyMac and TonyMacX86.