Using iFile + Zeppelin to create custom carrier icons
Zeppelin is a custom carrier icon jailbreak application, and when combined with iFile, it only takes a few minutes to create your own carrier icons.
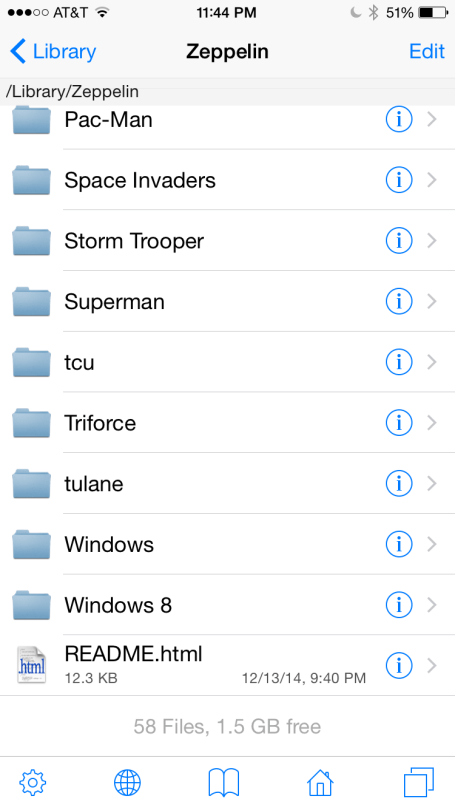
All of Zeppelin’s icons are located /Library/Zeppelin (using iFile). Also notable is the README.html located in the same directly which contains all the specs for custom Zeppelin icons, which are all listed here.
Most guides recommend a plethora of icon names and sizes but most pertain to old iOS versions. As of iOS 7, only three styles matter.
Step 1: Creating the icons
For iOS 7 and iOS 8 (tested on iOS 8.4), you’ll need to create three separate icon styles at three sizes for a total of nine icons. Here’s a quick run-down of the three styles:
- logo - black silhouetted logo (free of whitespace). This is used by Zeppelin to color accordingly.
- dark - this is used when the statusbar icons are dark. It can use any combination of colors.
- light - this is used when the statusbar icons are dark. It can use any combination of colors.
Each icon needs three separate sizes for varying densities, standard, 2x and 3x sizes. The height is the most important if the size height is incorrect, you may see icon flashing on screen transitions. The sizes are as follows: 40px by 16px , 80px by 32px @2x, and 120px by 48px @3x.
So for a working set of Zeppelin icons you’ll need to create a total of nine icons:
- logo.png - black silhouetted logo. 40px (max width) x 16px.
- logo@2x.png - 80px (max width) x 32px.
- logo@3x.png - 120px (max width) x 48px
- dark.png - show on dark toolbar, 40px (max width) x 16px.
- dark@2x.png - 80px (max width) x 32px.
- dark@3x.png - 120px (max width) x 48px
- light.png - show on light toolbar, 40px (max width) x 16px.
- light@2x.png - 80px (max width) x 32px.
- light@3x.png - 120px (max width) x 48px
For this example, I created an based off of University of Oregon’s O logo, you can download my icon set here (click download zip on the lower right hand corner).
Step 2: Launch iFile and go to Library/Zeppelin.
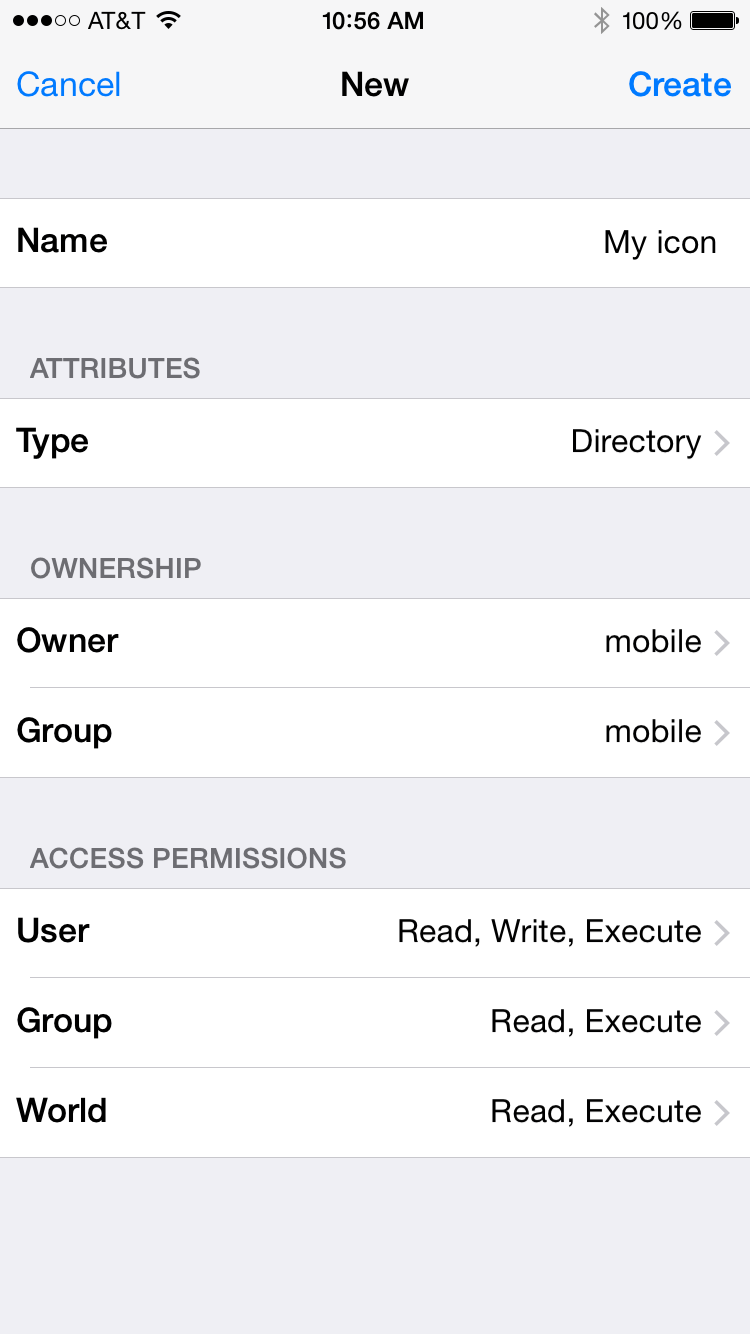
Step 3: Create a new folder for your new icon.
Click Edit in upper right hand corner and click the + symbol.
Name your icon whatever you’d like, all the default iFile attributes and ownerships should be correct.
Step 4: Start up iFile and click the web server (the globe icon).
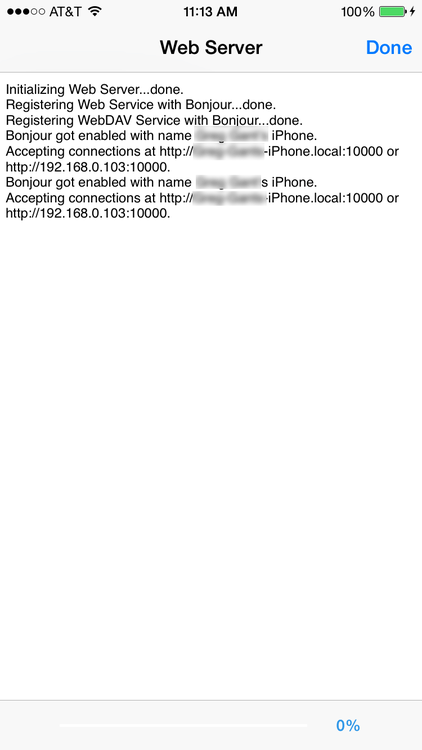
Plug the IP address that ifile reports into your web browser on your desktop computer (In this example its 192.168.0:103:10000), and navigate to Library/Zeppelin/[YOUR FOLDER] and upload your set of 9 PNGs.
Step 5: Close iFile’s webserver and go to your iPhone’s Settings -> ZeppelinStep 6: Select your custom icon under your theme menu!
That’s it